Implementing Sound and Movement
1st February 2019 - Julian Whatley
The goal was to model a humanoid character based on the theme of the automaton and place it in an environment that is fitting along with creating sounds for both the character and environment. The environment sounds could be background noise or music. I tried to go with a little of both.
What I define as an automaton is a robot that looks human like. I chose to model my character based upon that theme and idea.
Starting out with a drawing from what I showed in my presentation in a previous assignment. I loaded up 3DS Max and imported the drawing onto a plane.
I set up the scale in 3ds max to match unity scaling system, Meters. I then matched a plane to the height of about 1.75m and applied the drawing of the robot that I made to it. I used a UV map to make sure the drawing is not stretched on the plane.
Next was setting up the feet. I started with one foot then mirrored it using a mirror modifier. While editing the foot I was saving in increments. After applying OpenSubdiv I was satisfied with the feet and moved on to the bottom part of the leg making sure I label everything as I went along and made sure I saved in increments. I made the ball joint in the foot then made the right leg. I then added a spring and used a modifier to shape it how I wanted. I decided that it would be a good idea to take the mirror tool off for now as it would work, I do add it on later though.
Moving on to the upper part of the leg I started on the knee joint. The top part of the leg is rather simple in that I used one object and just used bevel and extrude where I needed to, to make it look like a hydrolic. I then made the ball joint for the right hip. And to make sure everything was aligned I used the quick align tool in the toolbar at the top. If that didn’t work then I would use the normal align tool. I then used the Unwrap UVW modifier because I wanted to test out adding textures to the right leg in substance painter.
Going back to the mirror modifier I applied it to each object on the right leg to make a left leg and keeping the material id’s the same so I could apply materials to just one leg and it would effect the other. I made sure to rename the objects on the left leg to make it clear that’s the left side.
I worked on the hip base and added some hip joint sockets again using the mirror modifier. I added sockets and socket holders (it’s what I named them to keep things clear on what everything is in scene explorer) Staying with the Hip base I then made a stomach hydraulic and assigned a material id to everything that I missed out. I simply used a extrude and bevel just like I did on the top part of the leg. I then added the stomach spring which will lead on to the lower torso.
Making the lower torso was relatively simple. I made a cylinder and used a FFD 4x4x4 modifier and shaped it to what I pictured in my head and what was drawn out. I then worked on the middle torso and used a hose which I’m going to attach the lower pivot point to the lower torso and later I will add the upper pivot point to the upper torso. Moving on to the upper torso I again used the FFD 4x4x4 modifier on a cylinder that I beveled and extruded.
Next came the neck. I used a hose once again and changed the parameters to fit the style of the drawing. I assigned the lower pivot point to the upper torso and the upper pivot point to the head. Which leads me on to creating the head. It was a bit of a challenge getting the top of the head smoothed out properly. I did a lot of bevelling then applied a smooth group (not a modifier) to the top of the head. I then extruded out a mohawk and detached it to a separate object. Still following along with all the naming, I named it accordingly.
Continuing with the head I made a cylinder and used the bevel tool and pulled in some polygons every 2nd poly to make what looks to be some sort of grill or cog. I then continued using the bevel tool and pulled out the top to make it rounded and smooth. I next rotated it and aligned it to the head as a right ear then mirrored it to make two ears and named them accordingly.
Now moving on to the arms. I started with the right arm holder which later on causes me a few problems. I copied the right socket holder for the hips and resized it to match the scale of the arm in the drawing. I flicked between orthographic view and perspective a lot to allow myself to view my creation from different angles. I then copied the right hip ball joint and aligned it and moved it to the right side of the character and created a socket that holds the ball joint in place. The right arm was also copied from the right leg, albeit I resized the hydraulics and removed the spring. Then I created a hand using spheres which I used a FFD 4x4x4 modifier on. I then mirrored the whole arm, right side to the left side and renamed each left object accordingly.
Now the character is complete I can now move on to rigging. I used a Biped which is located in systems and scaled it up to match the height of the character, (about 1.75m). As my character is made up of individual objects it was just a case of attaching each object to the relevant bone on the biped making sure that the bones were correctly sized to match the character as much as possible. Once I attached all the objects I set a default pose at this point again. It didn’t really matter too much how the pose was set out as I didn’t create one single mesh so no stretching of textures would occur later on.
Now my character is rigged I can apply a mocap file and this is where all the problems occured. I searched around on google looking for websites that hosted mocap files for a walk animation. I could’ve used the built in walk animation in 3ds max but I wanted something more human and casual. Then I came across a site called animium which happened to have the exact walk style I was looking for. I proceeded to download that and apply the file to my character. The file format is .bip. A lot of cleaning up needed to be done. The arm holder which I said about earlier wasn’t attached directly to the collar bones. This is because I used a mirror modifier, so it only attached to the left collar bone making the right arm holder move inline with the left collar bone, way up in the air. I corrected that by making it a separate object from the mirror and attaching the right arm holder to the right collar bone. The steps were slightly too close together as in the feet were crossing over each other with each step so I hand to manually alter the distance apart. Now the walk cycle is complete.
Making sure that I was saving as I went along in increments I went back to a save file that I named defaultRig and went to a site called cgspeed. I was looking for a roll animation which I found and applied to the rig and this is where it all messed up. The character looked like it was being sucked into a little ball. I figured out that I could load up max in a separate instance and make a biped and apply the roll animation to the biped. I then saved the biped animation which I then applied back to my character biped which solved the problem. I then went in and manually cleaned up the animation because the head of my character was going through the floor when doing a roll. I deleted the keys on the pelvis from the point on which the head just about goes through the floor to when the heads then leaves the floor. I then recreated the roll by rotating and moving at each keyframe to give the illusion that the character is rolling. I then went on to create more keyframes once the roll was complete to make it look like the character is opening an oven door and pulling out a tray. I saved this animation as OpenOvenDoor.
For the whisking animation I simply went back to the defaultRig and manually keyframed what whisking looks like based on videos and references. It didn’t take too long as I could utilise the smoothing of the keyframe tool and literally only made 4 keyframes to make it look like the arm was moving in a circular motion i.e whisking.
I then went on to make the environment around the “OpenOvenDoor” animation.
In the video you’ll see that I modeled the display counter as it would be seen in a bakers shop, and I also modelled the oven. A couple of issues I ran into whilst doing this was that the render time took too long as I had so many lights in the scene and tried to make it look realistic and in unity the normals needed to be flipped so I could see the room. (Pro tip Don’t try to render a scene with loads of lights in 3ds max using Art renderer for animation. Takes too long. Export the scene to an FBX file and bake the animation of the oven door. Then import into Unity and run the lights mixed, baked and realtime.)
After making the environment I realised I didn’t have a reaction animation so went back to my defaultRig and went to the cgspeed site again to find a laughing mocap file. After trying out many different styles of laughing I found one called 79_70 laughing. You can see the video of me cleaning up the animation.
The issue I had is that the hands would flip and turn in all sorts of crazy directions so I had to delete the keyframes on the hands where this occurred. Again utilising the smoothing curve on keyframes I made the hand seem more natural and follow the rotation and turns when the arm was moved. This was a more tedious task out of all of the animations so far as I had to also correct the arm rotations too. I then saved the file as reactionRig.
This is where I went on to make and edit the sounds and music.


With the Oven sound I recorded myself opening the door whilst the oven was both on and off as well as closing the door whilst the oven was on and off. I recorded the fans on my computer as I can set them to spin faster and louder to make for a cleaner recording and to simulate the oven fan. I recorded the beeping of the oven turning on and off as separate sounds, as well as turning the dial. This resulted in a total of nine individual sounds recorded just for the oven.
I recorded 4 unique footstep sounds in my kitchen so the sound of the character walking on a wooden floor wouldn’t sound repetitive, as well as including squeaky floorboards to help the sound sound natural.
For the joints of the robot character I used a pop filter that I have attached to my mic and wiggled it about to create a metallic friction sound.
For the Music I used my BMX wheel and span it. The rear cassette is very loud making for a perfect filler, then I used a Ticking clock for the beat! To fill in the gaps of the ticking sound I used my keyboard and hit the keys with a rhythm.
As you probably noticed I’m not a music producer. I know how to use the software I just don’t have to expertise in creating music so I’m just an audio engineer in retrospect.
Below is the response and reaction animation.
What I’ve taken from all this, I strongly recommend using mocap files over manually keyframing every animation, as manually doing it is time consuming and in the industry you are on the clock. With the sound, the more sounds you source and record by yourself the more control you have over how it will sound.
See the Test biped animation.exe located in the build folder. Use alt-F4 to escape out of it or just close it. Also see Animation.UnityPackage file and import into your own unity to see the environment. If any problems with exe or package please contact me as I can have them instantly available as a whole project folder.
I did some work previously using motion capture back in 2011 using an xbox 360 kinect sensor. As you can imagine using a kinect for motion capture isn’t fun. It’s a tedious task and very unreliable. You might as well manually keyframe the animations. One of the major problems I encountered with the kinect was that for some reason every time I recorded a motion it would cause the biped to sway like a banana. It’s hard to describe, but imagine looking face on to the character, from the hip being the pivot point it would rotate left and right or swing. You can see an example of my work here:
This is something I worked on in my own time. Unfortunately I know longer have access to the kinect sensor, computer or software that I used in 2011 and as it was a project I worked on in my spare hours I didn’t really log anything other than uploading the animation to youtube. If I were to do it again I would not use a kinect for motion capture as it’s not just reliable. I’d much rather use a motion capture suit which is designed specifically for the task.
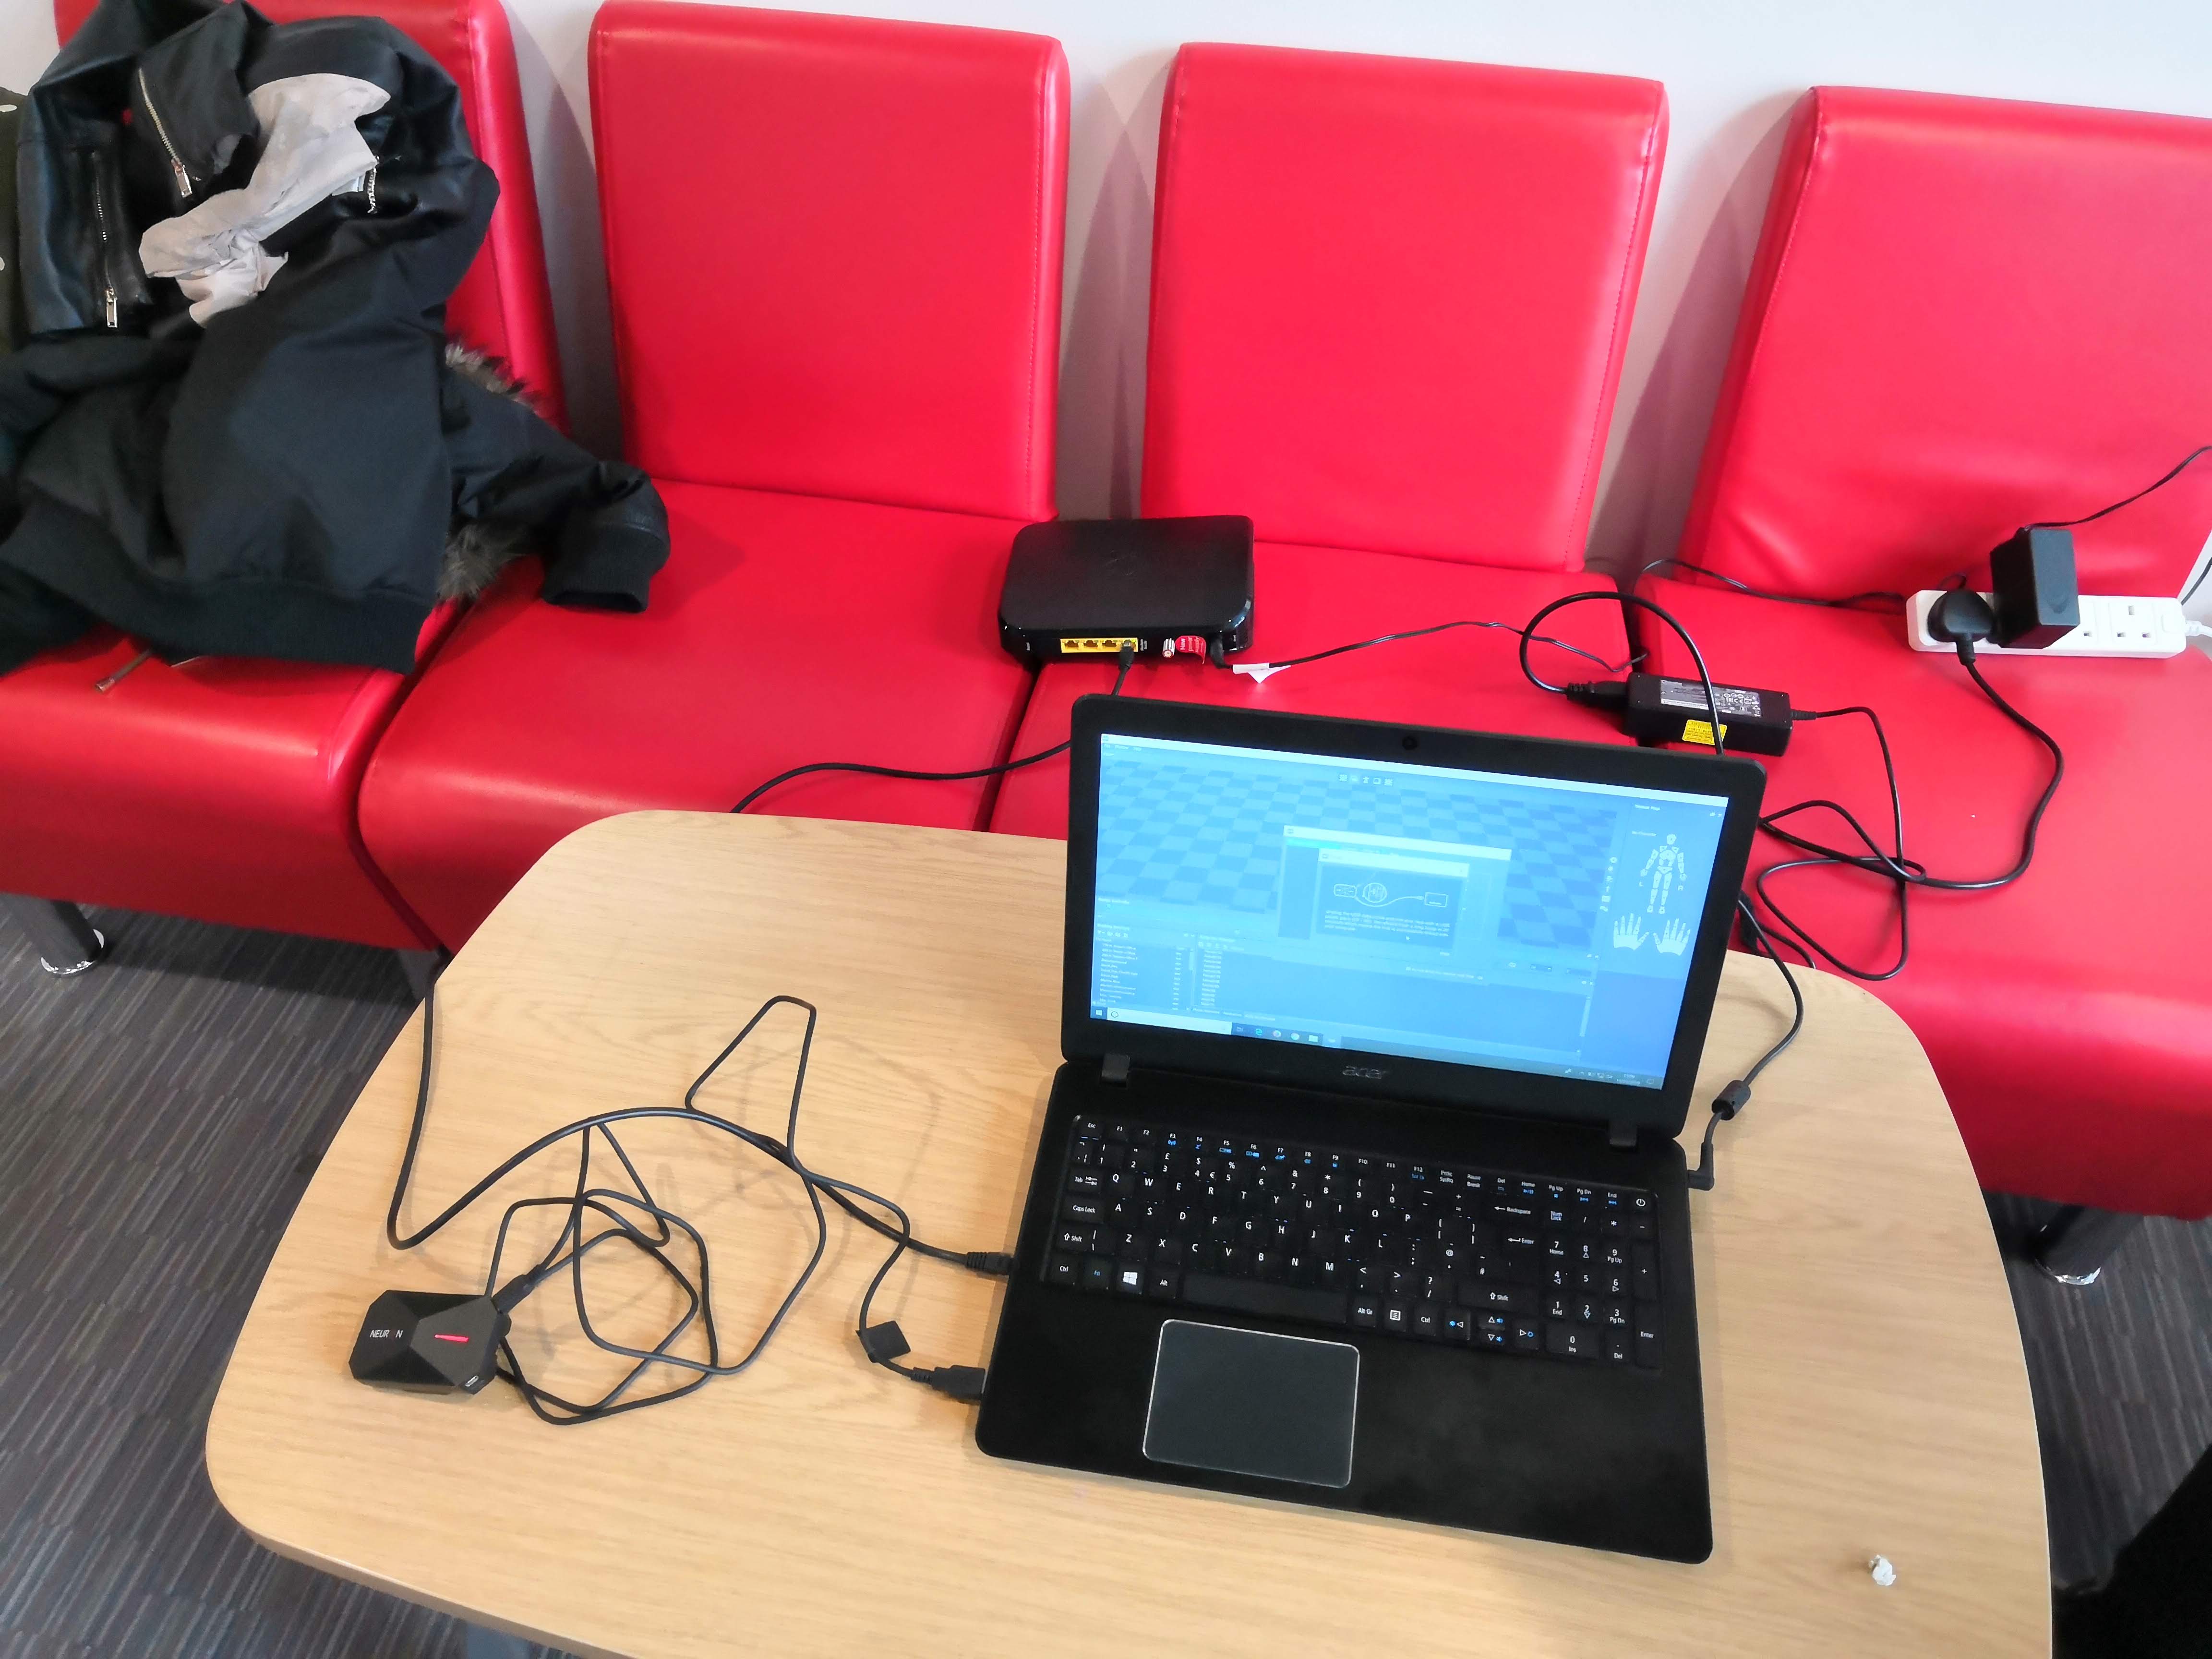
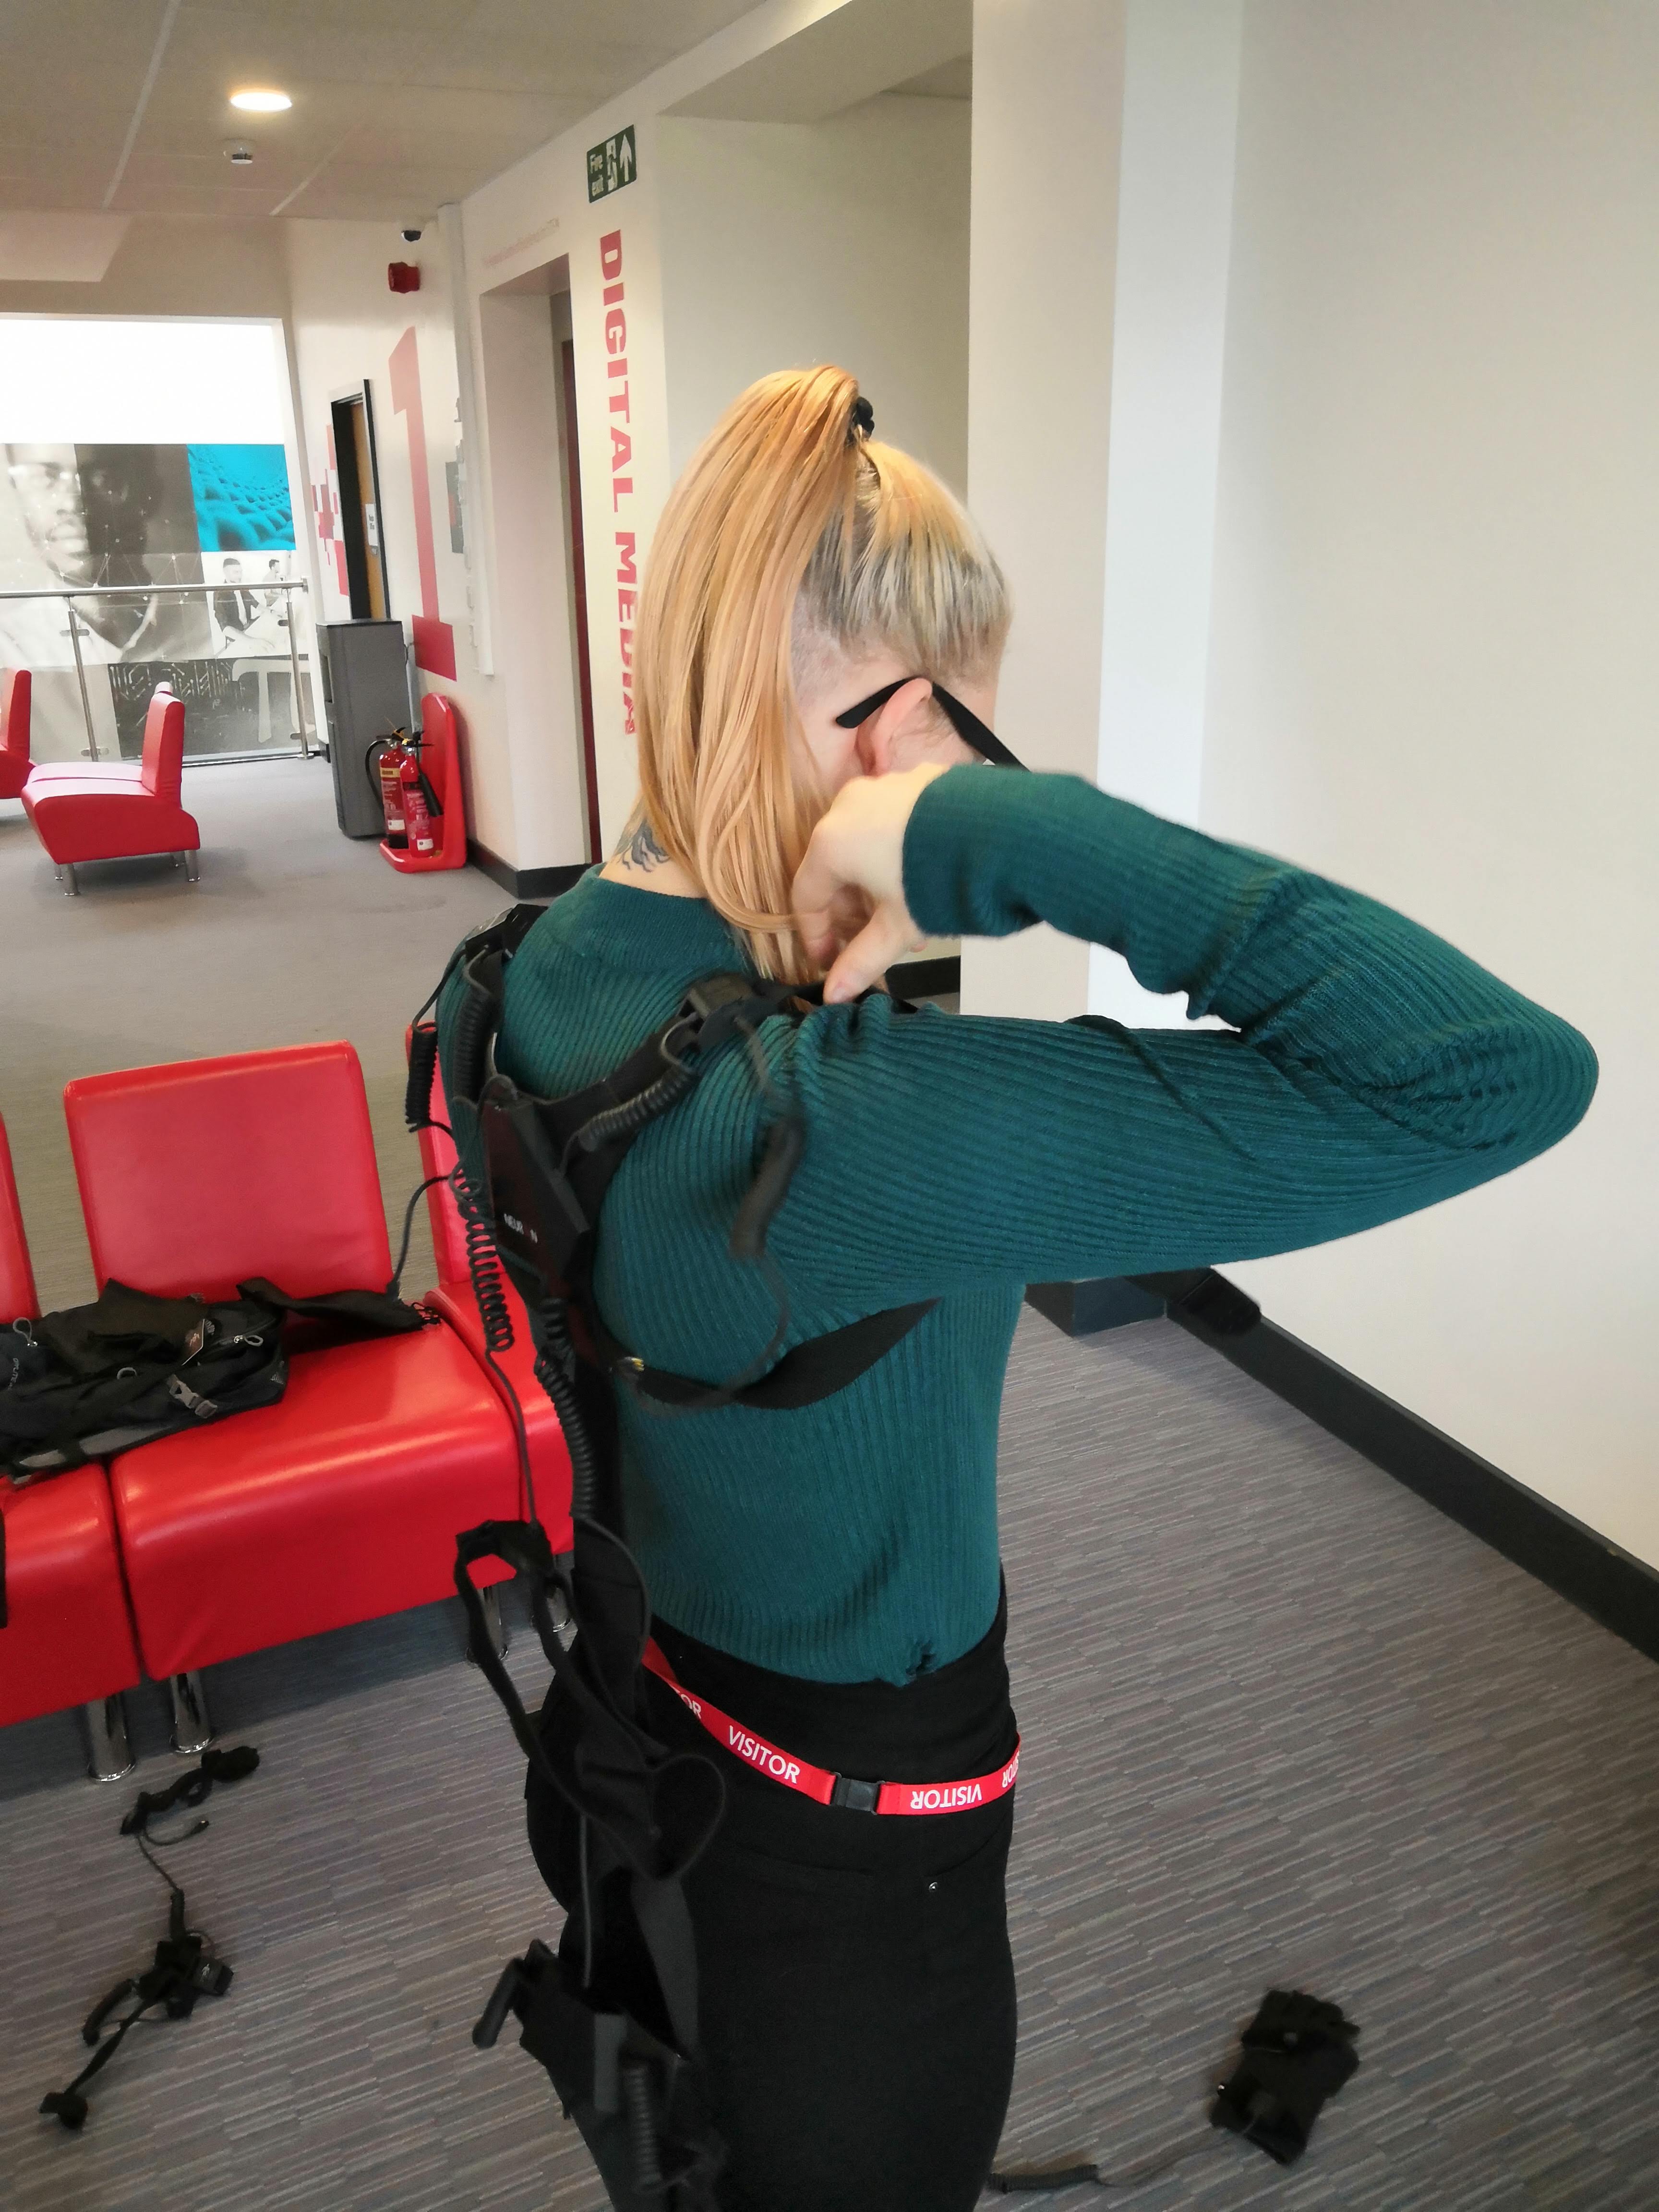
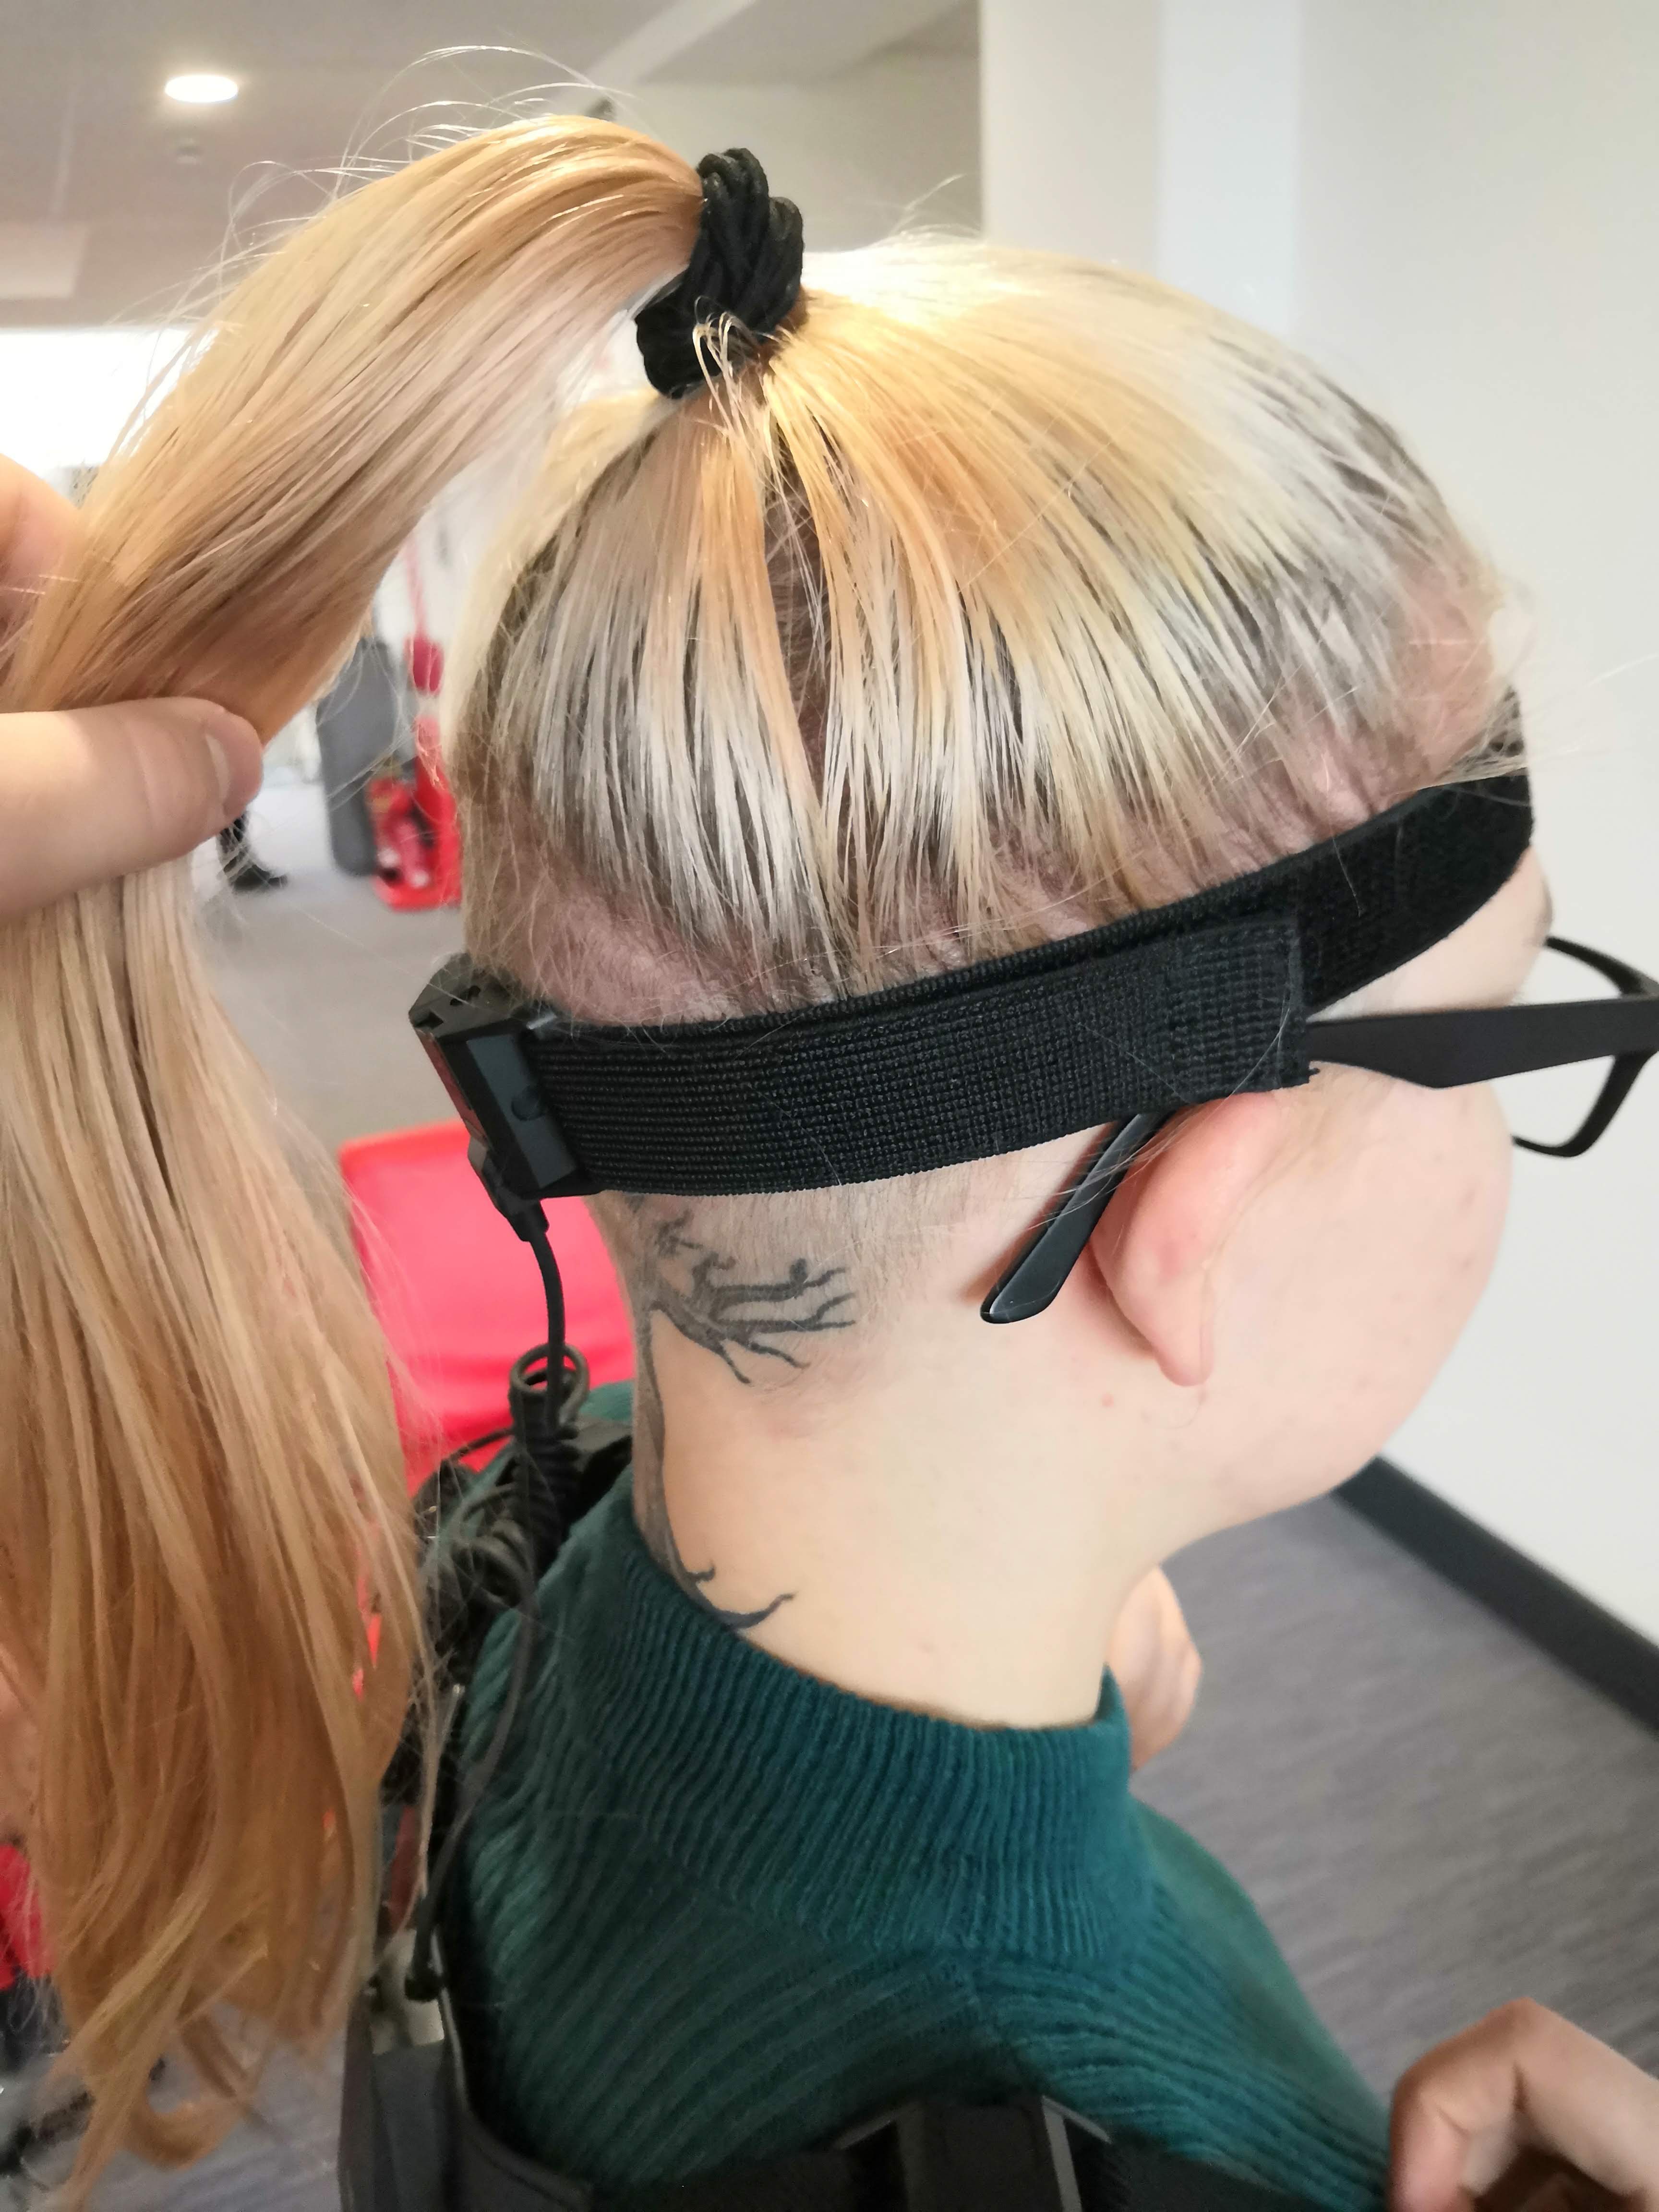
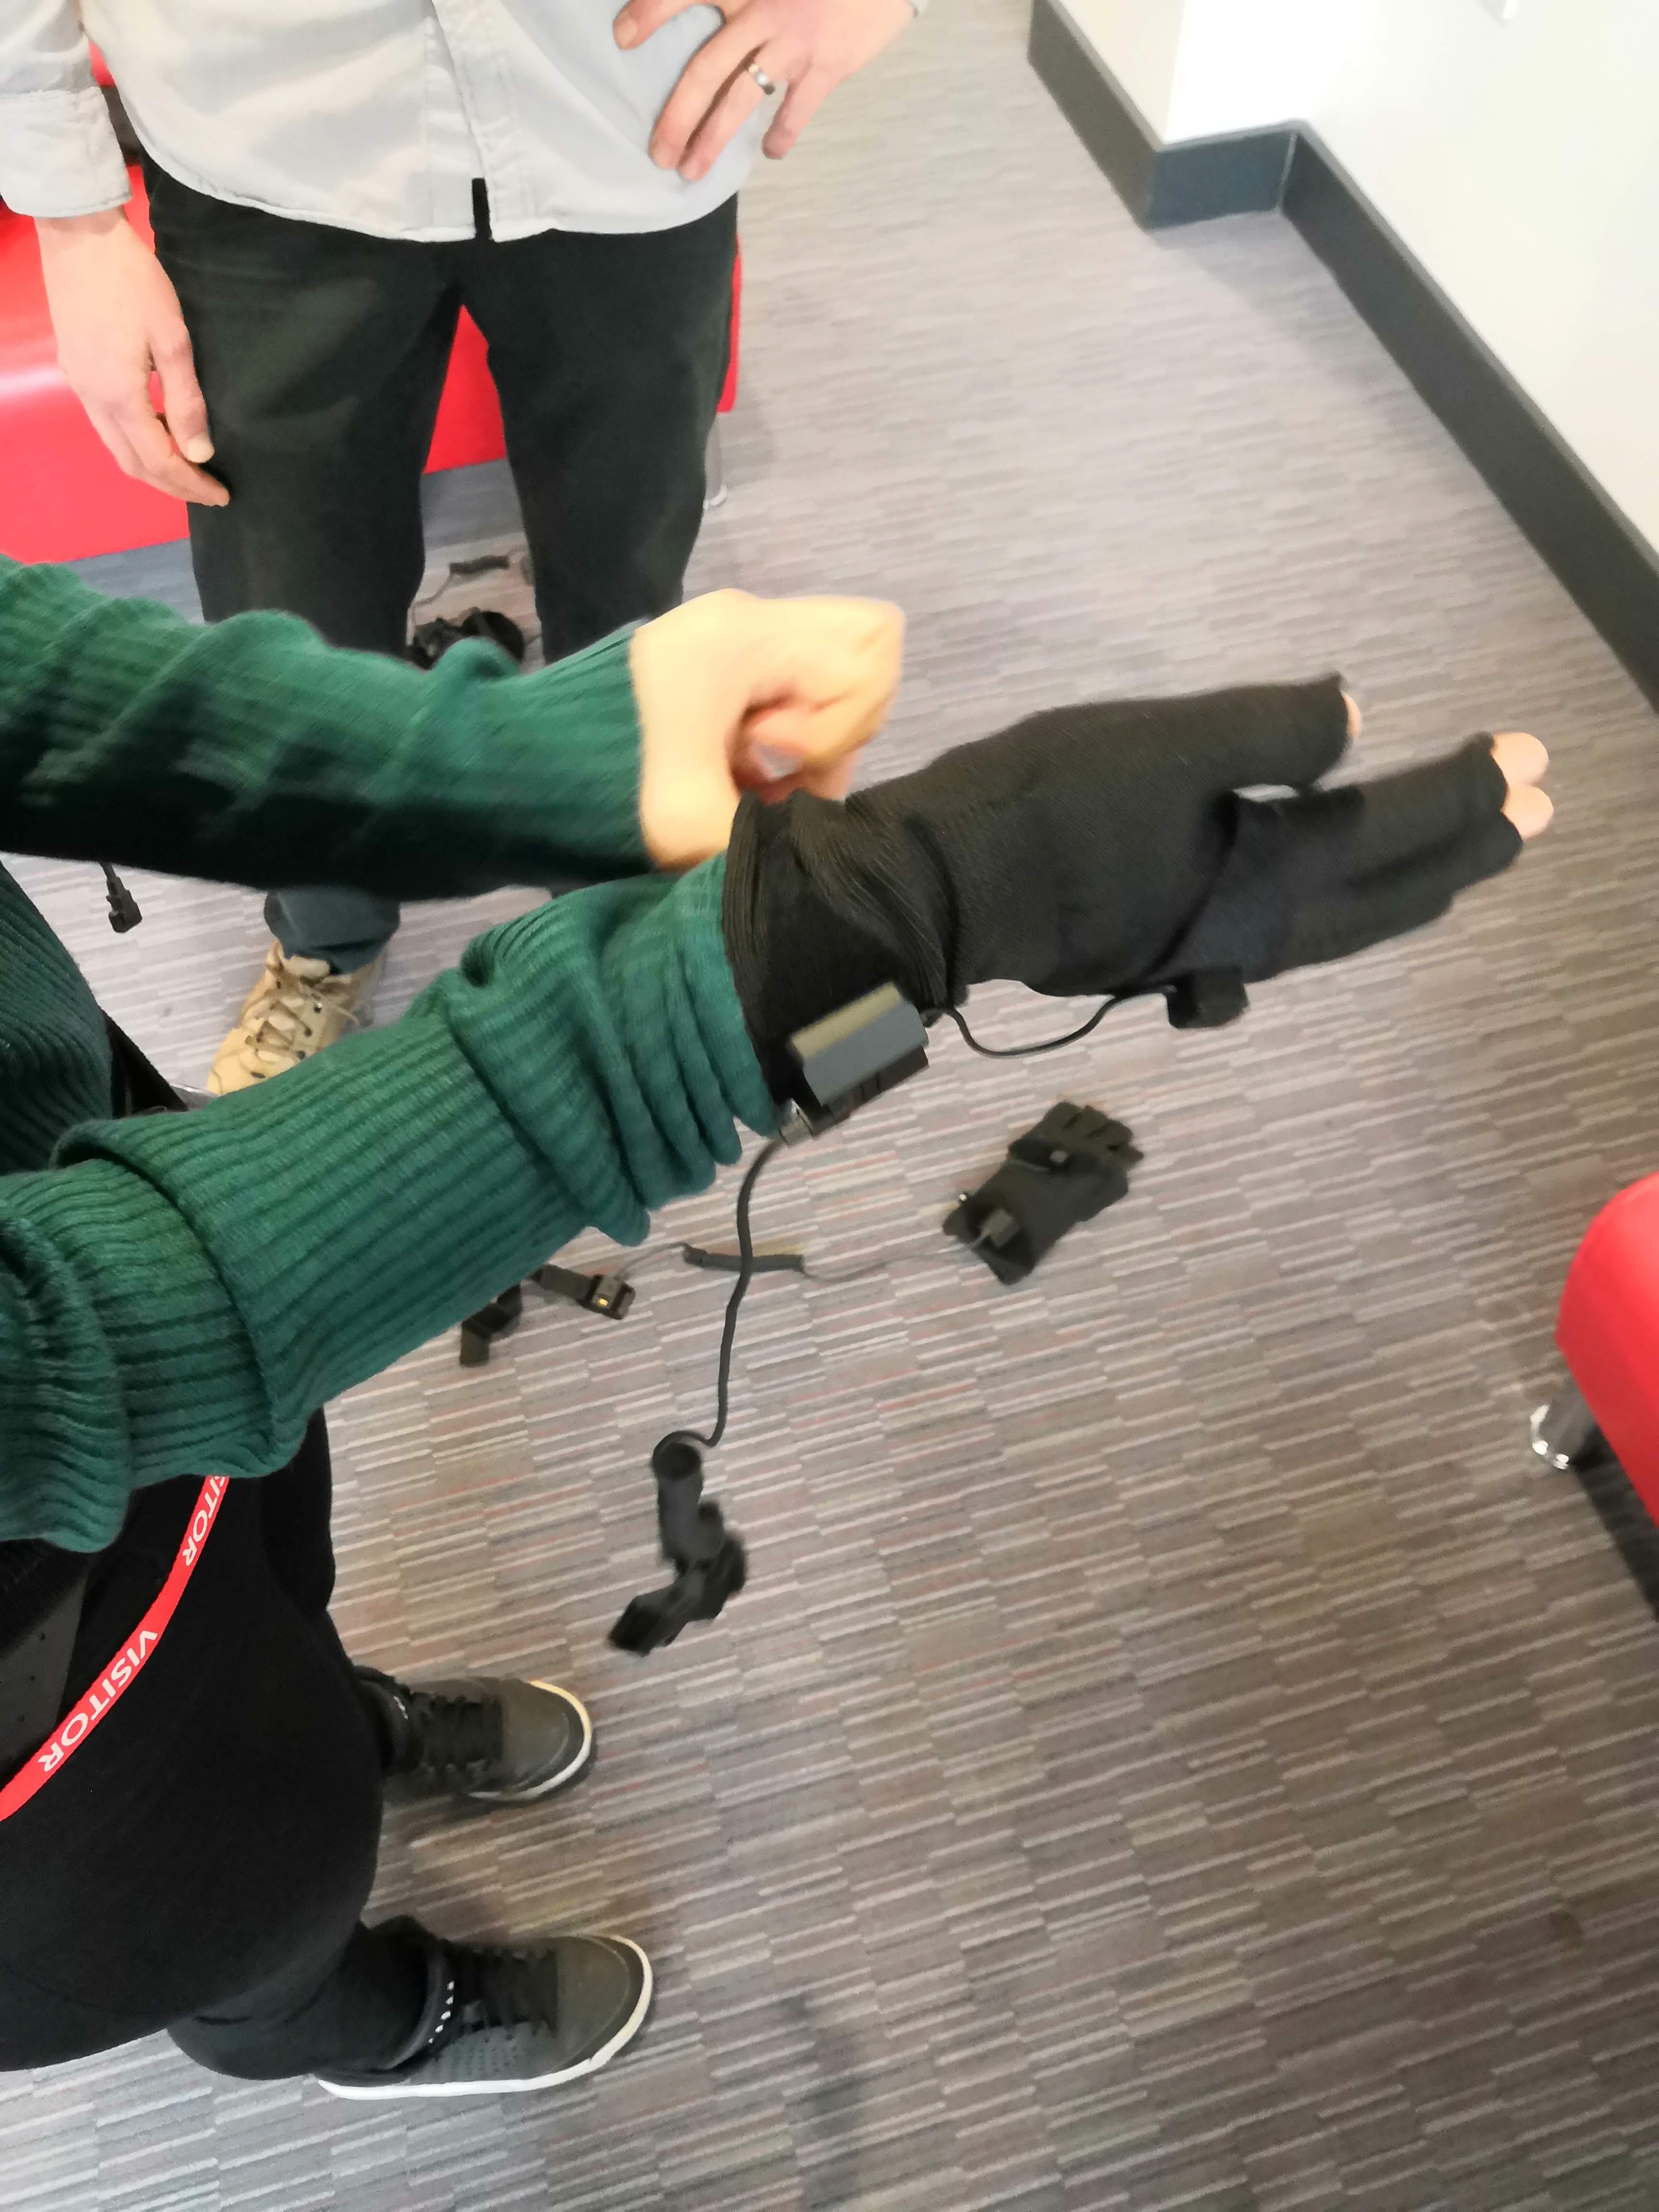
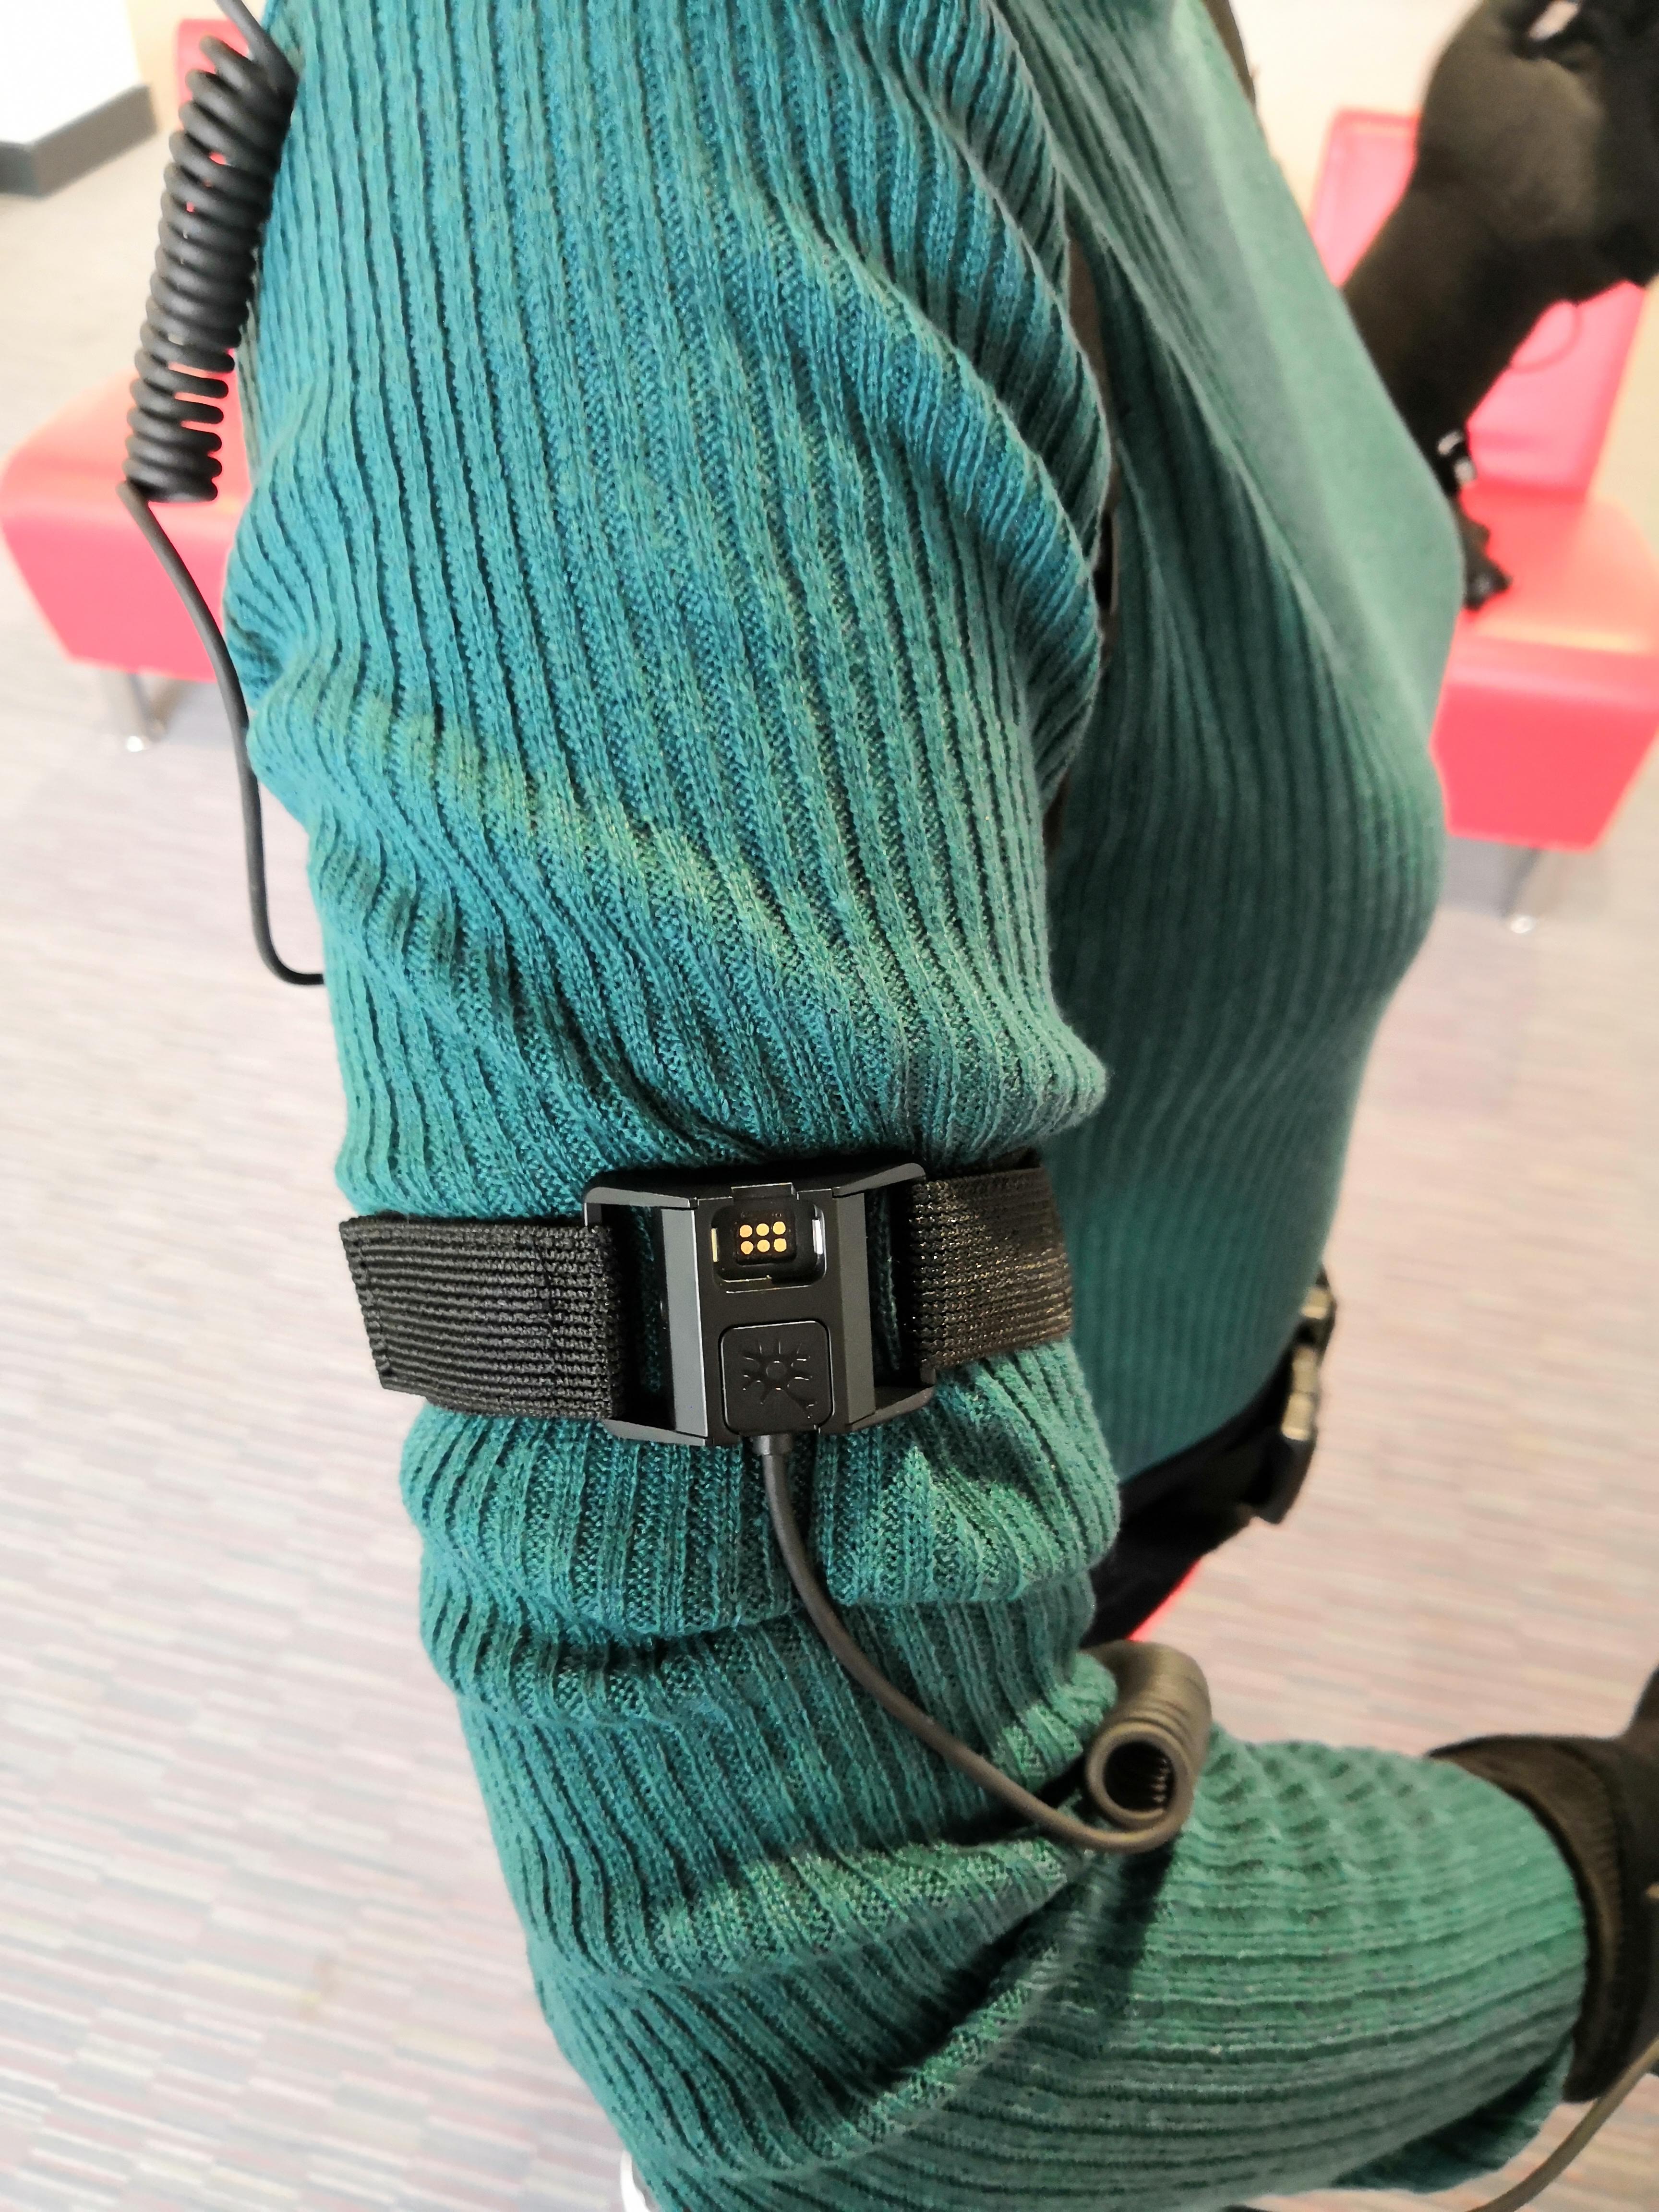
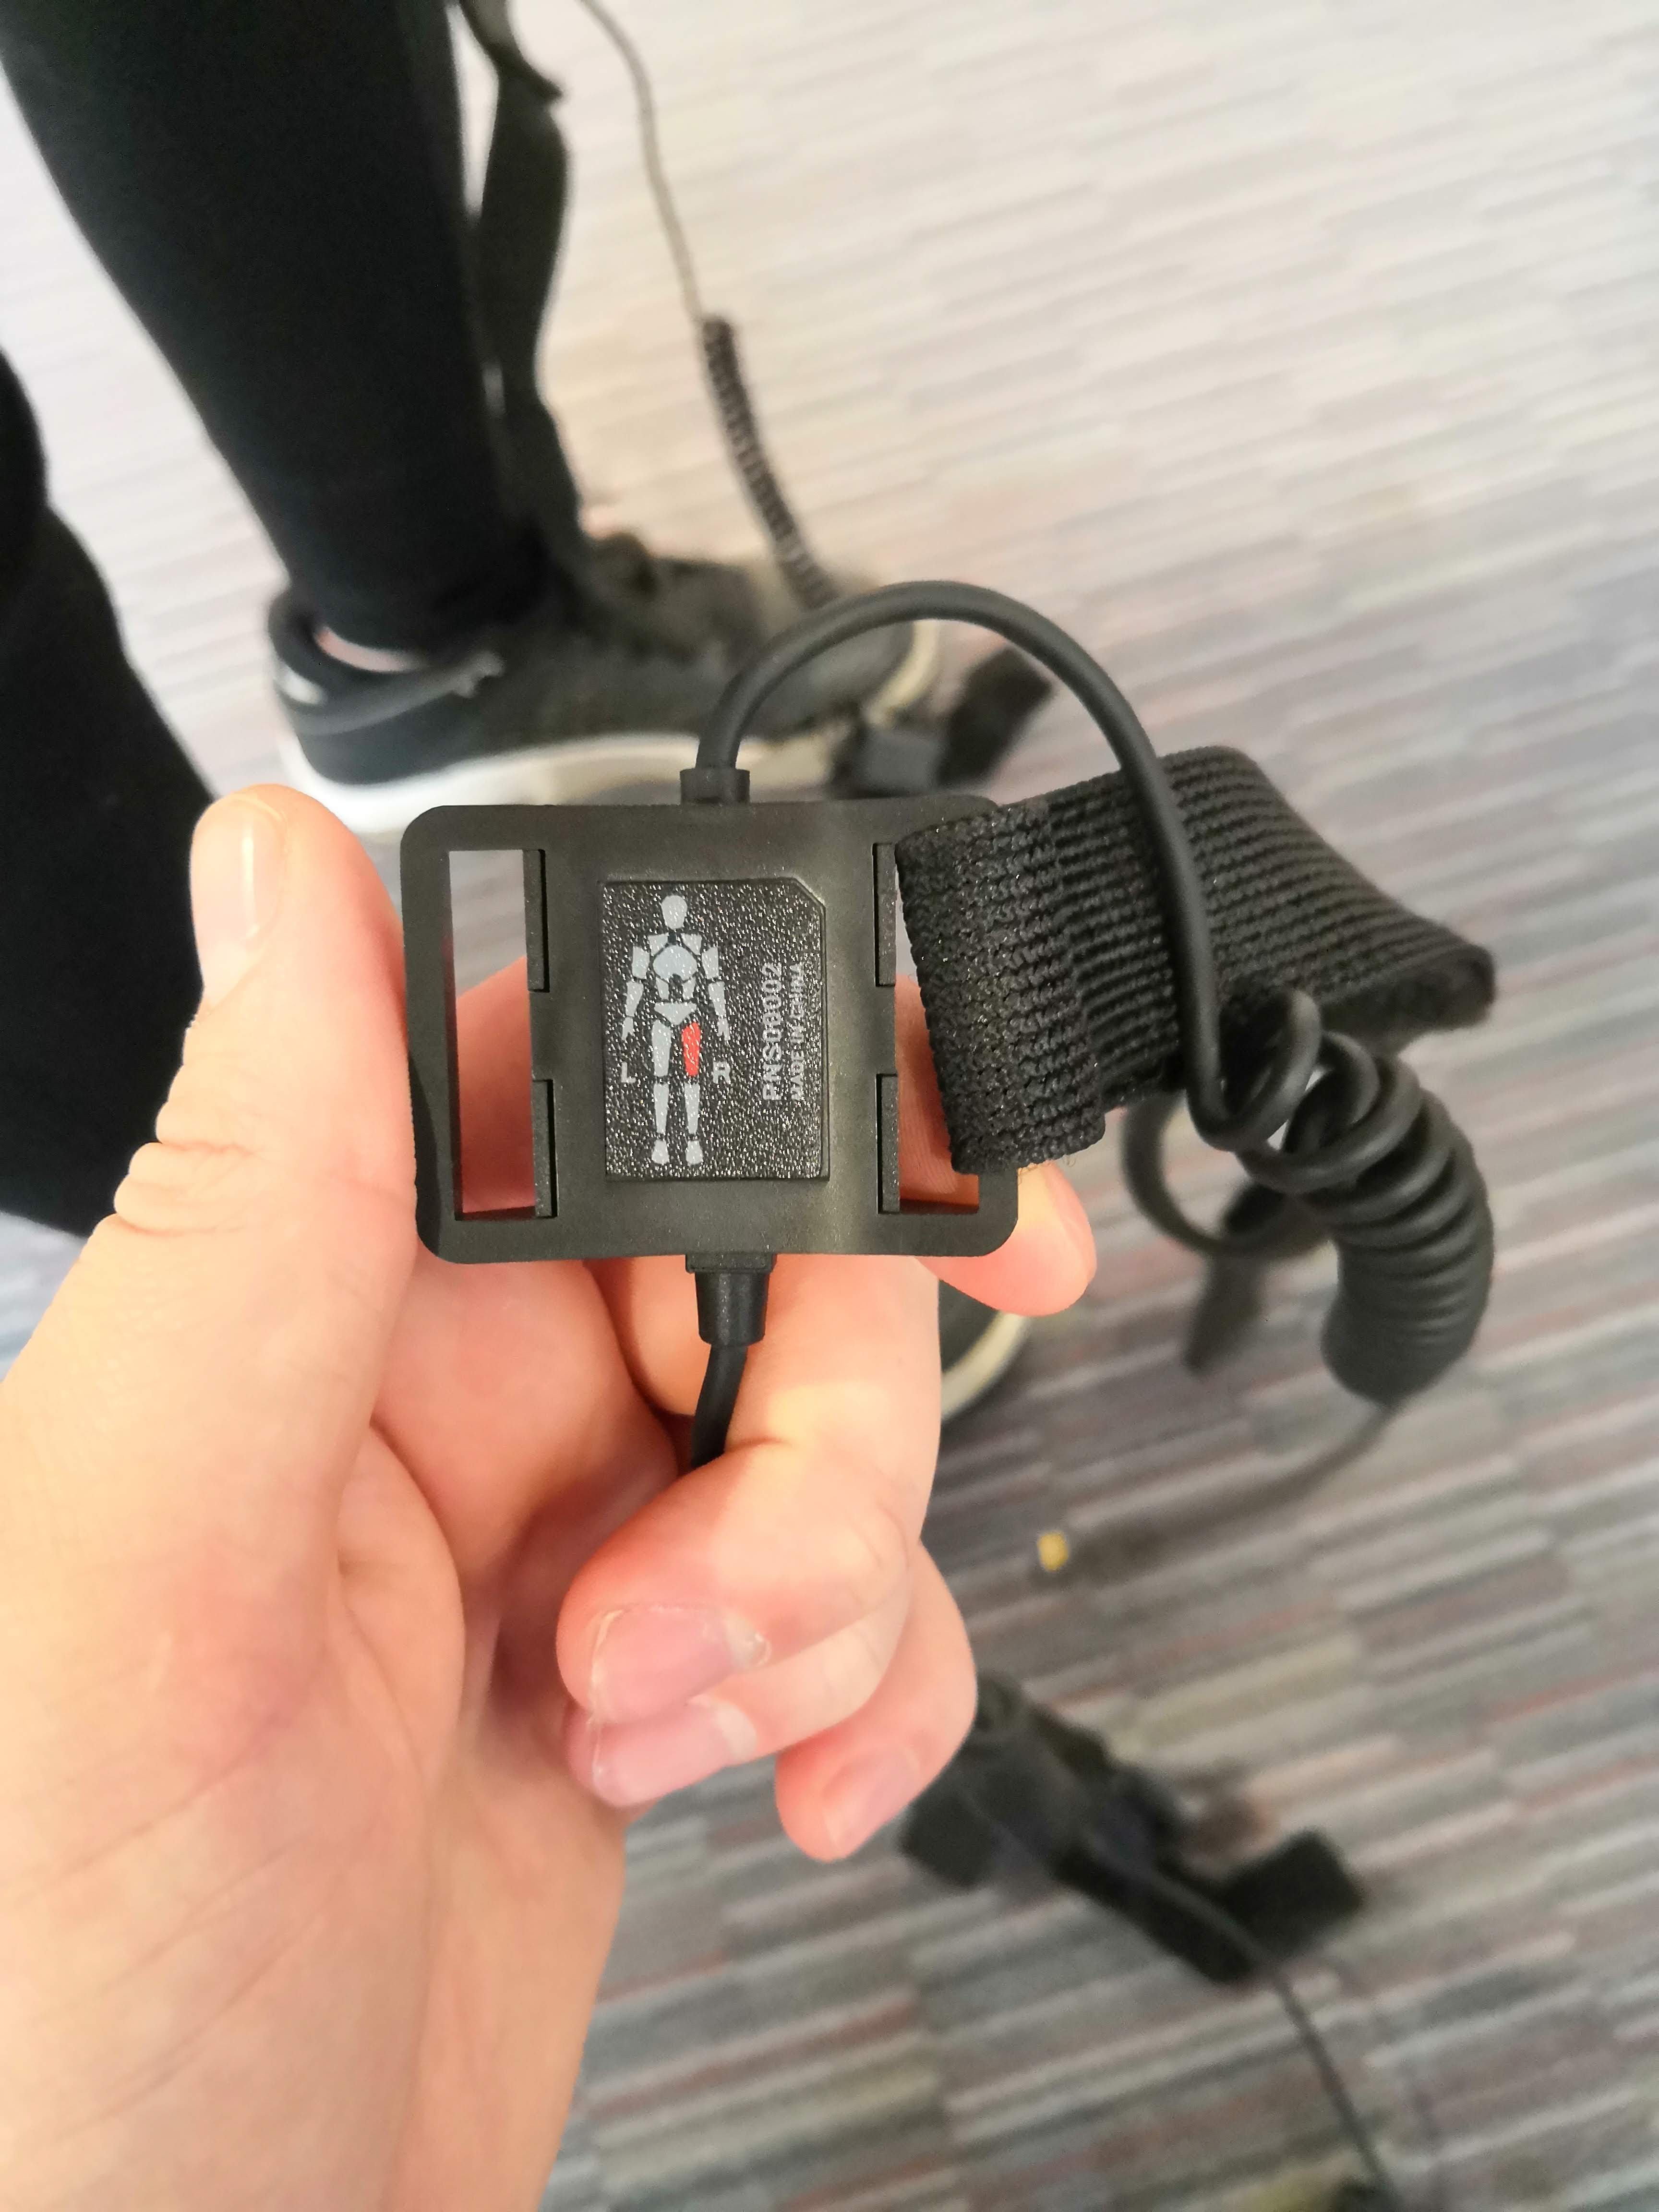
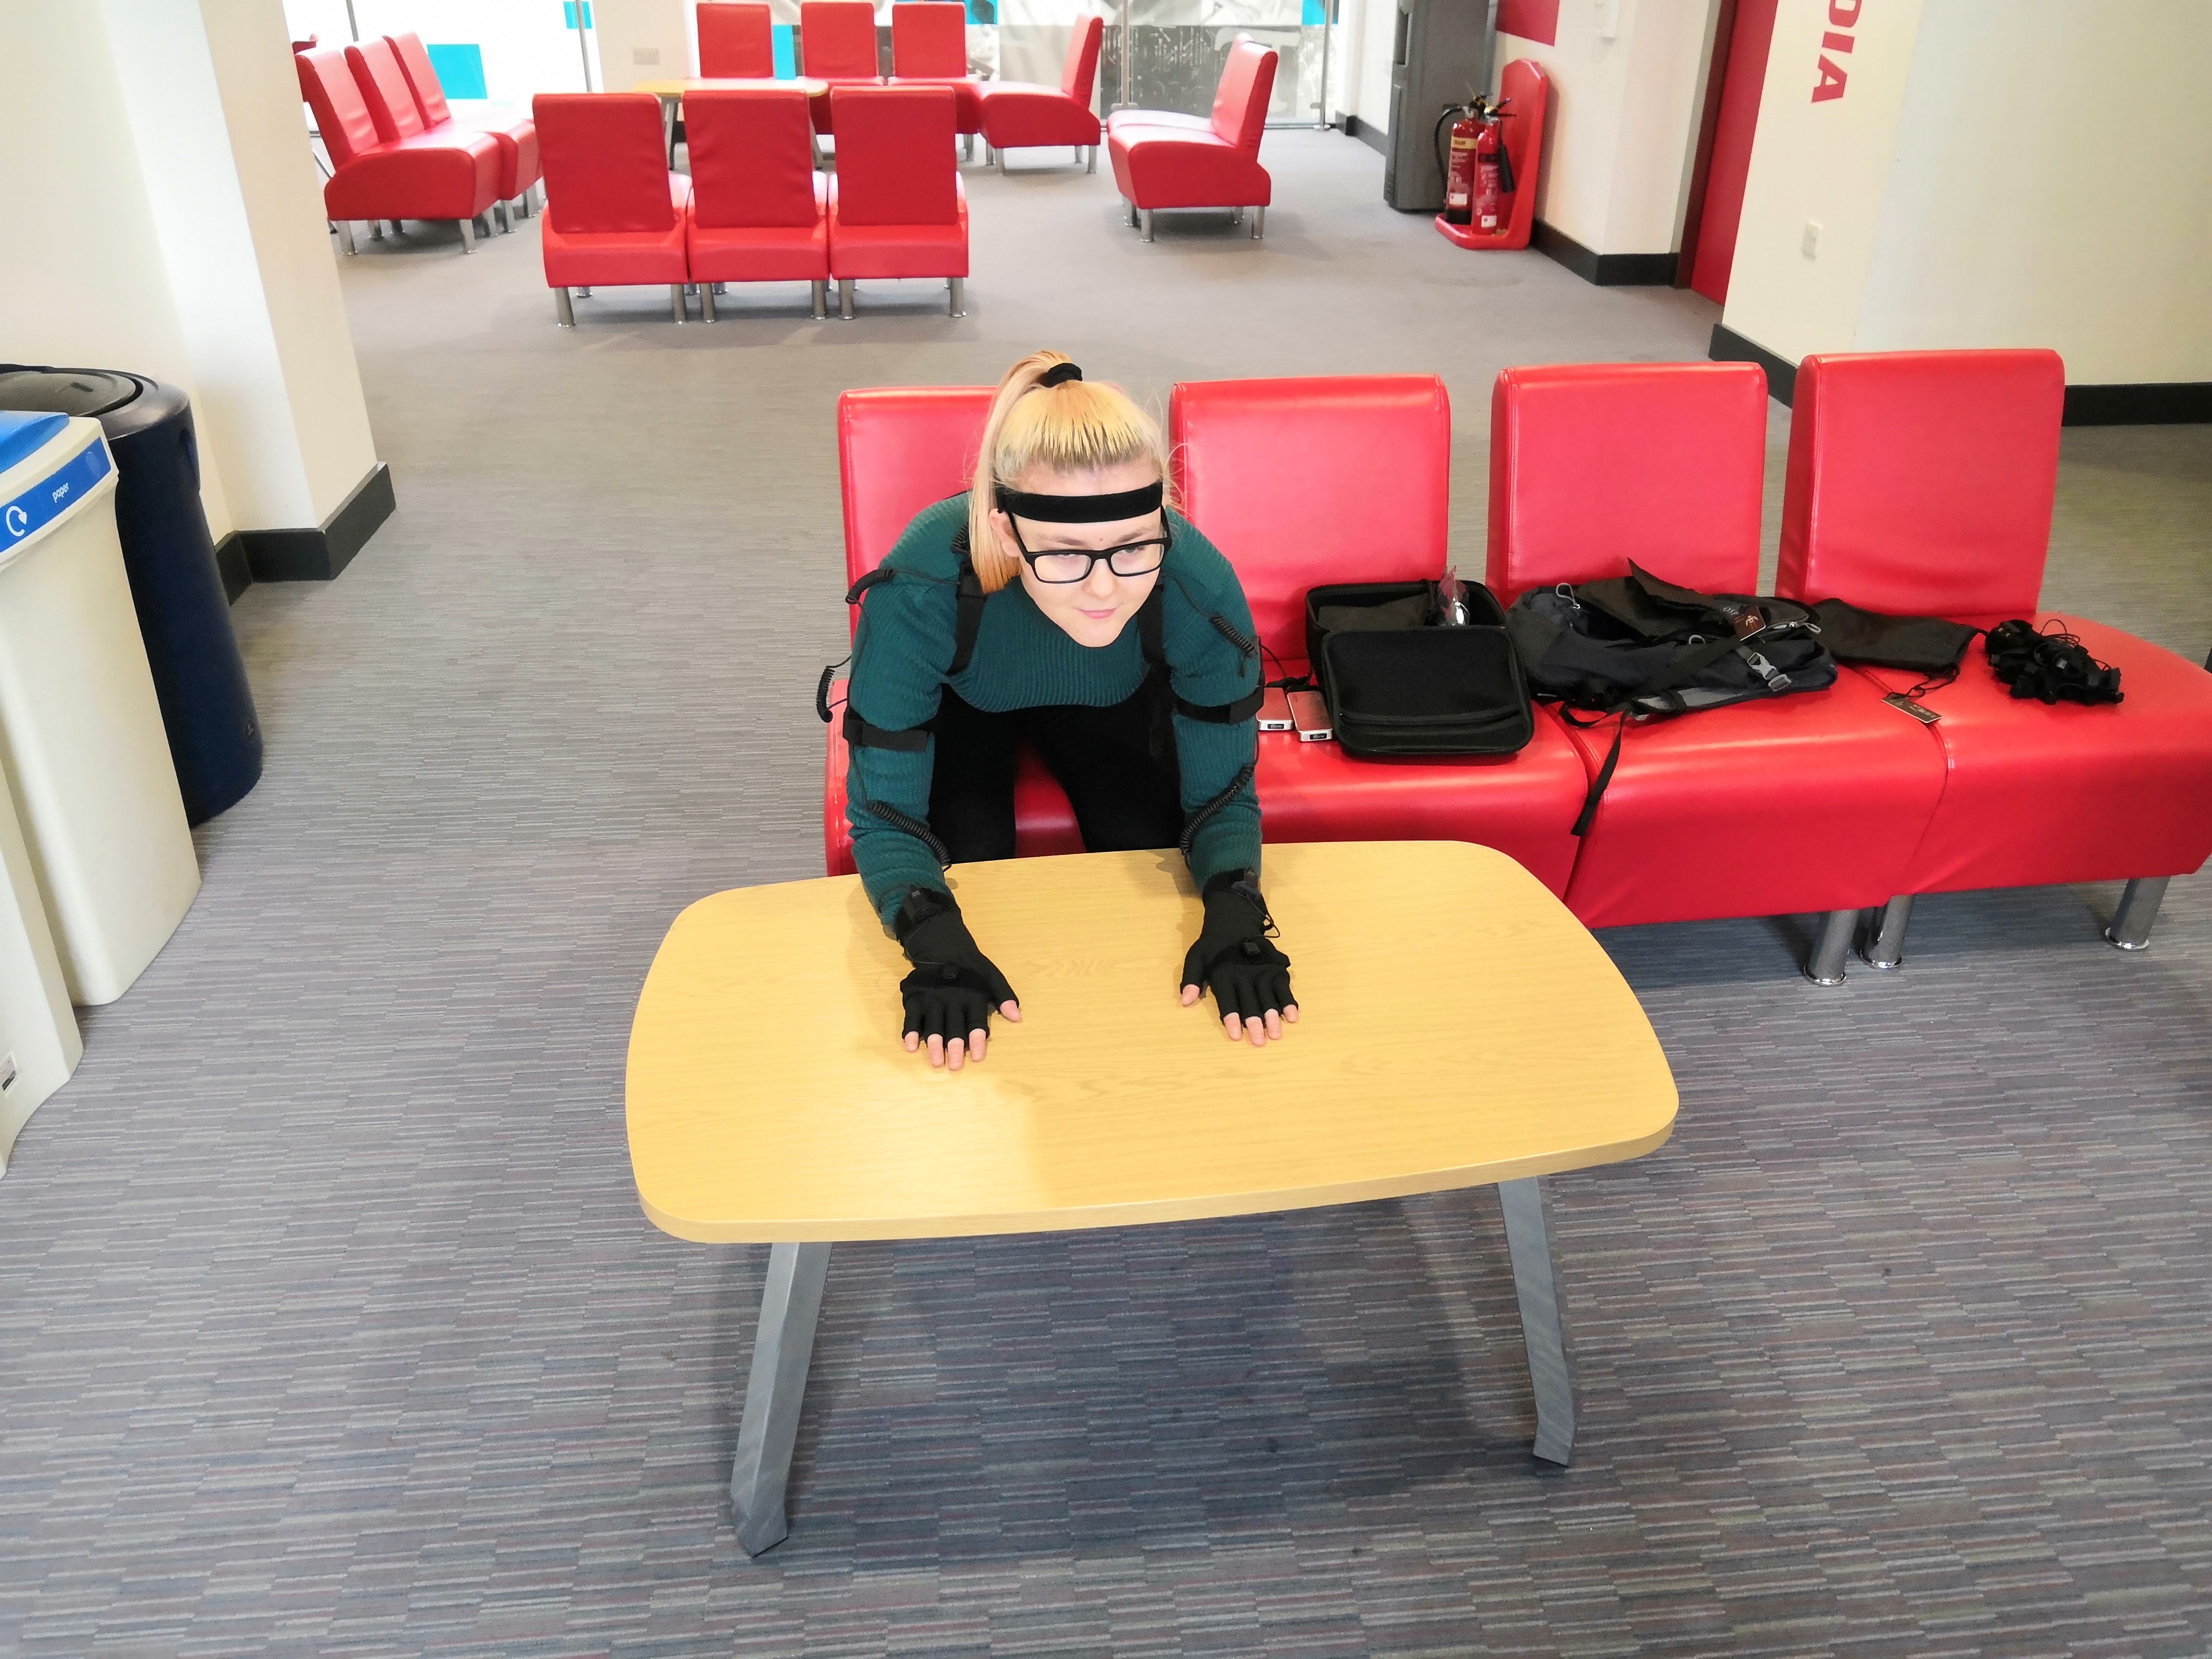
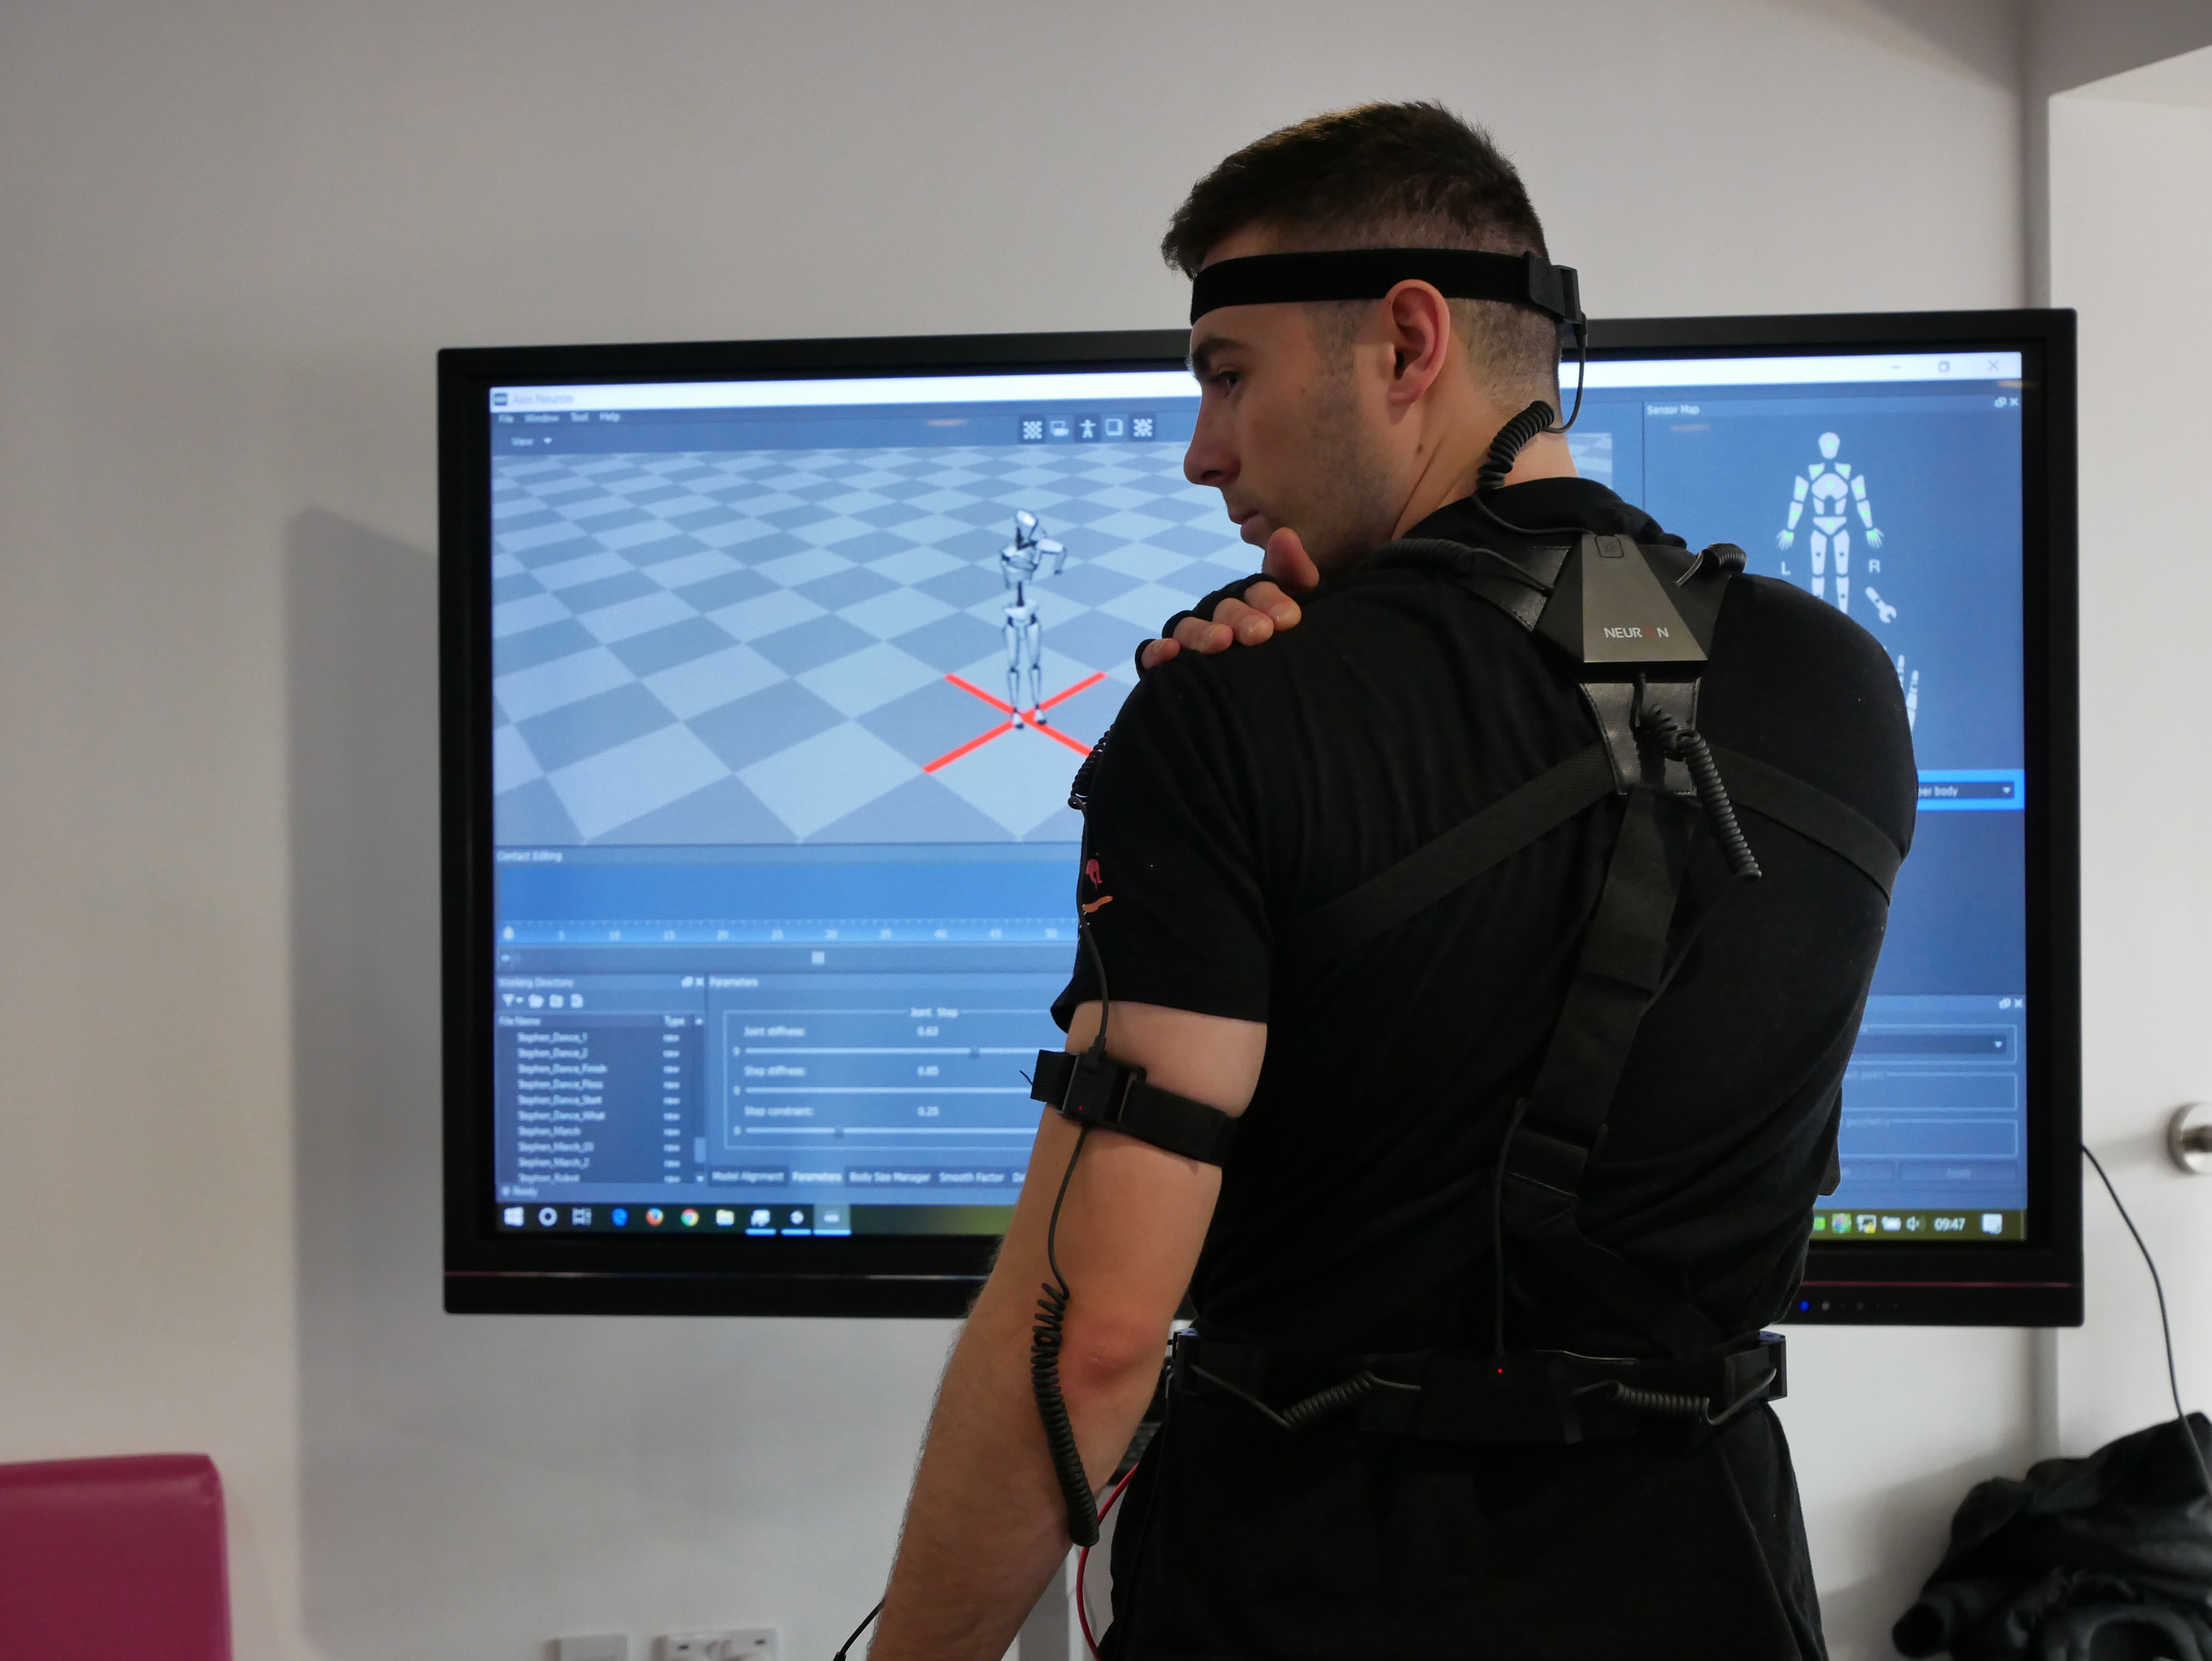
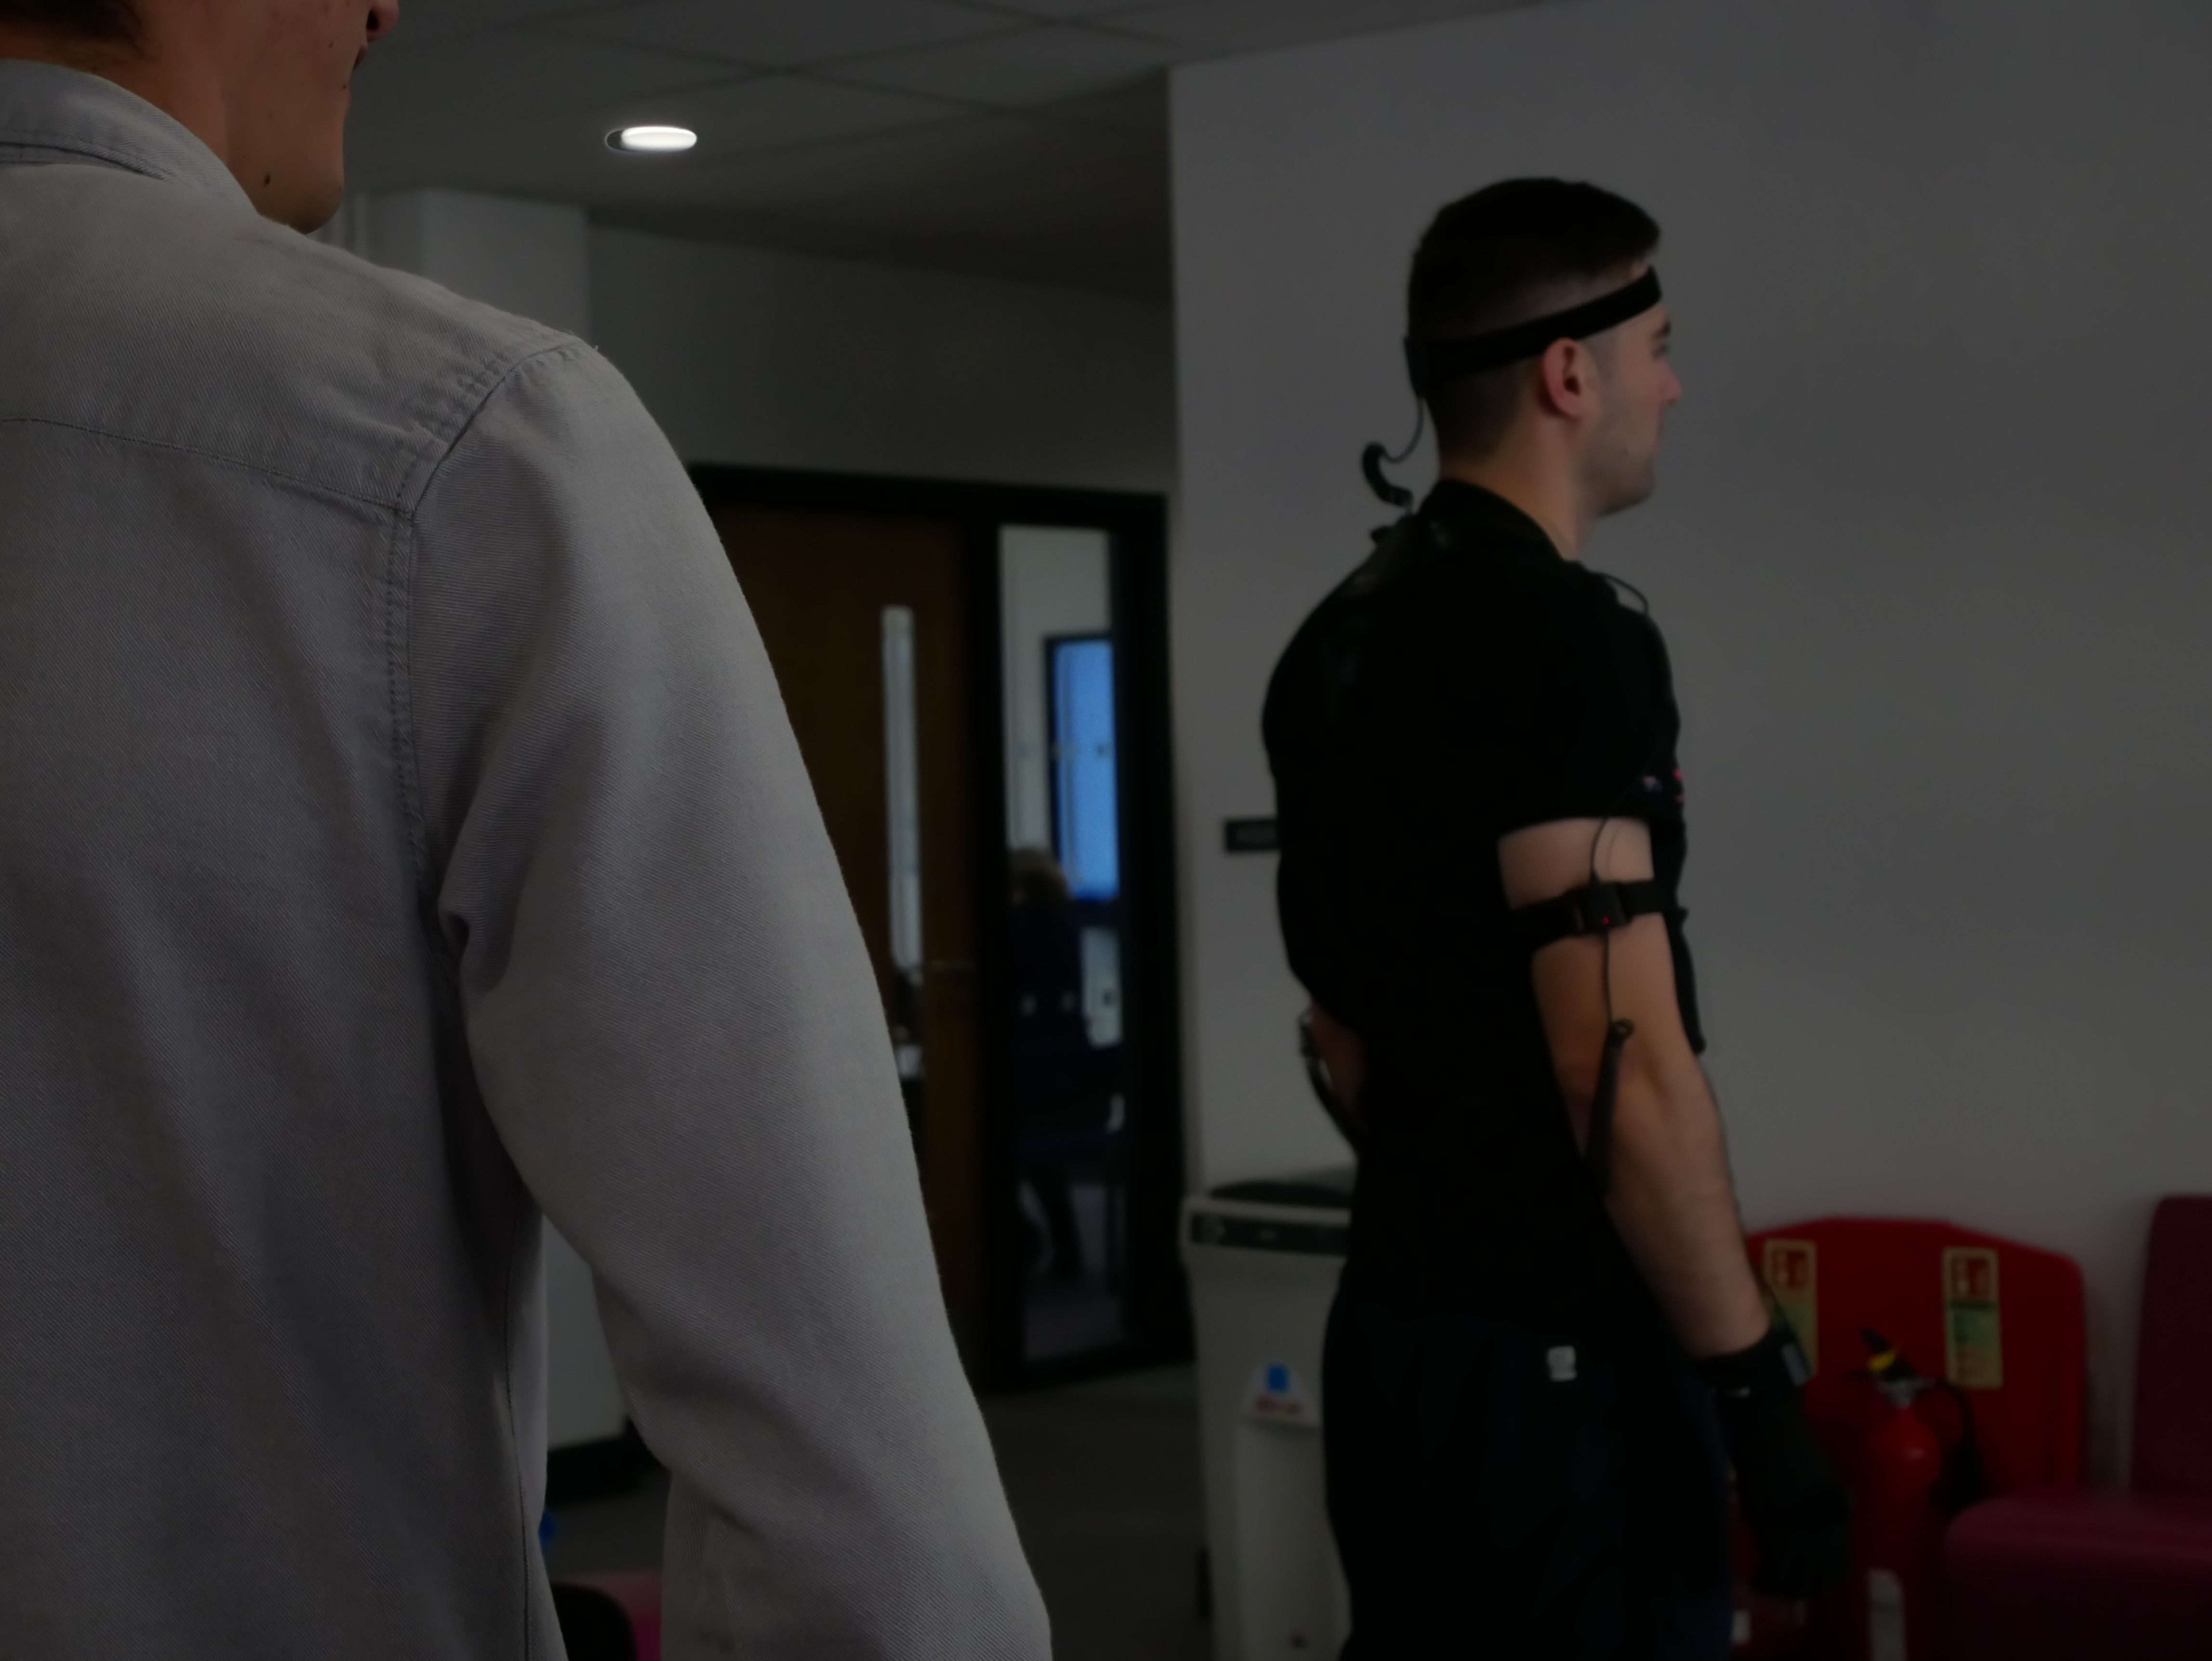
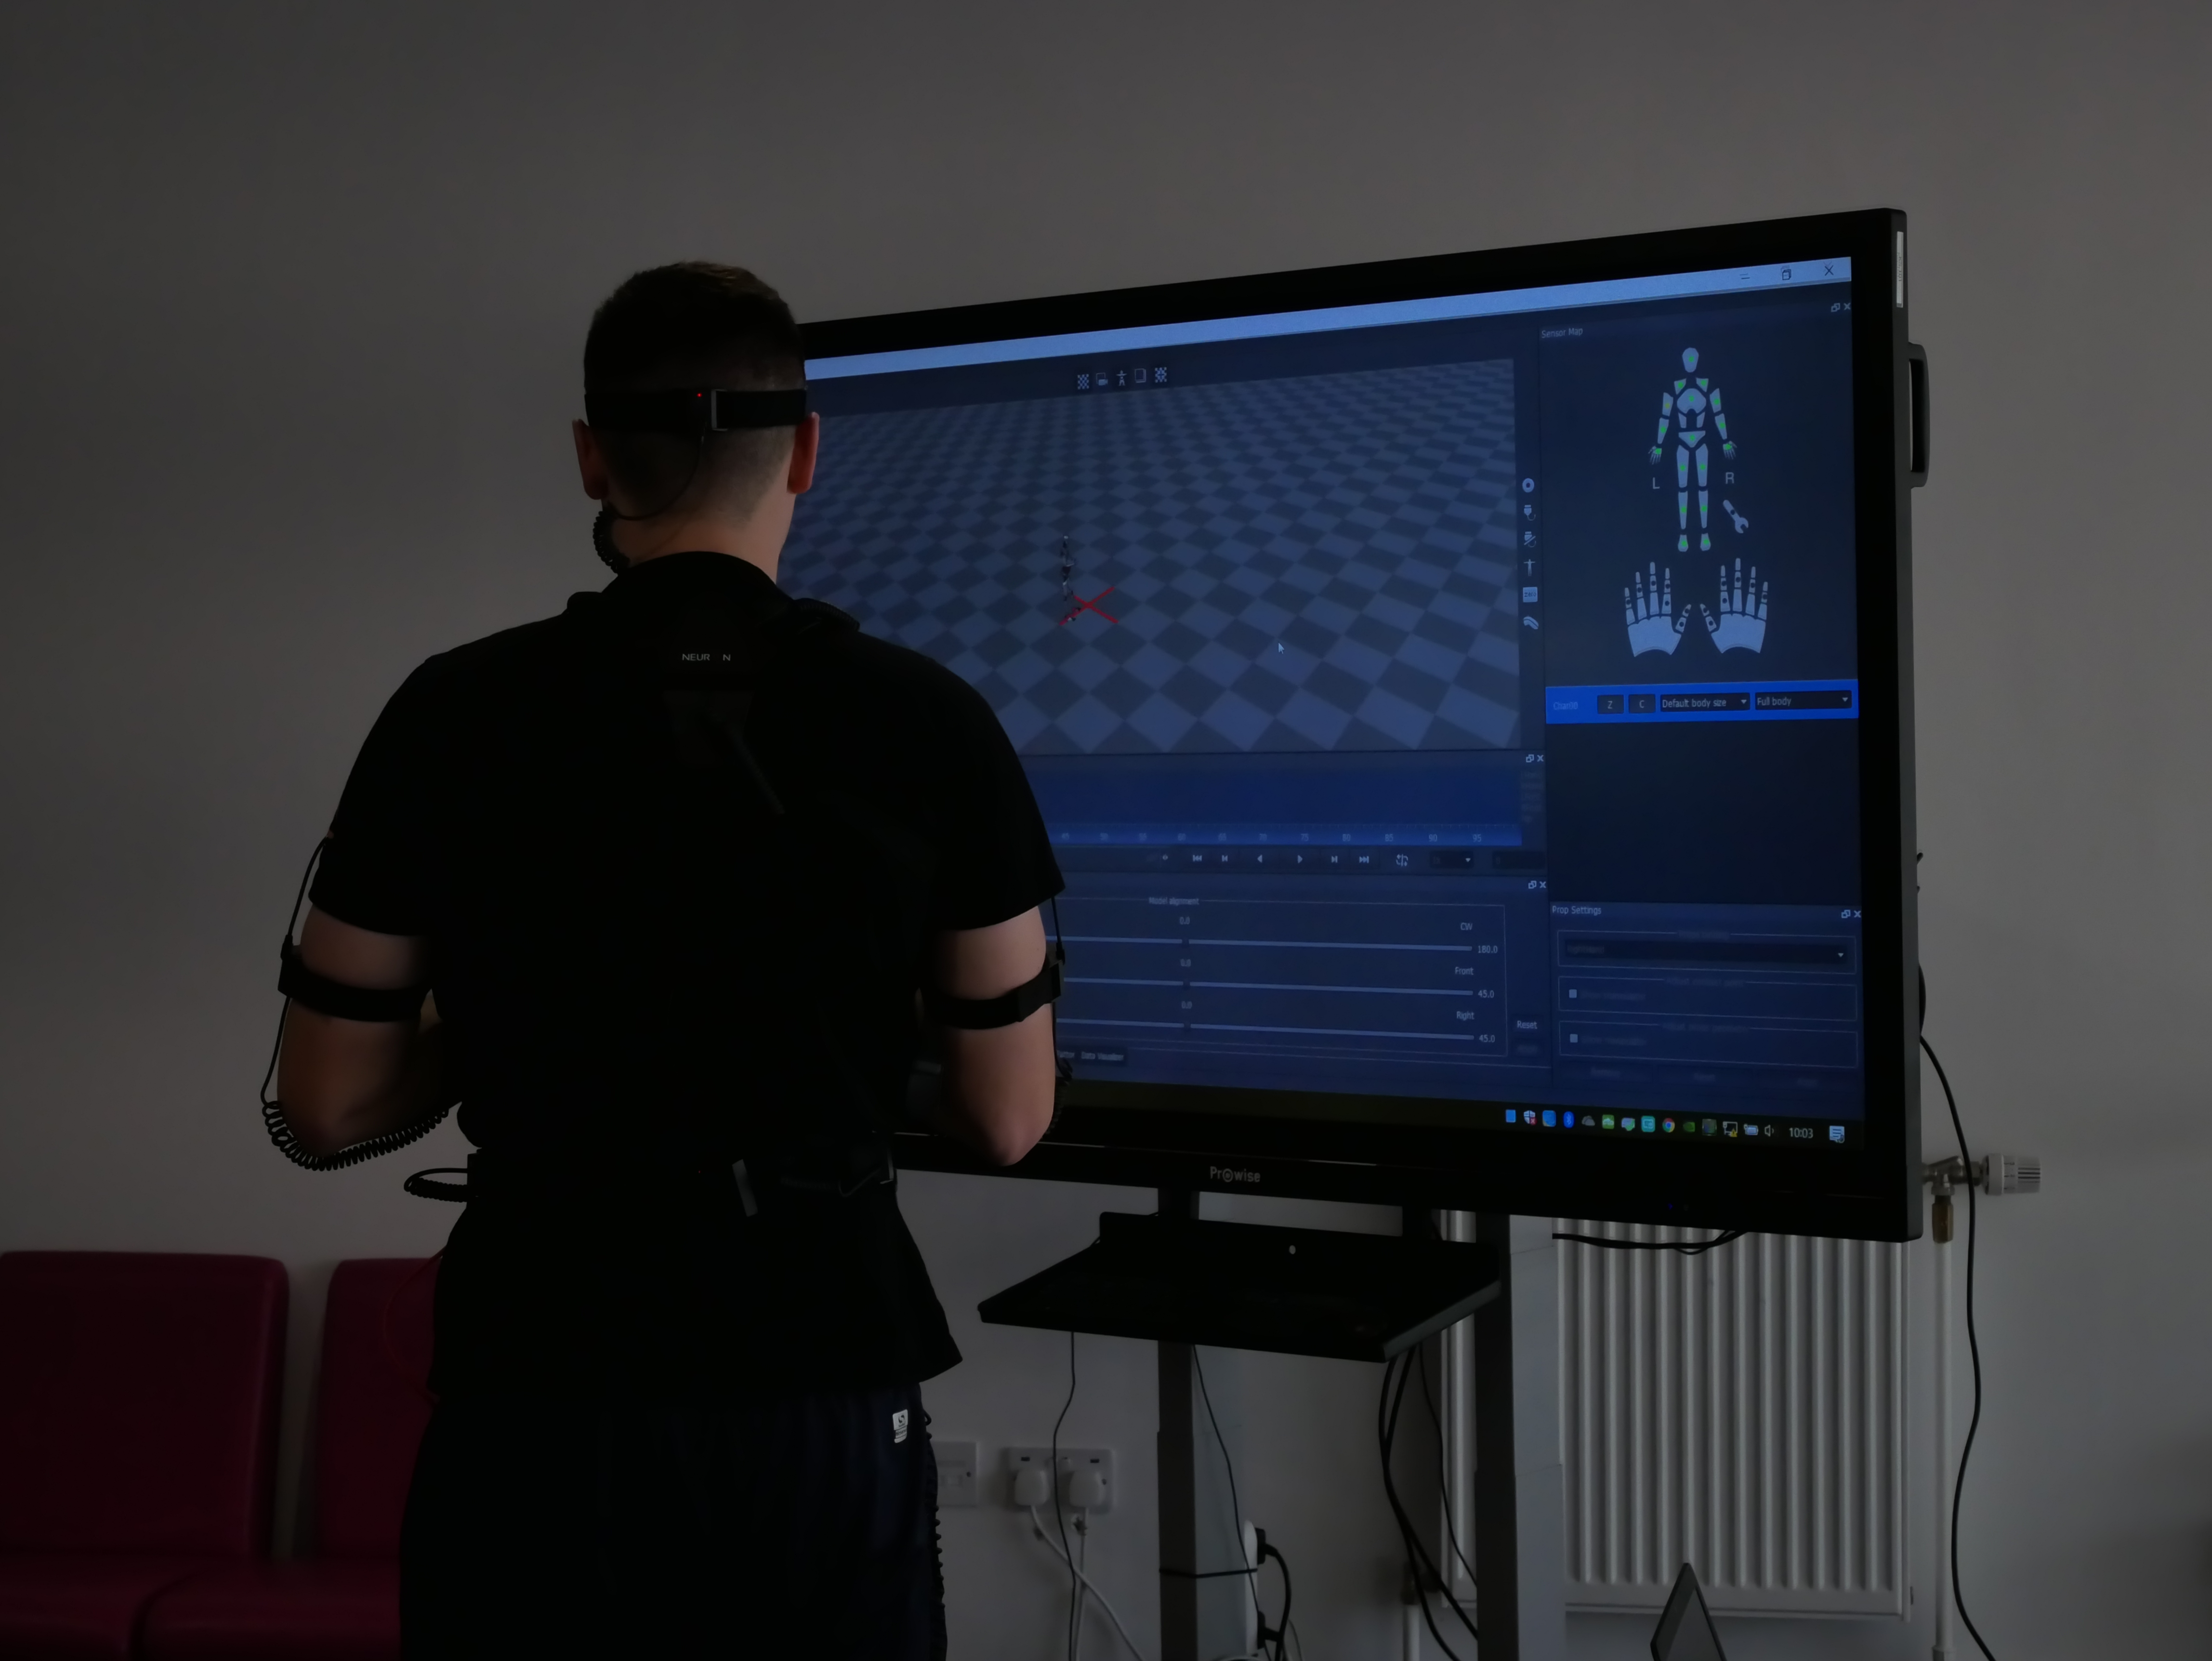
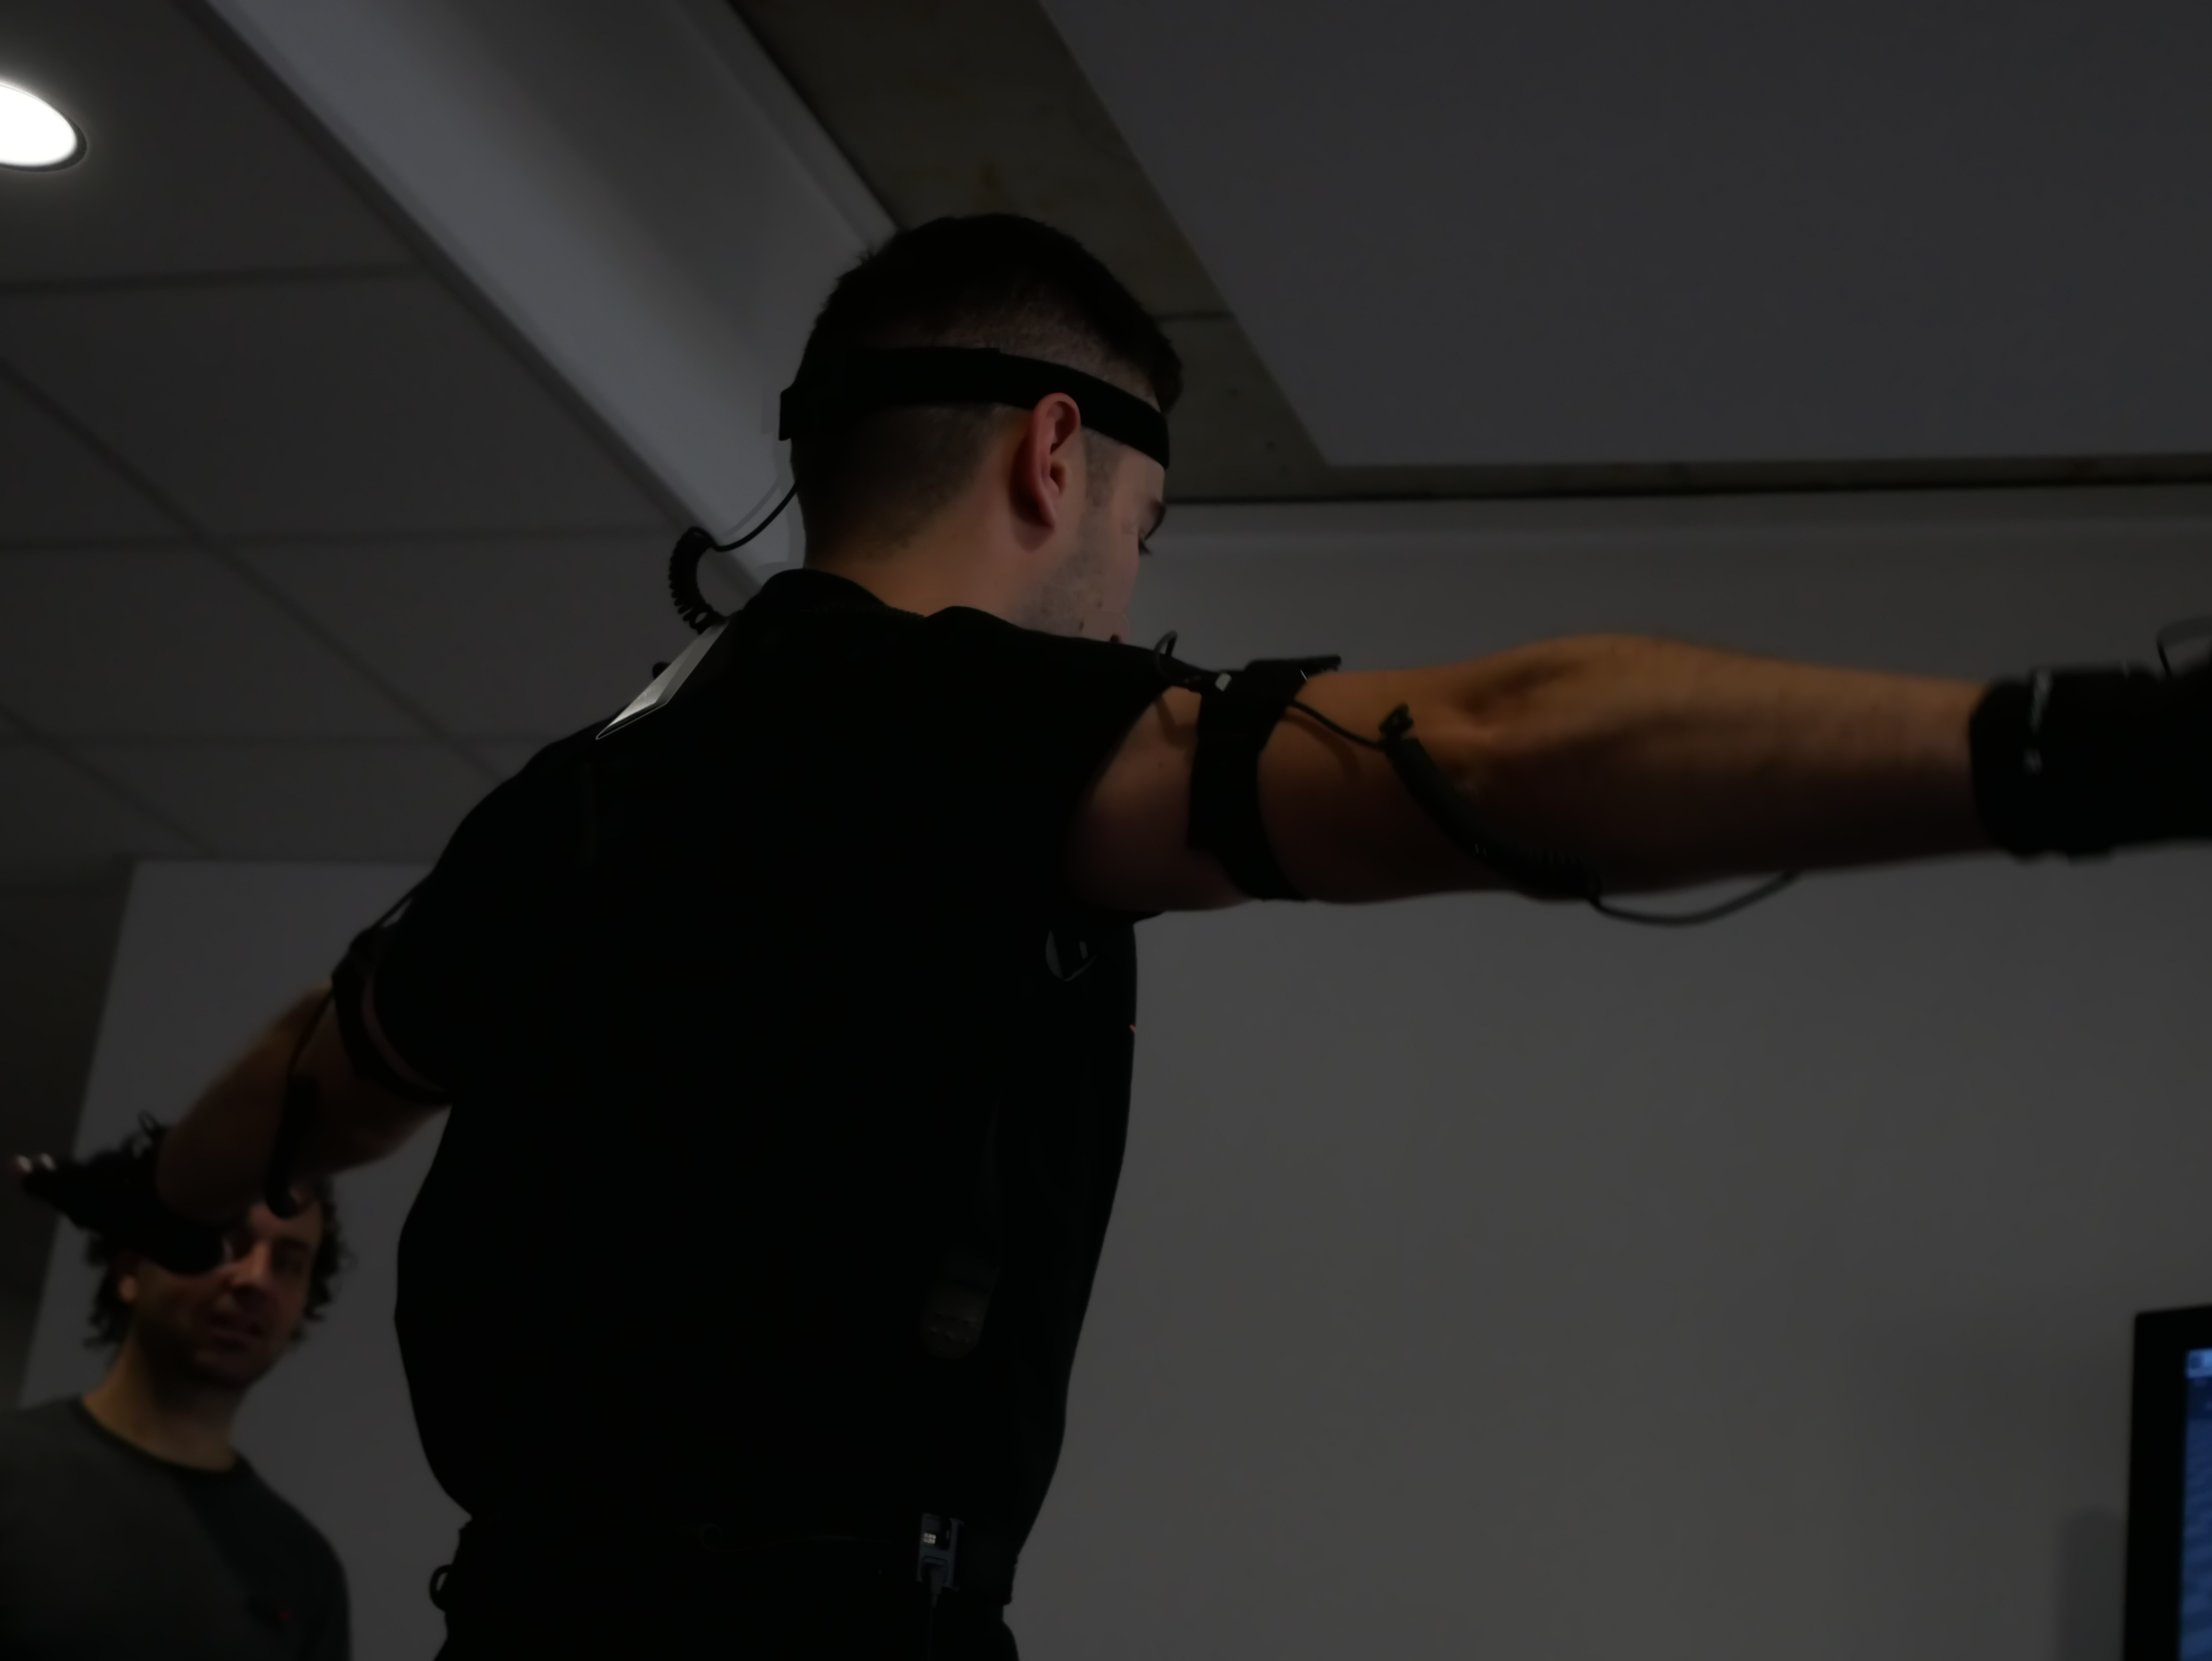
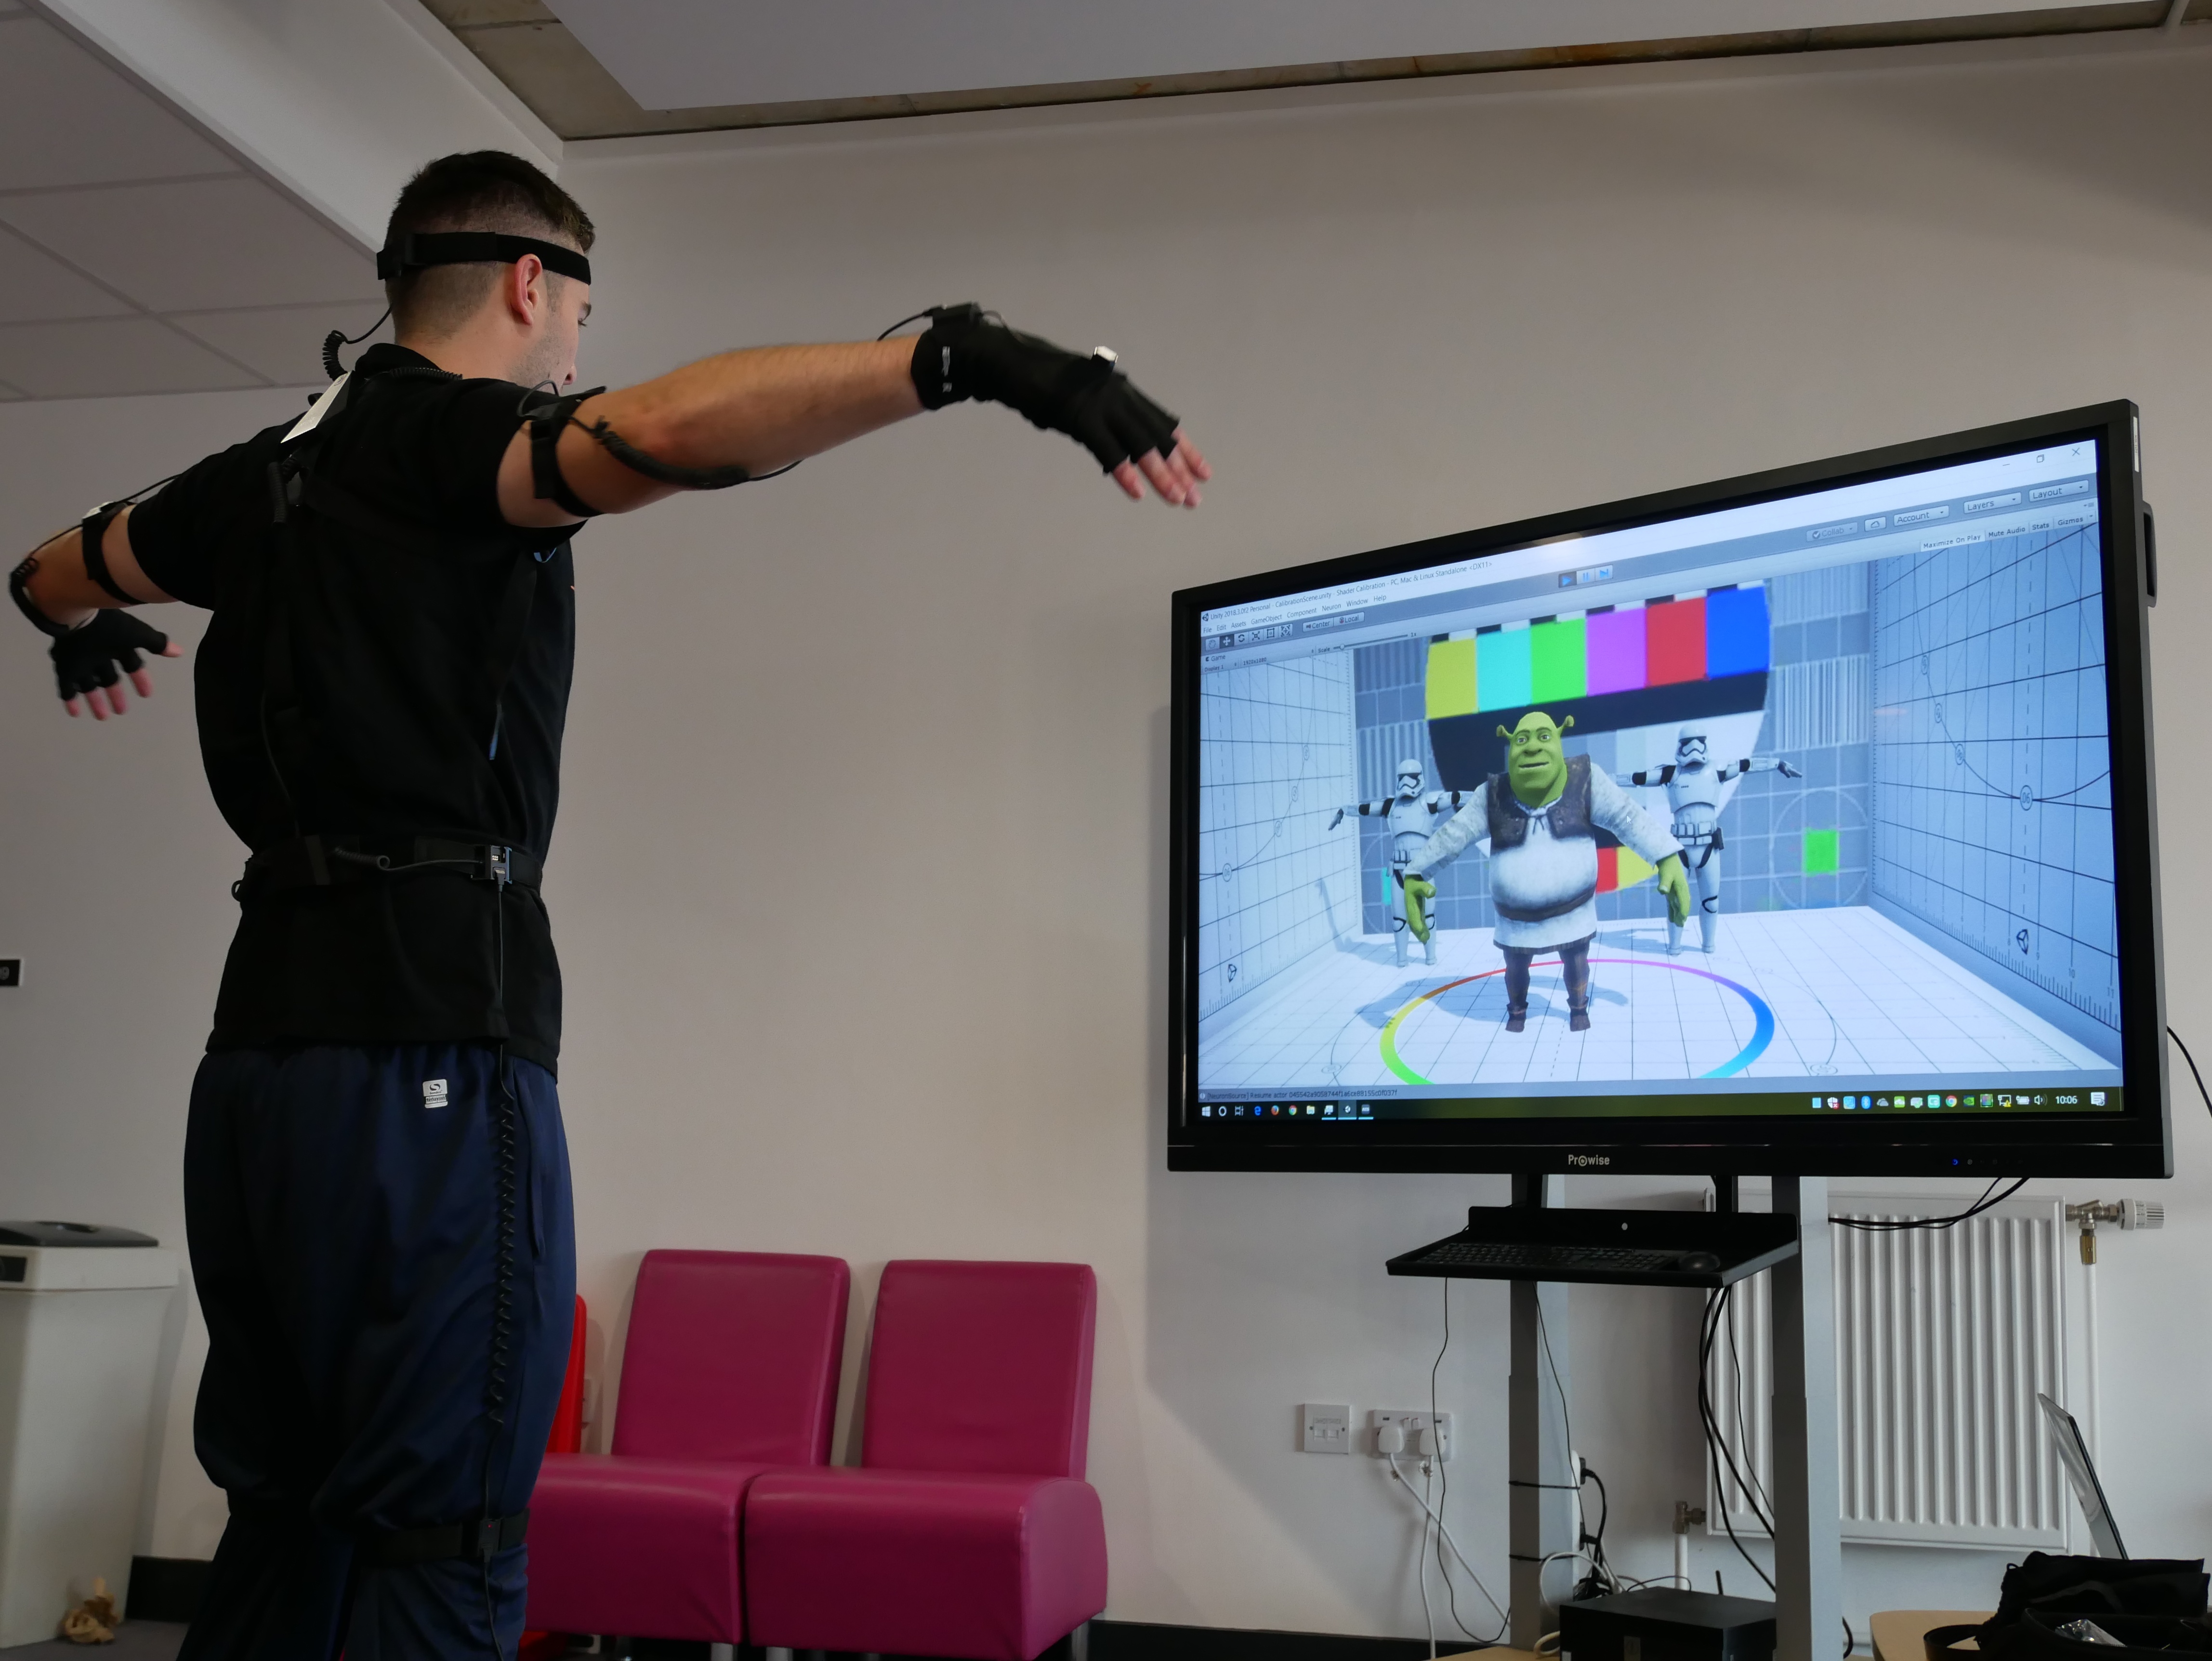
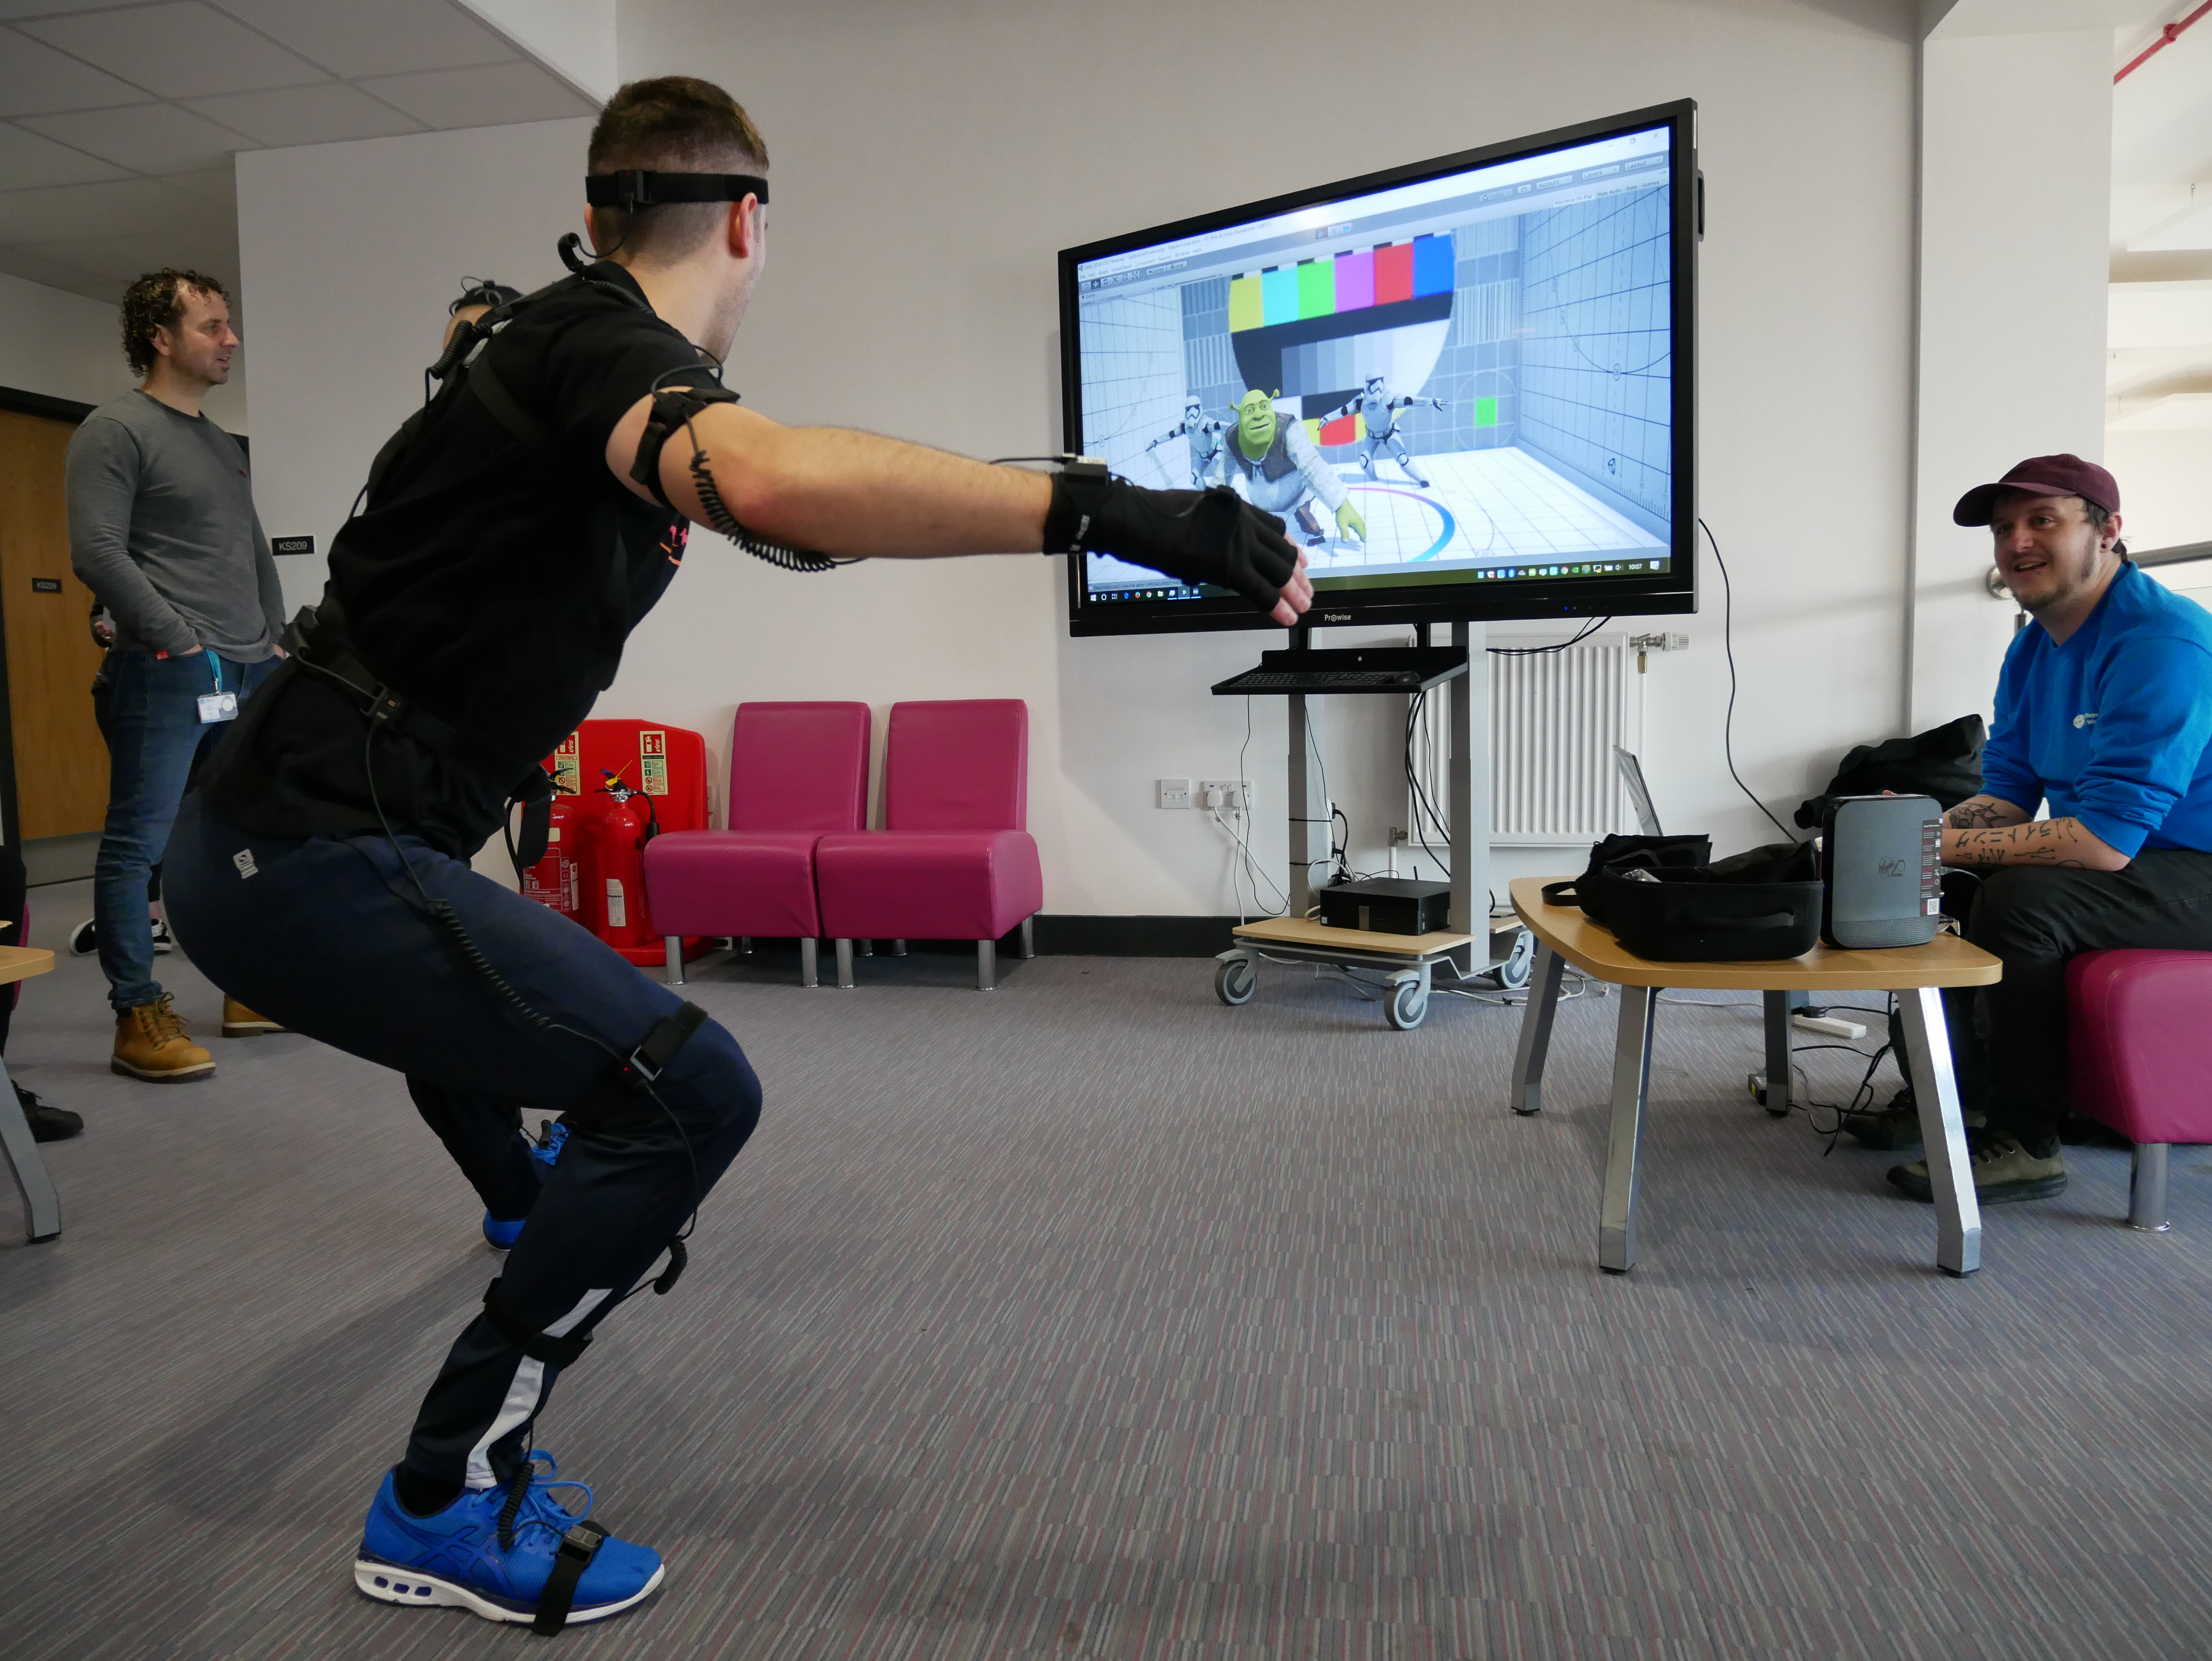
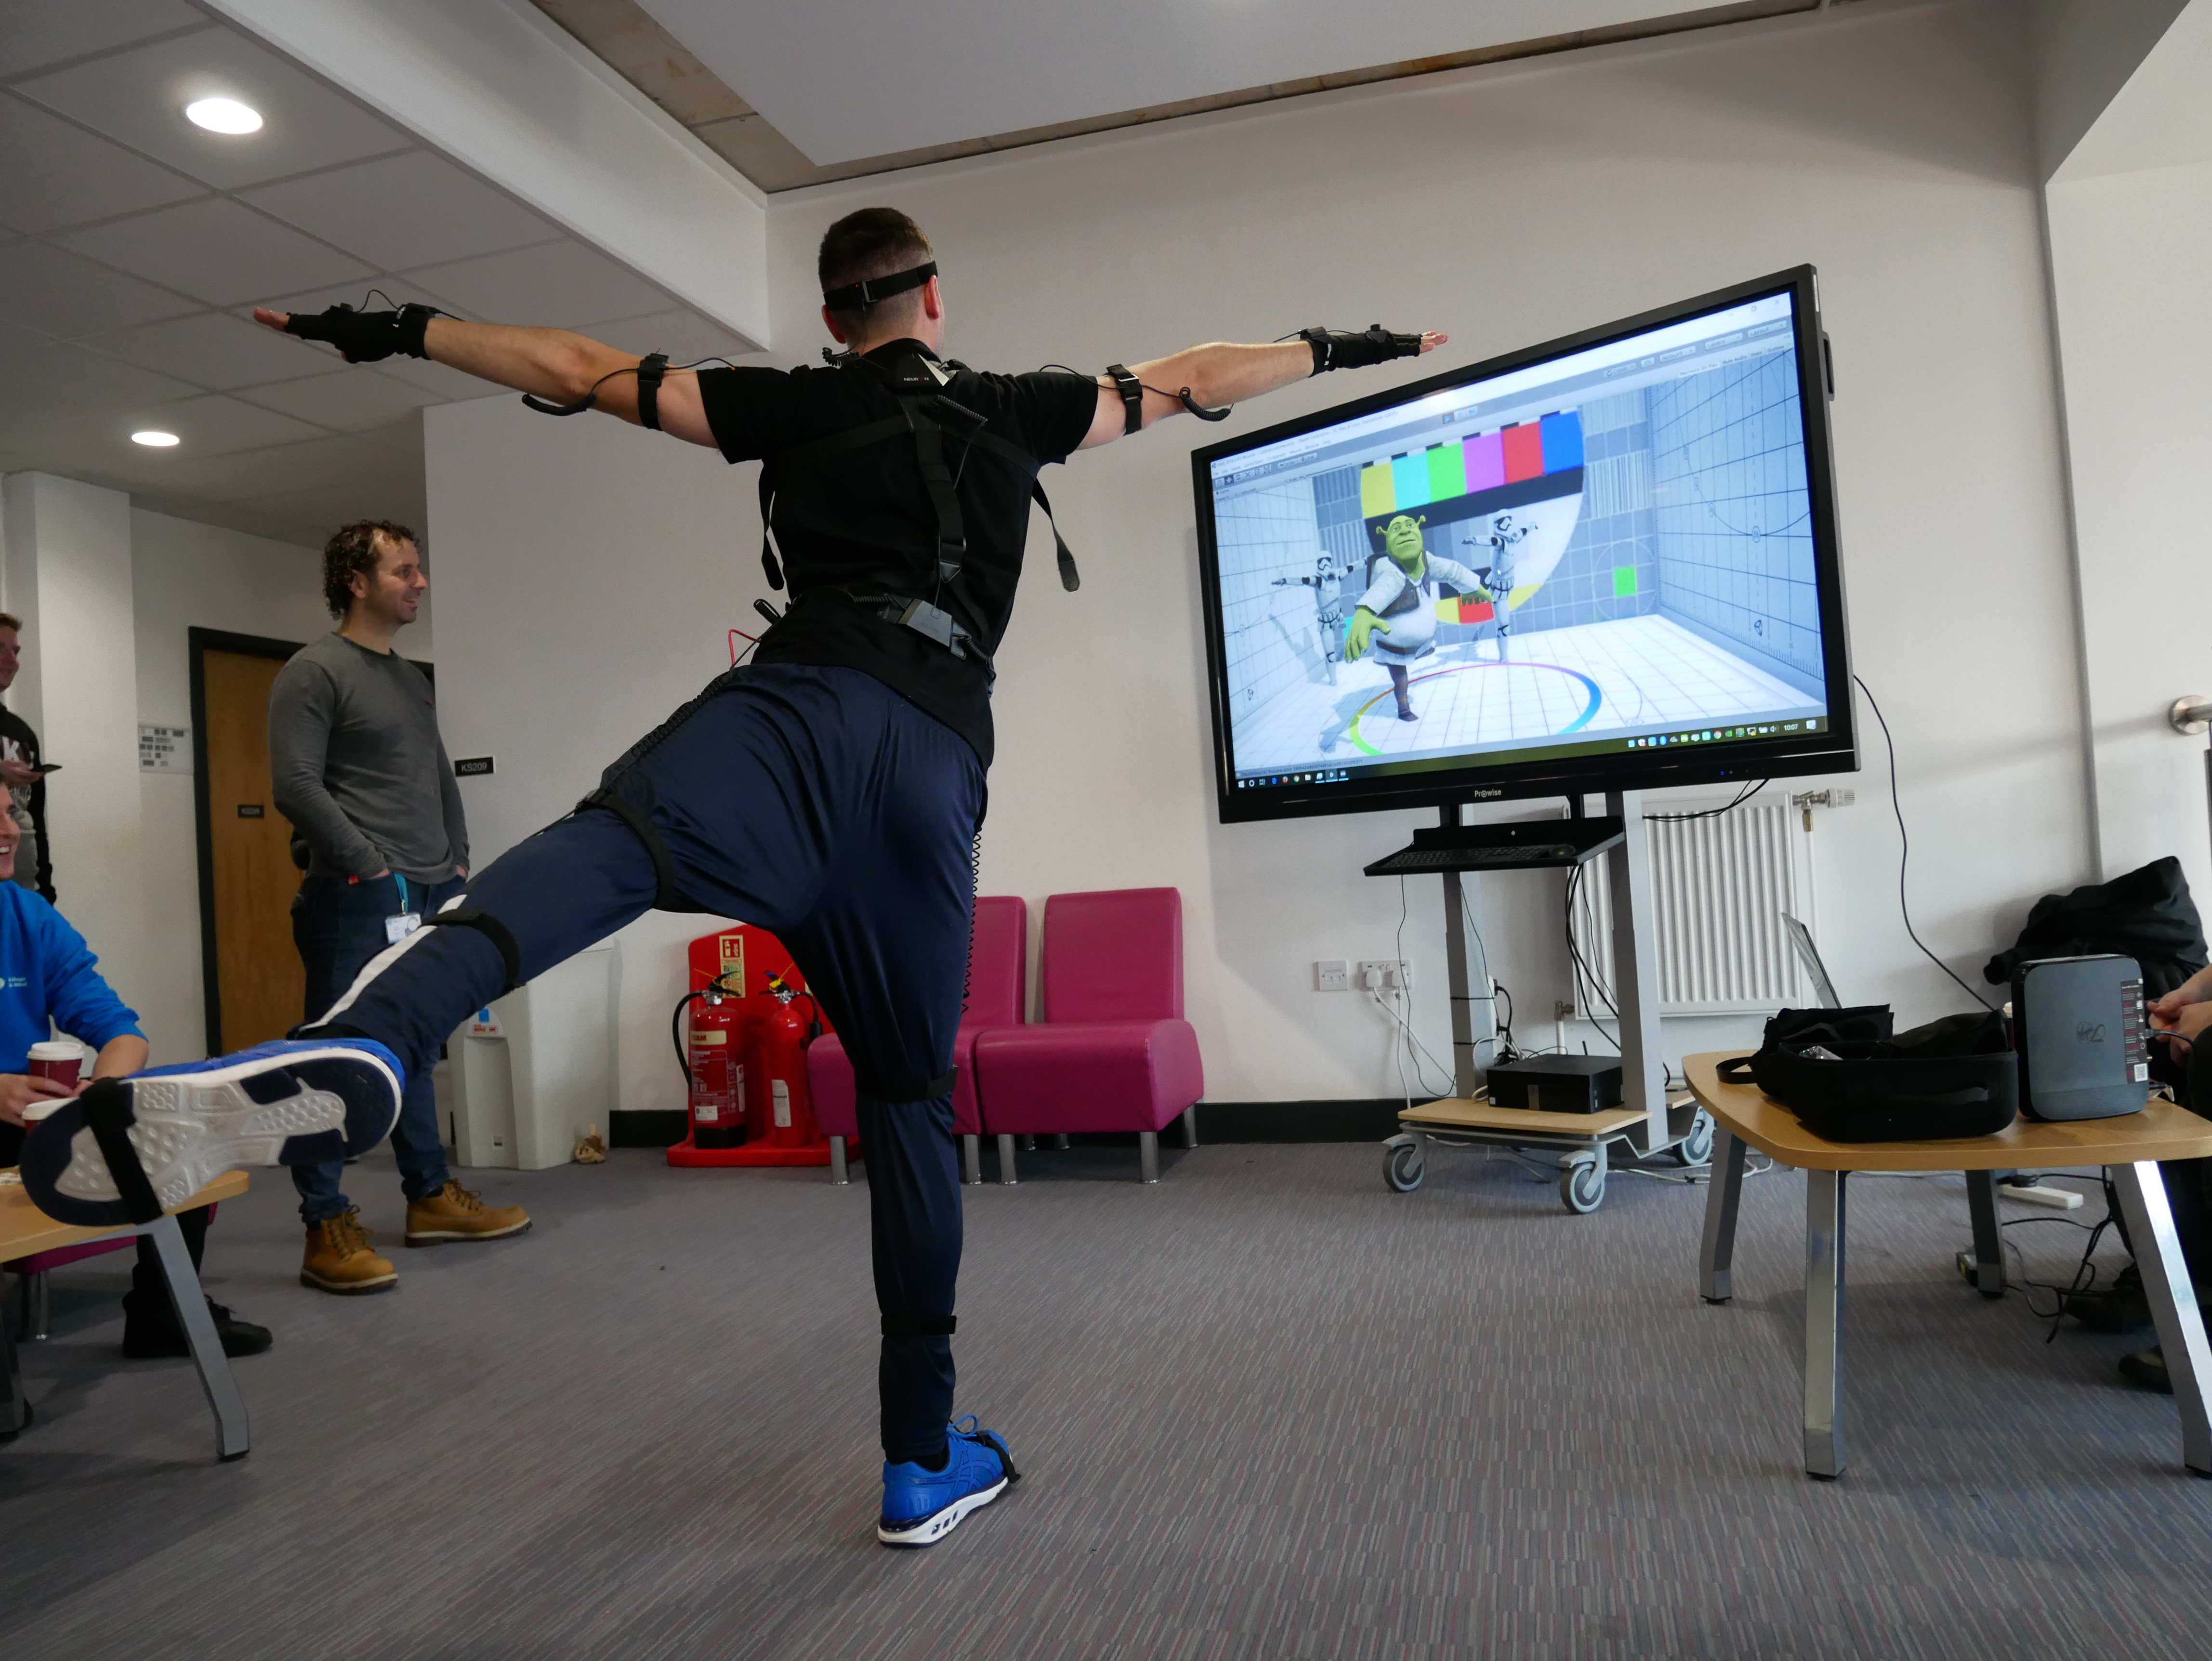
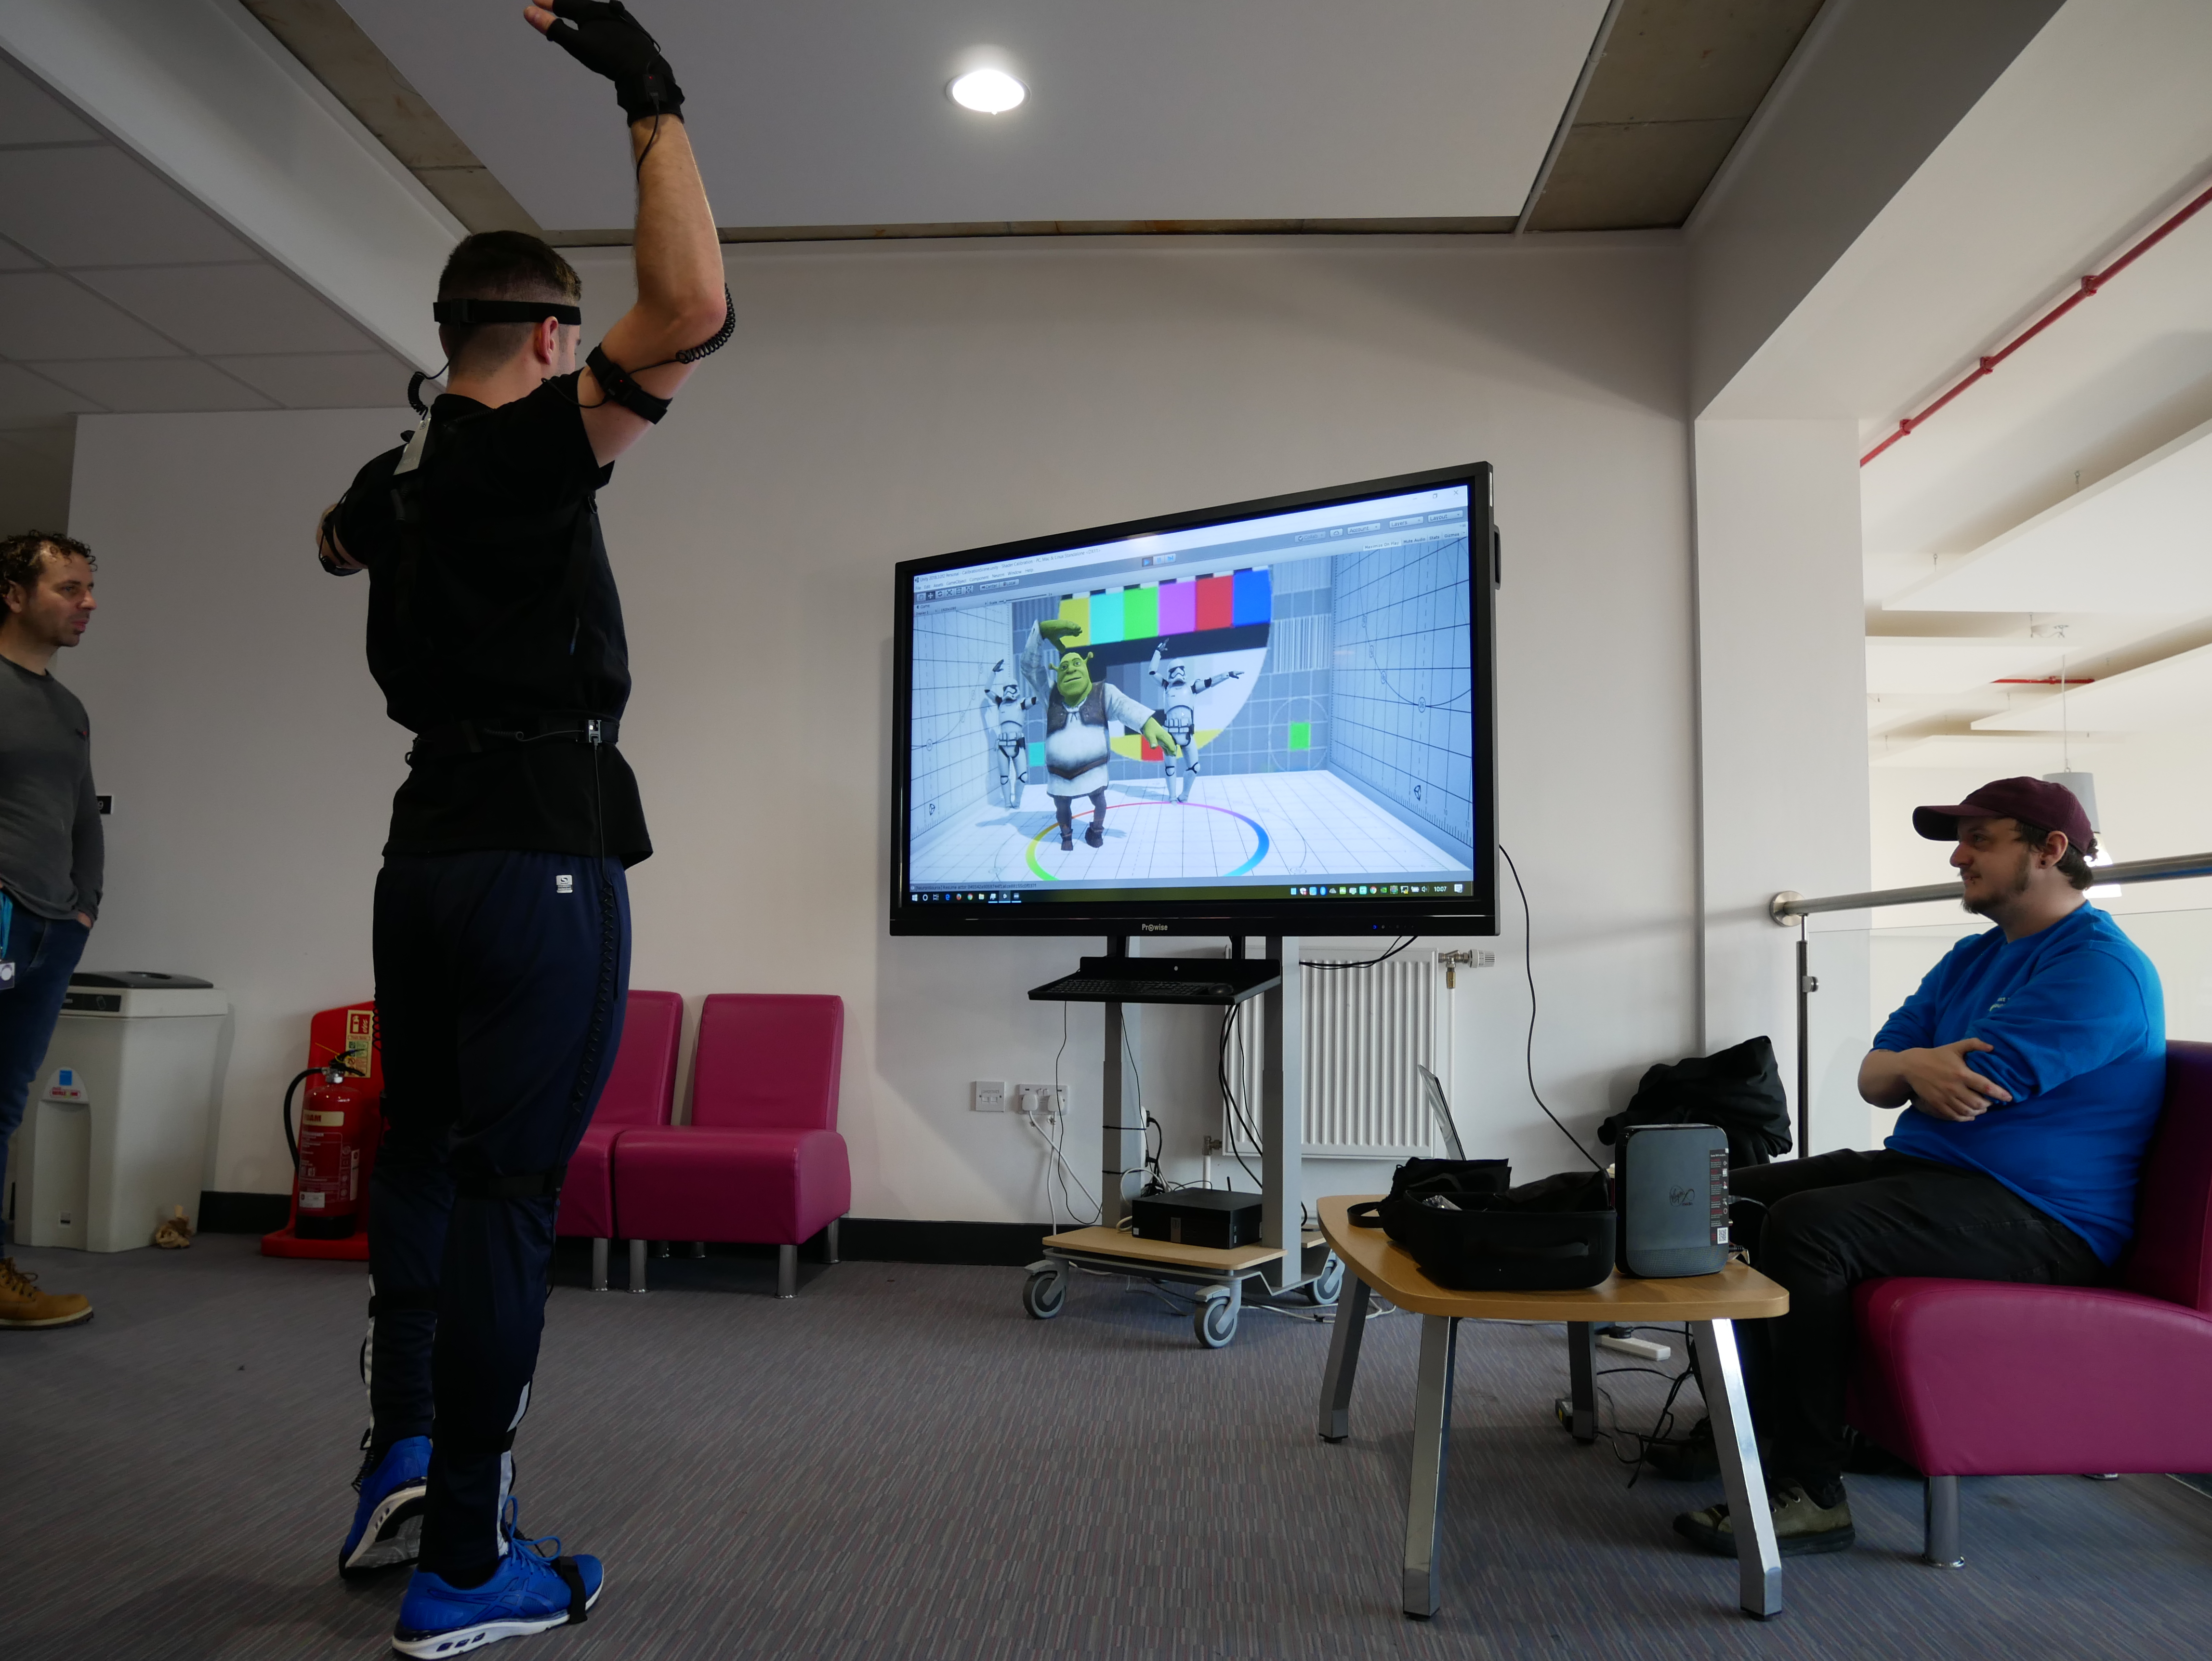
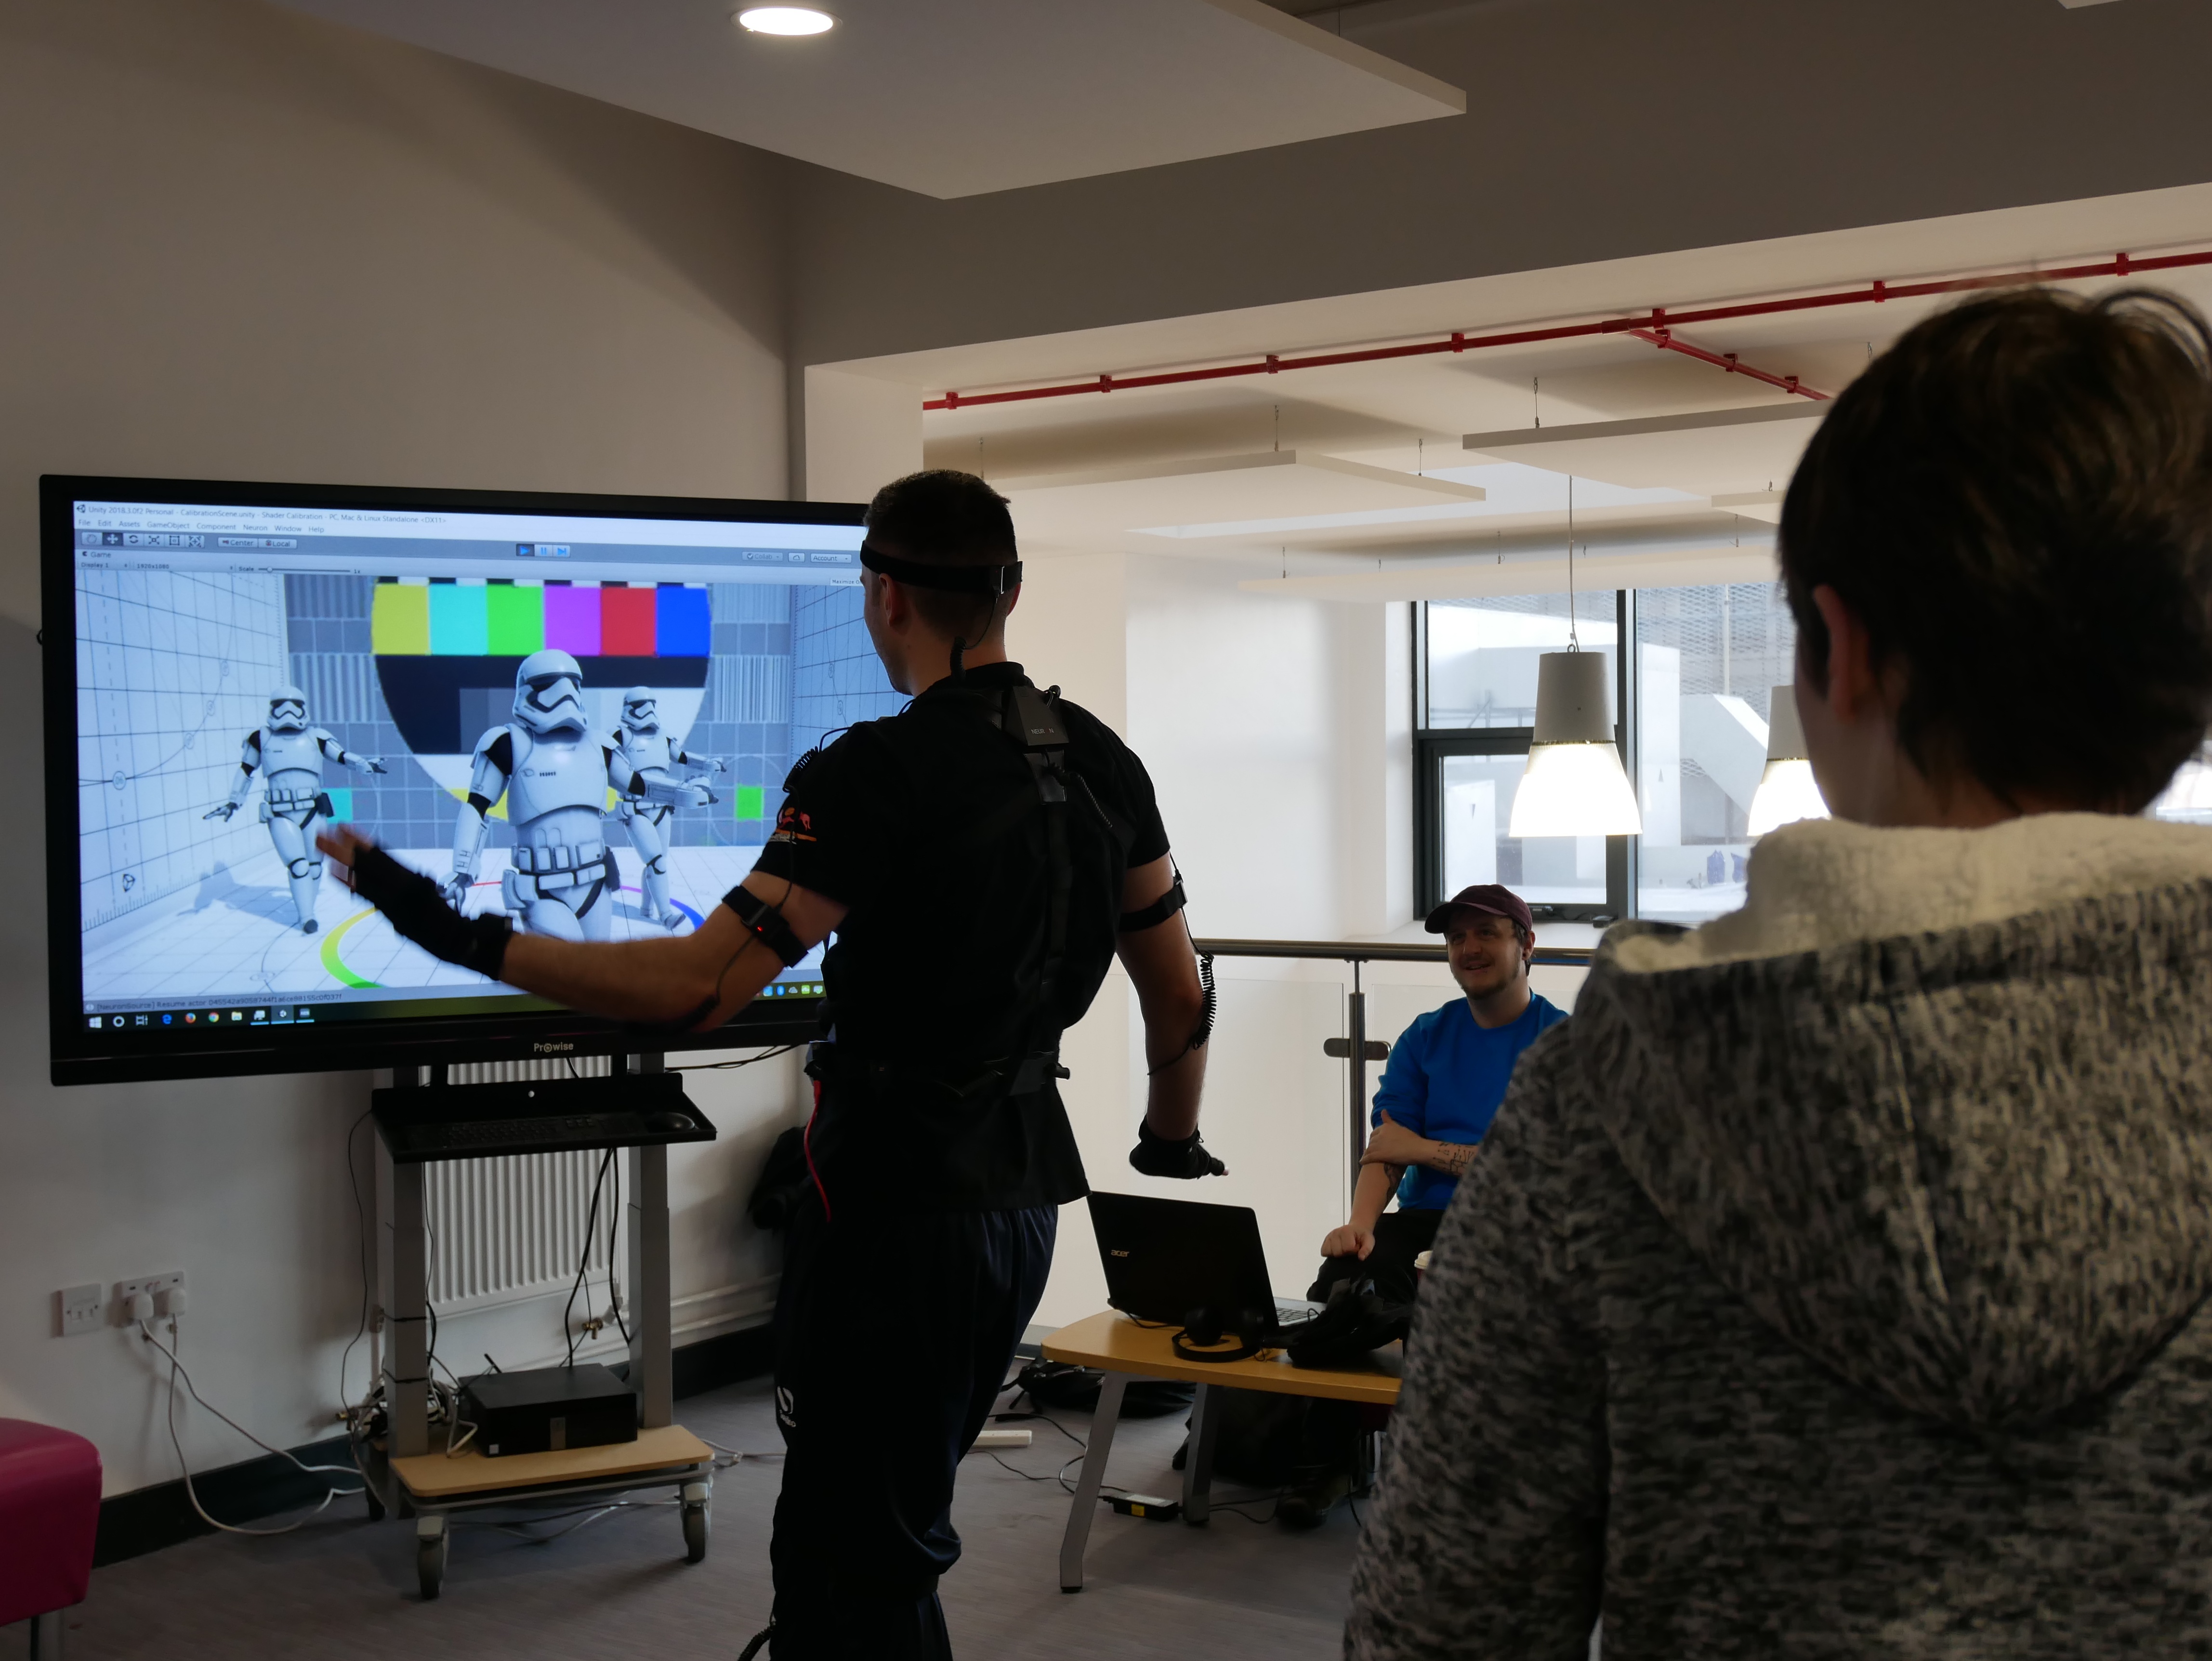
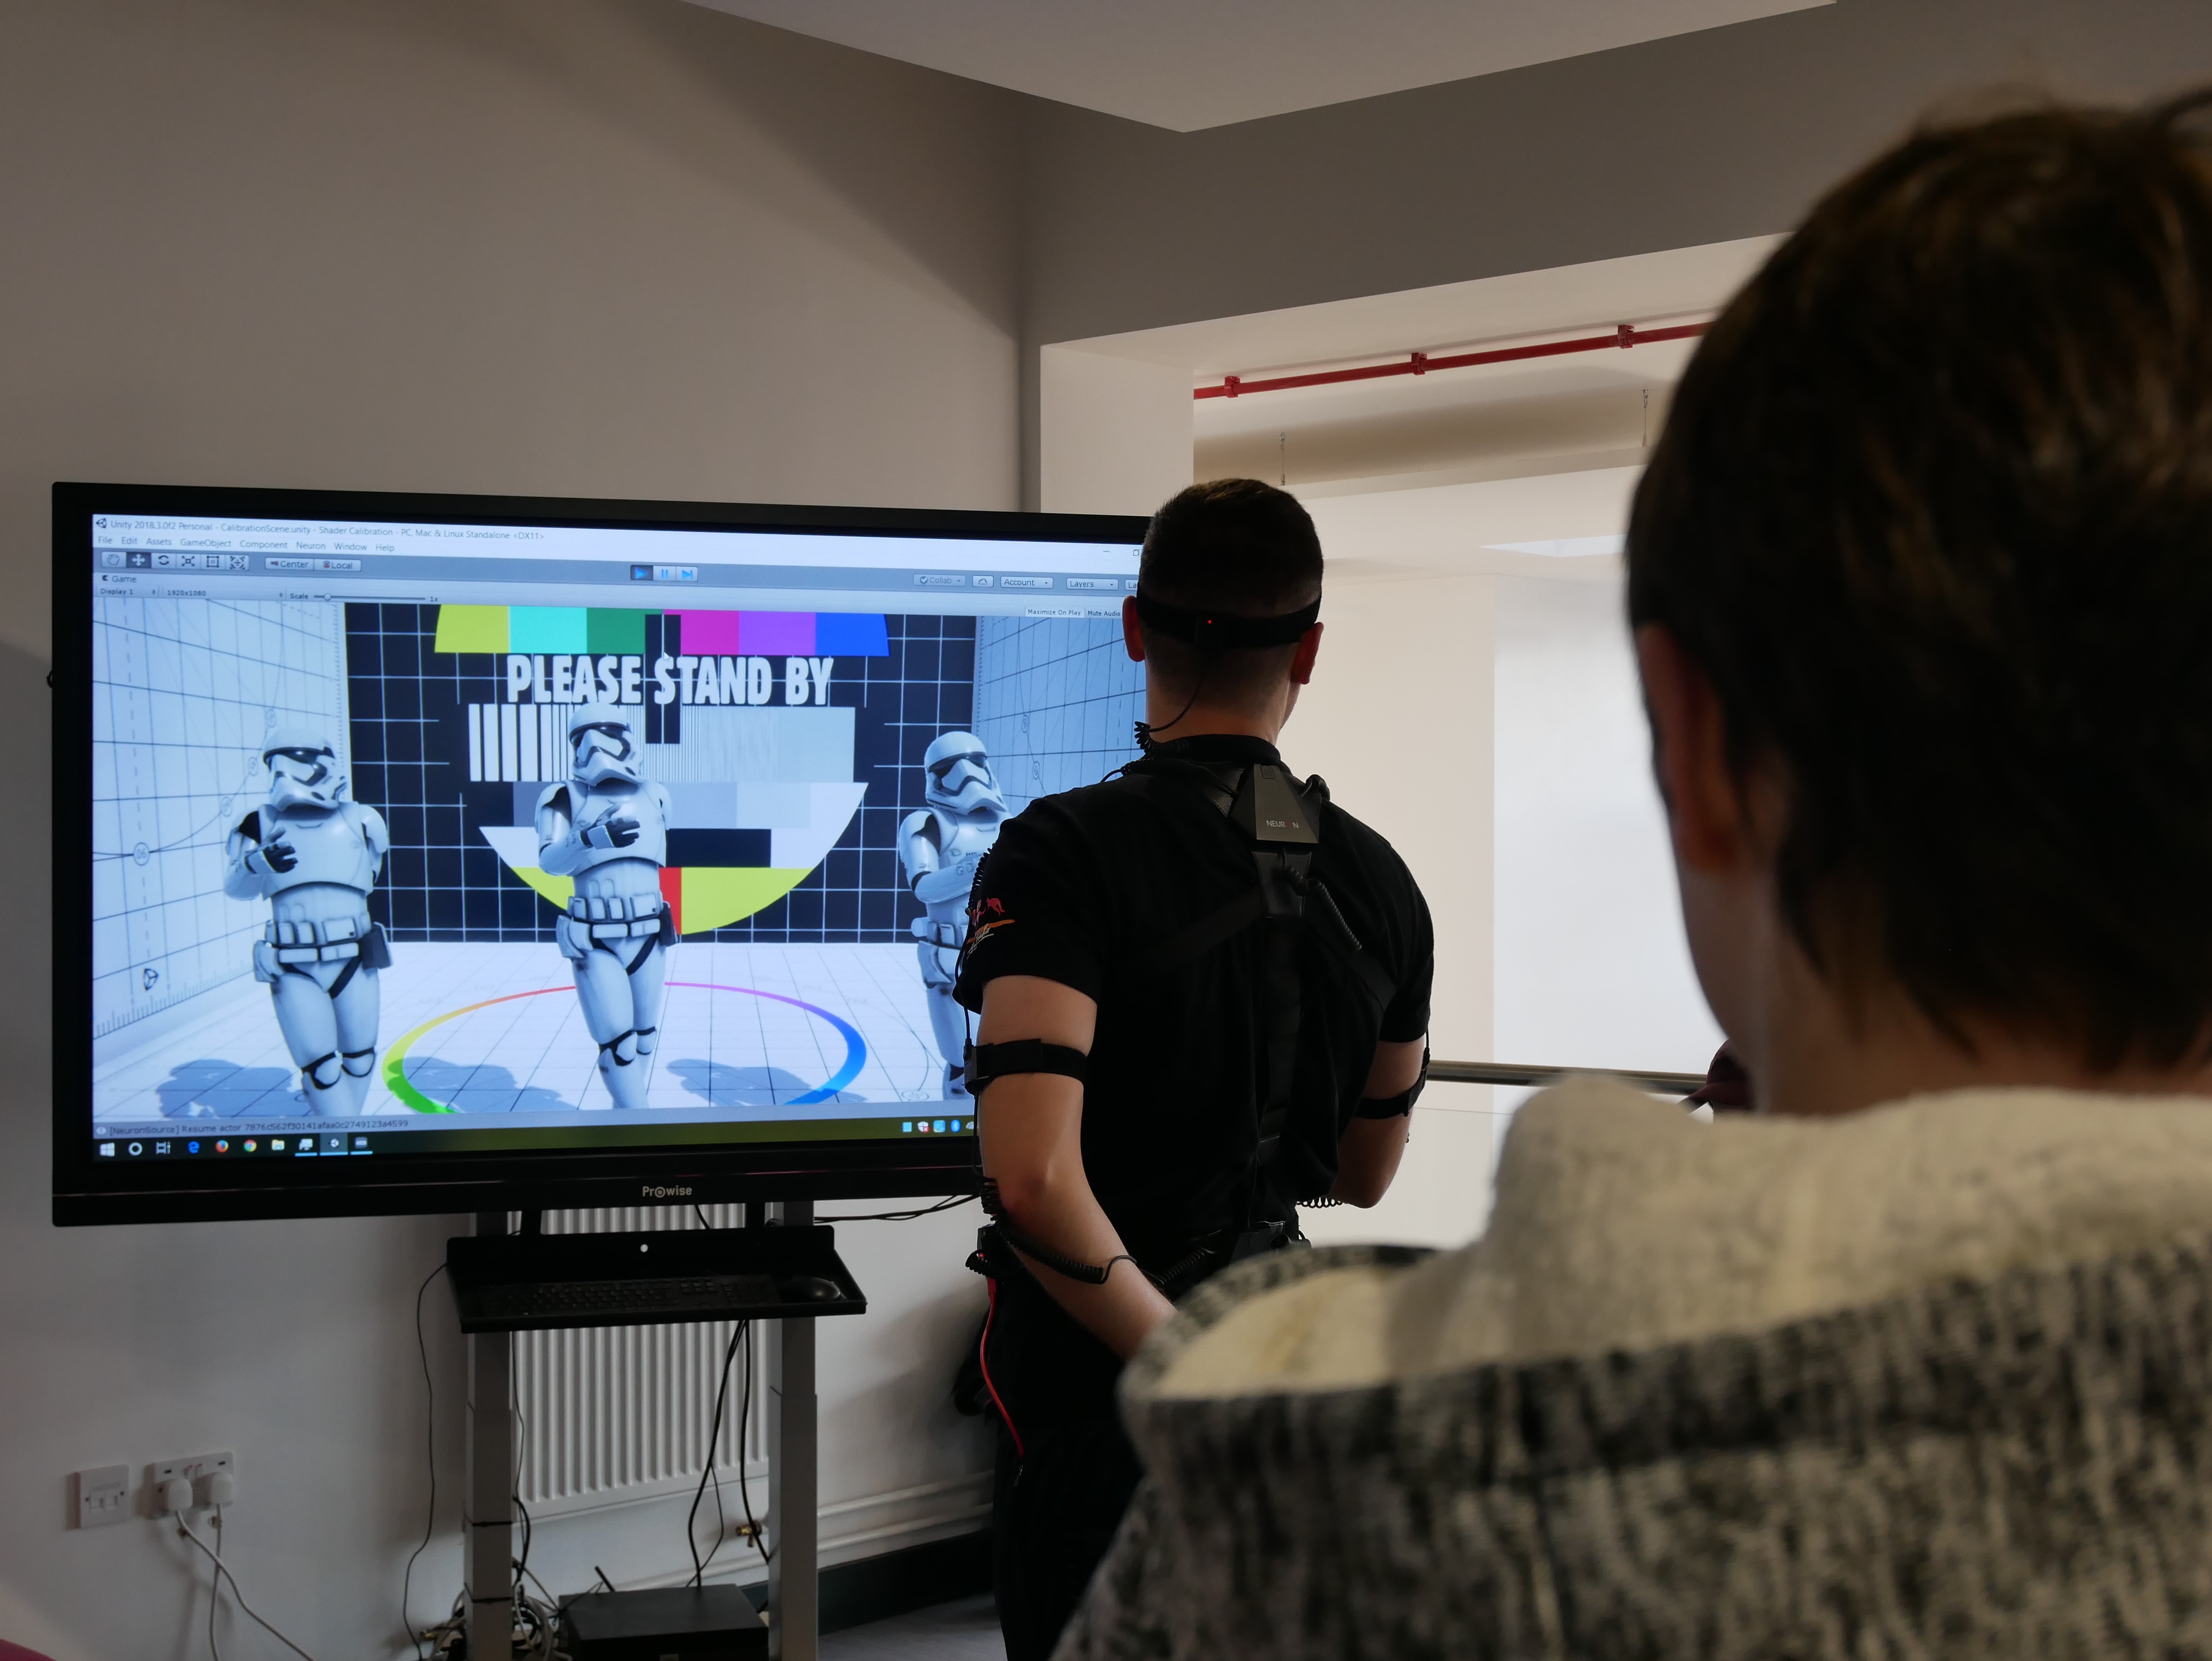
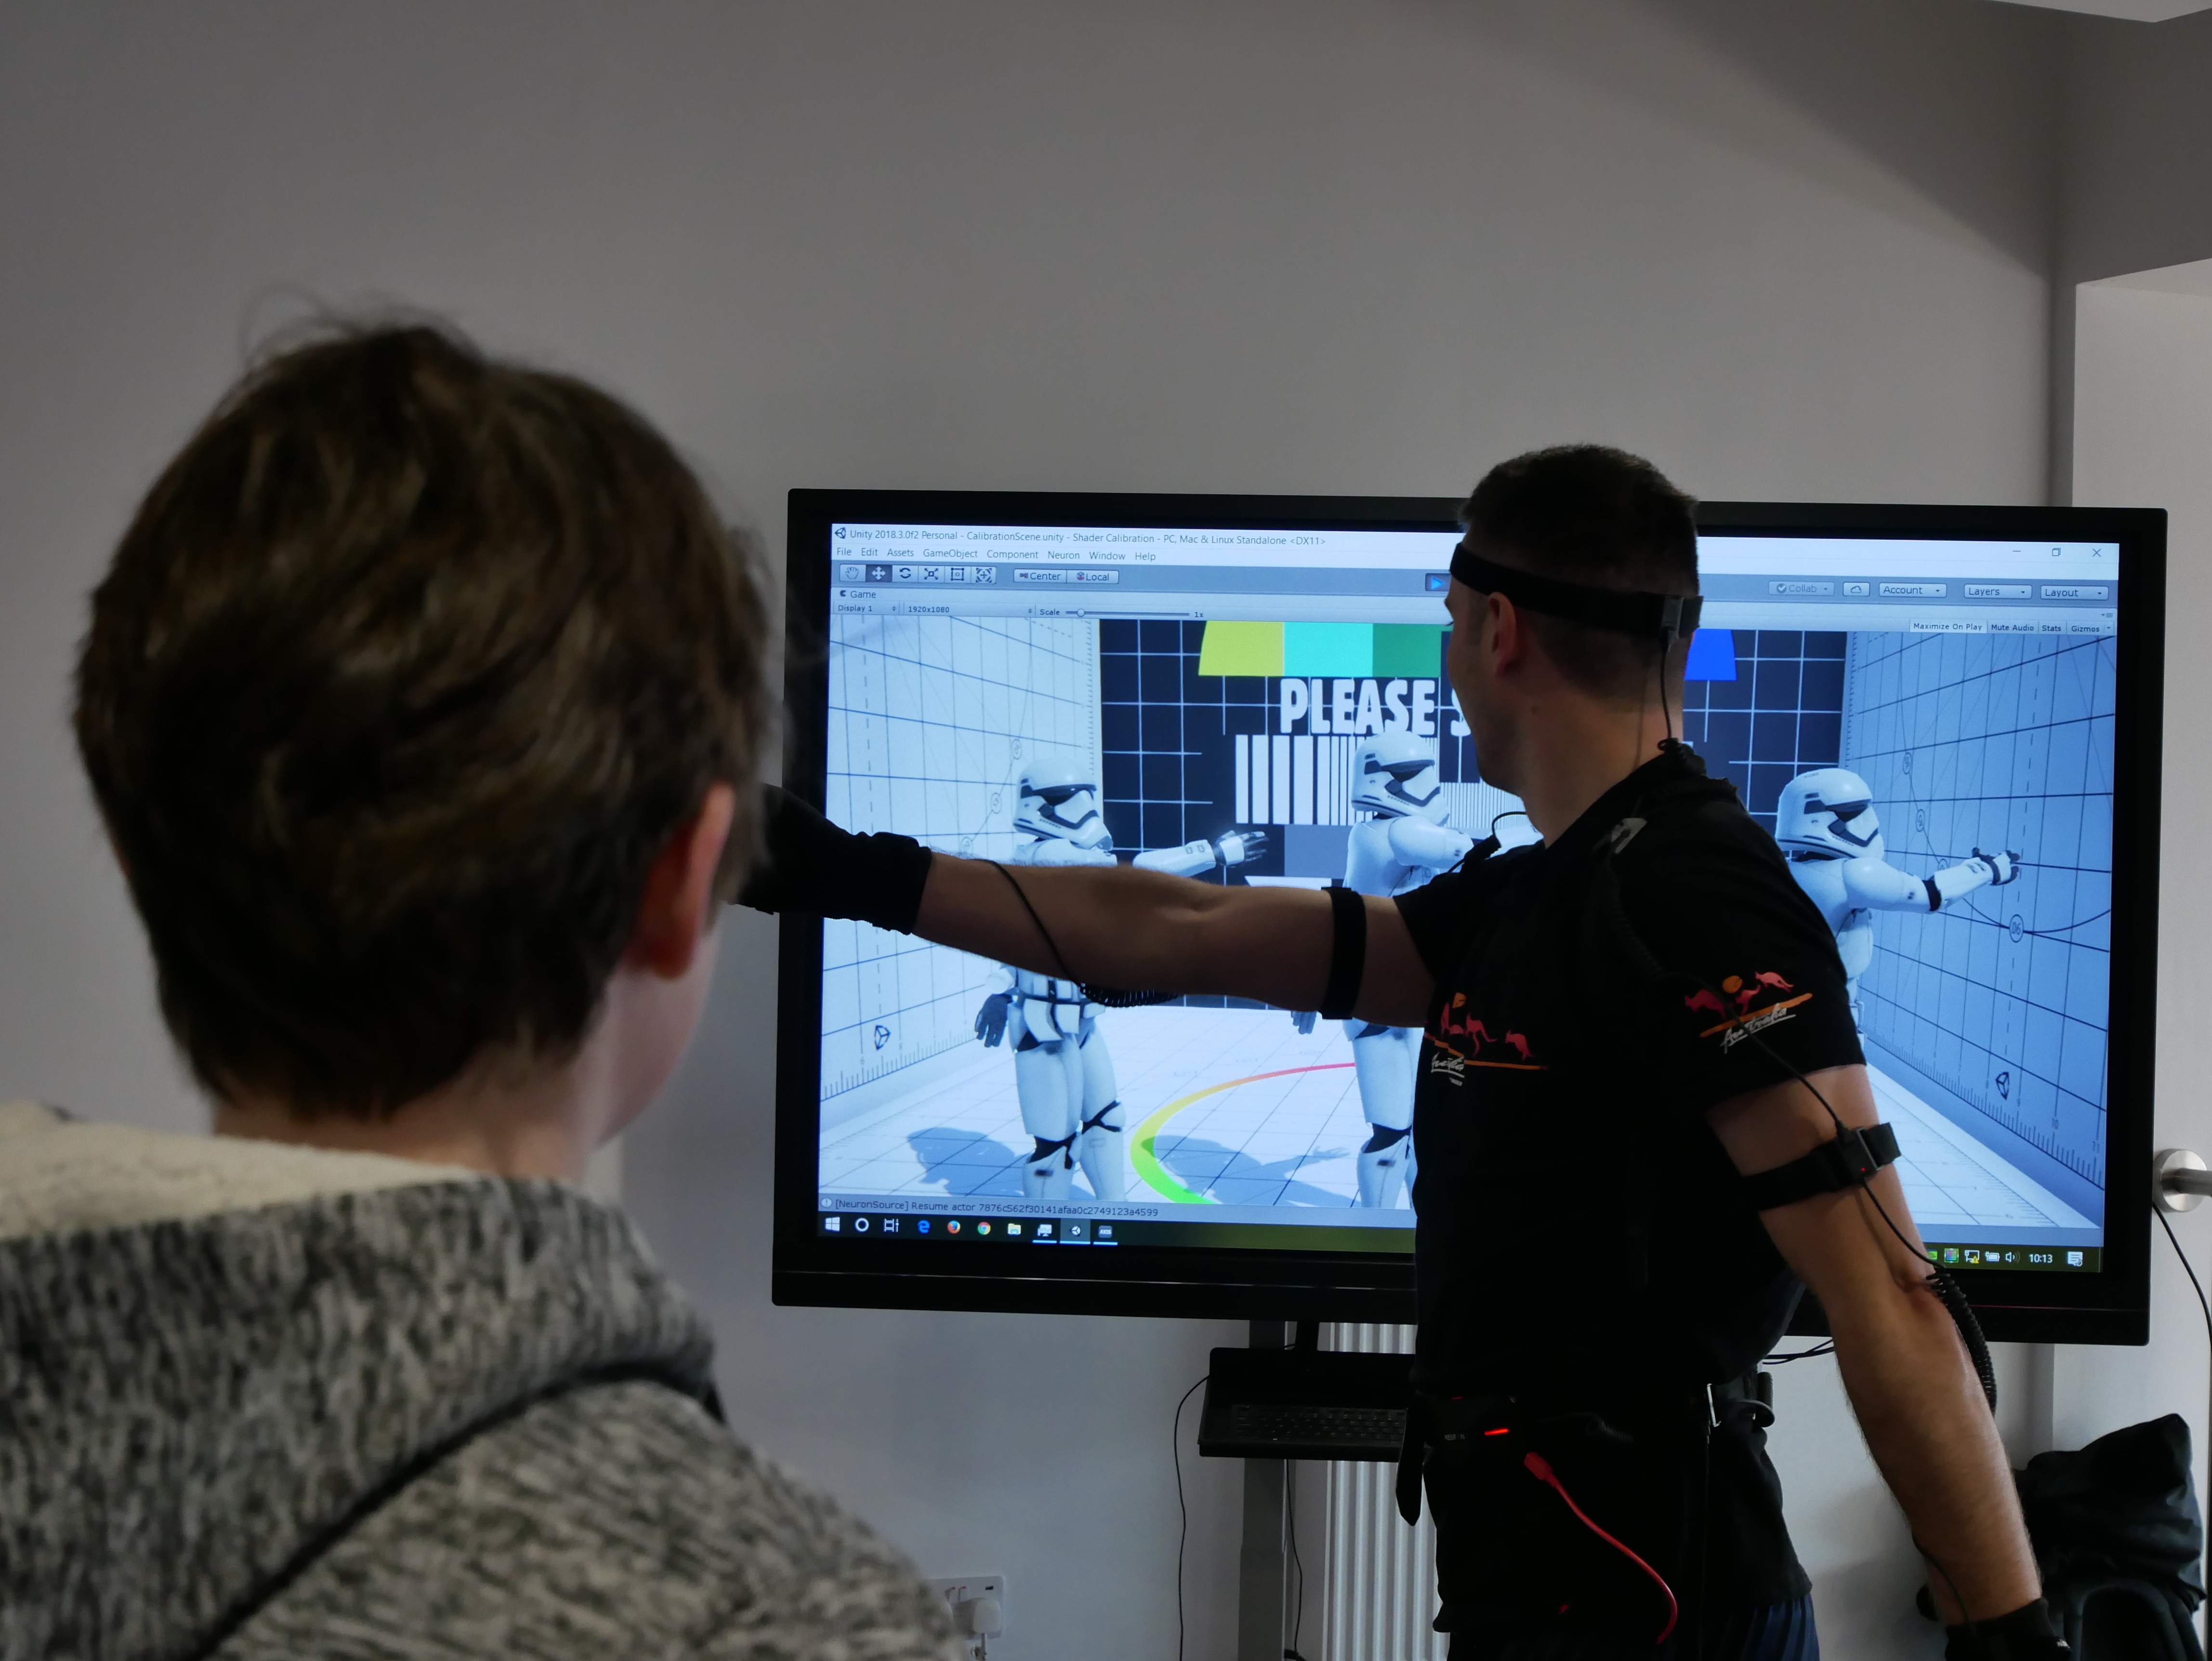
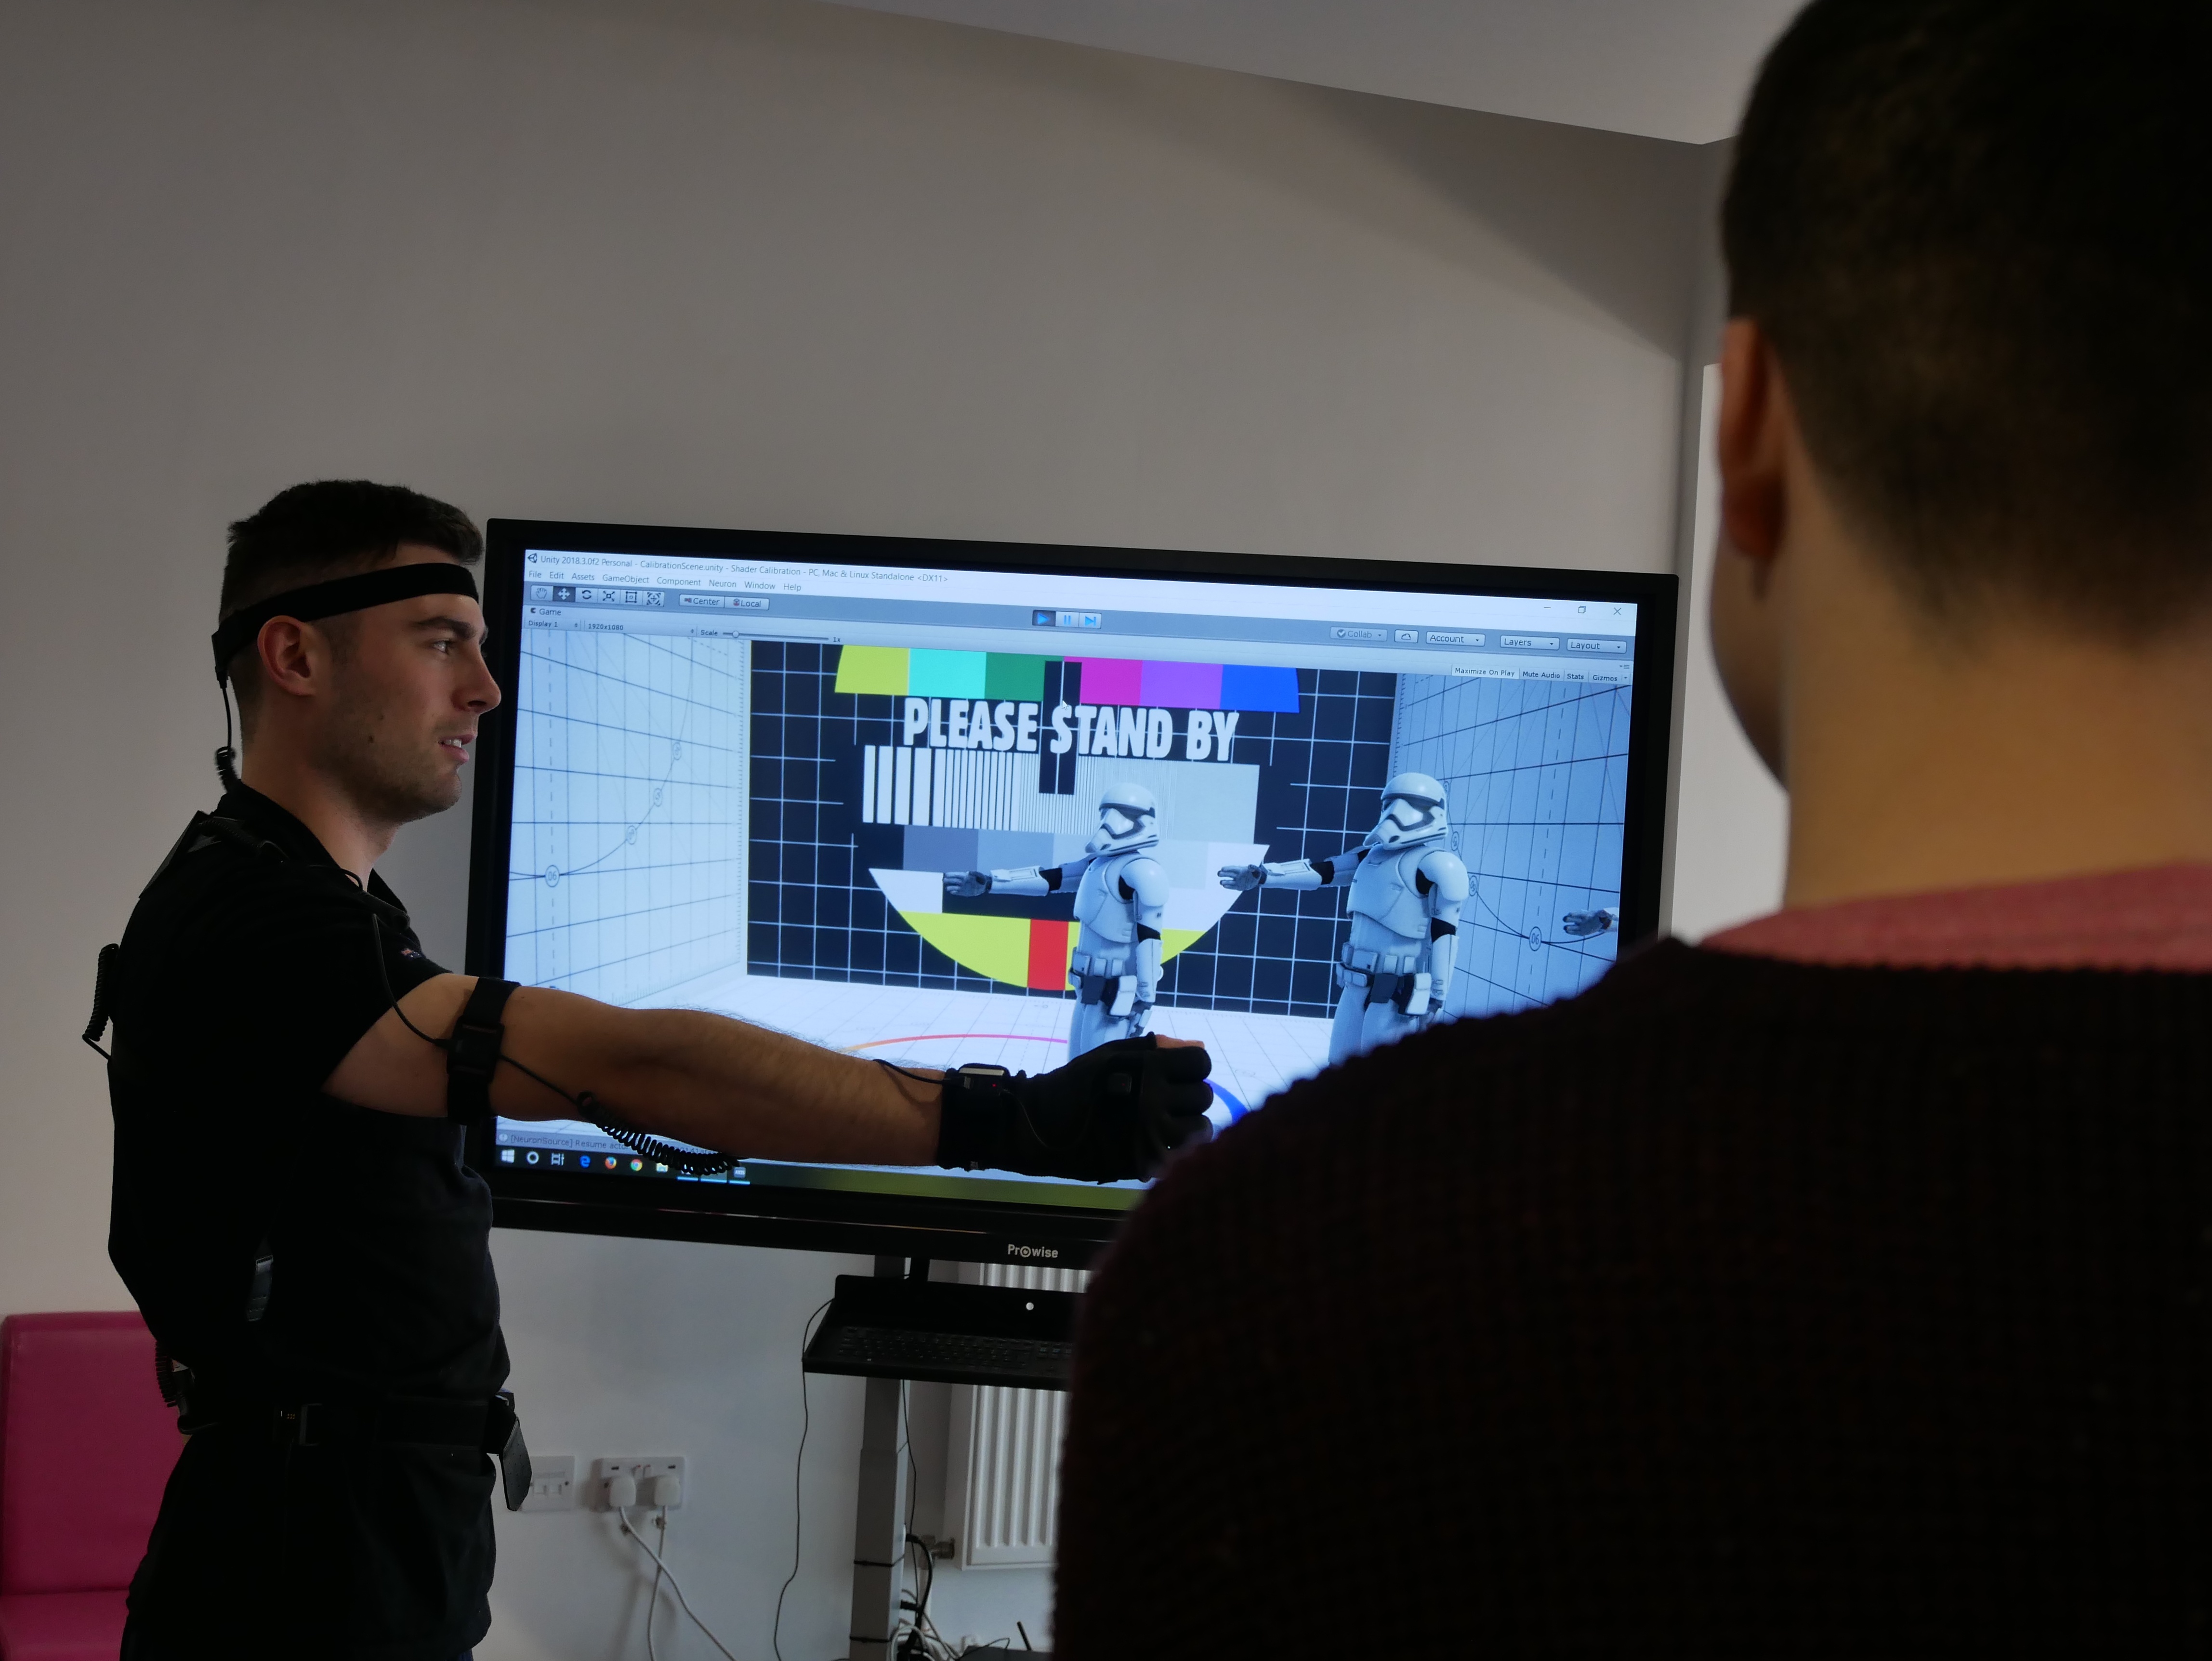
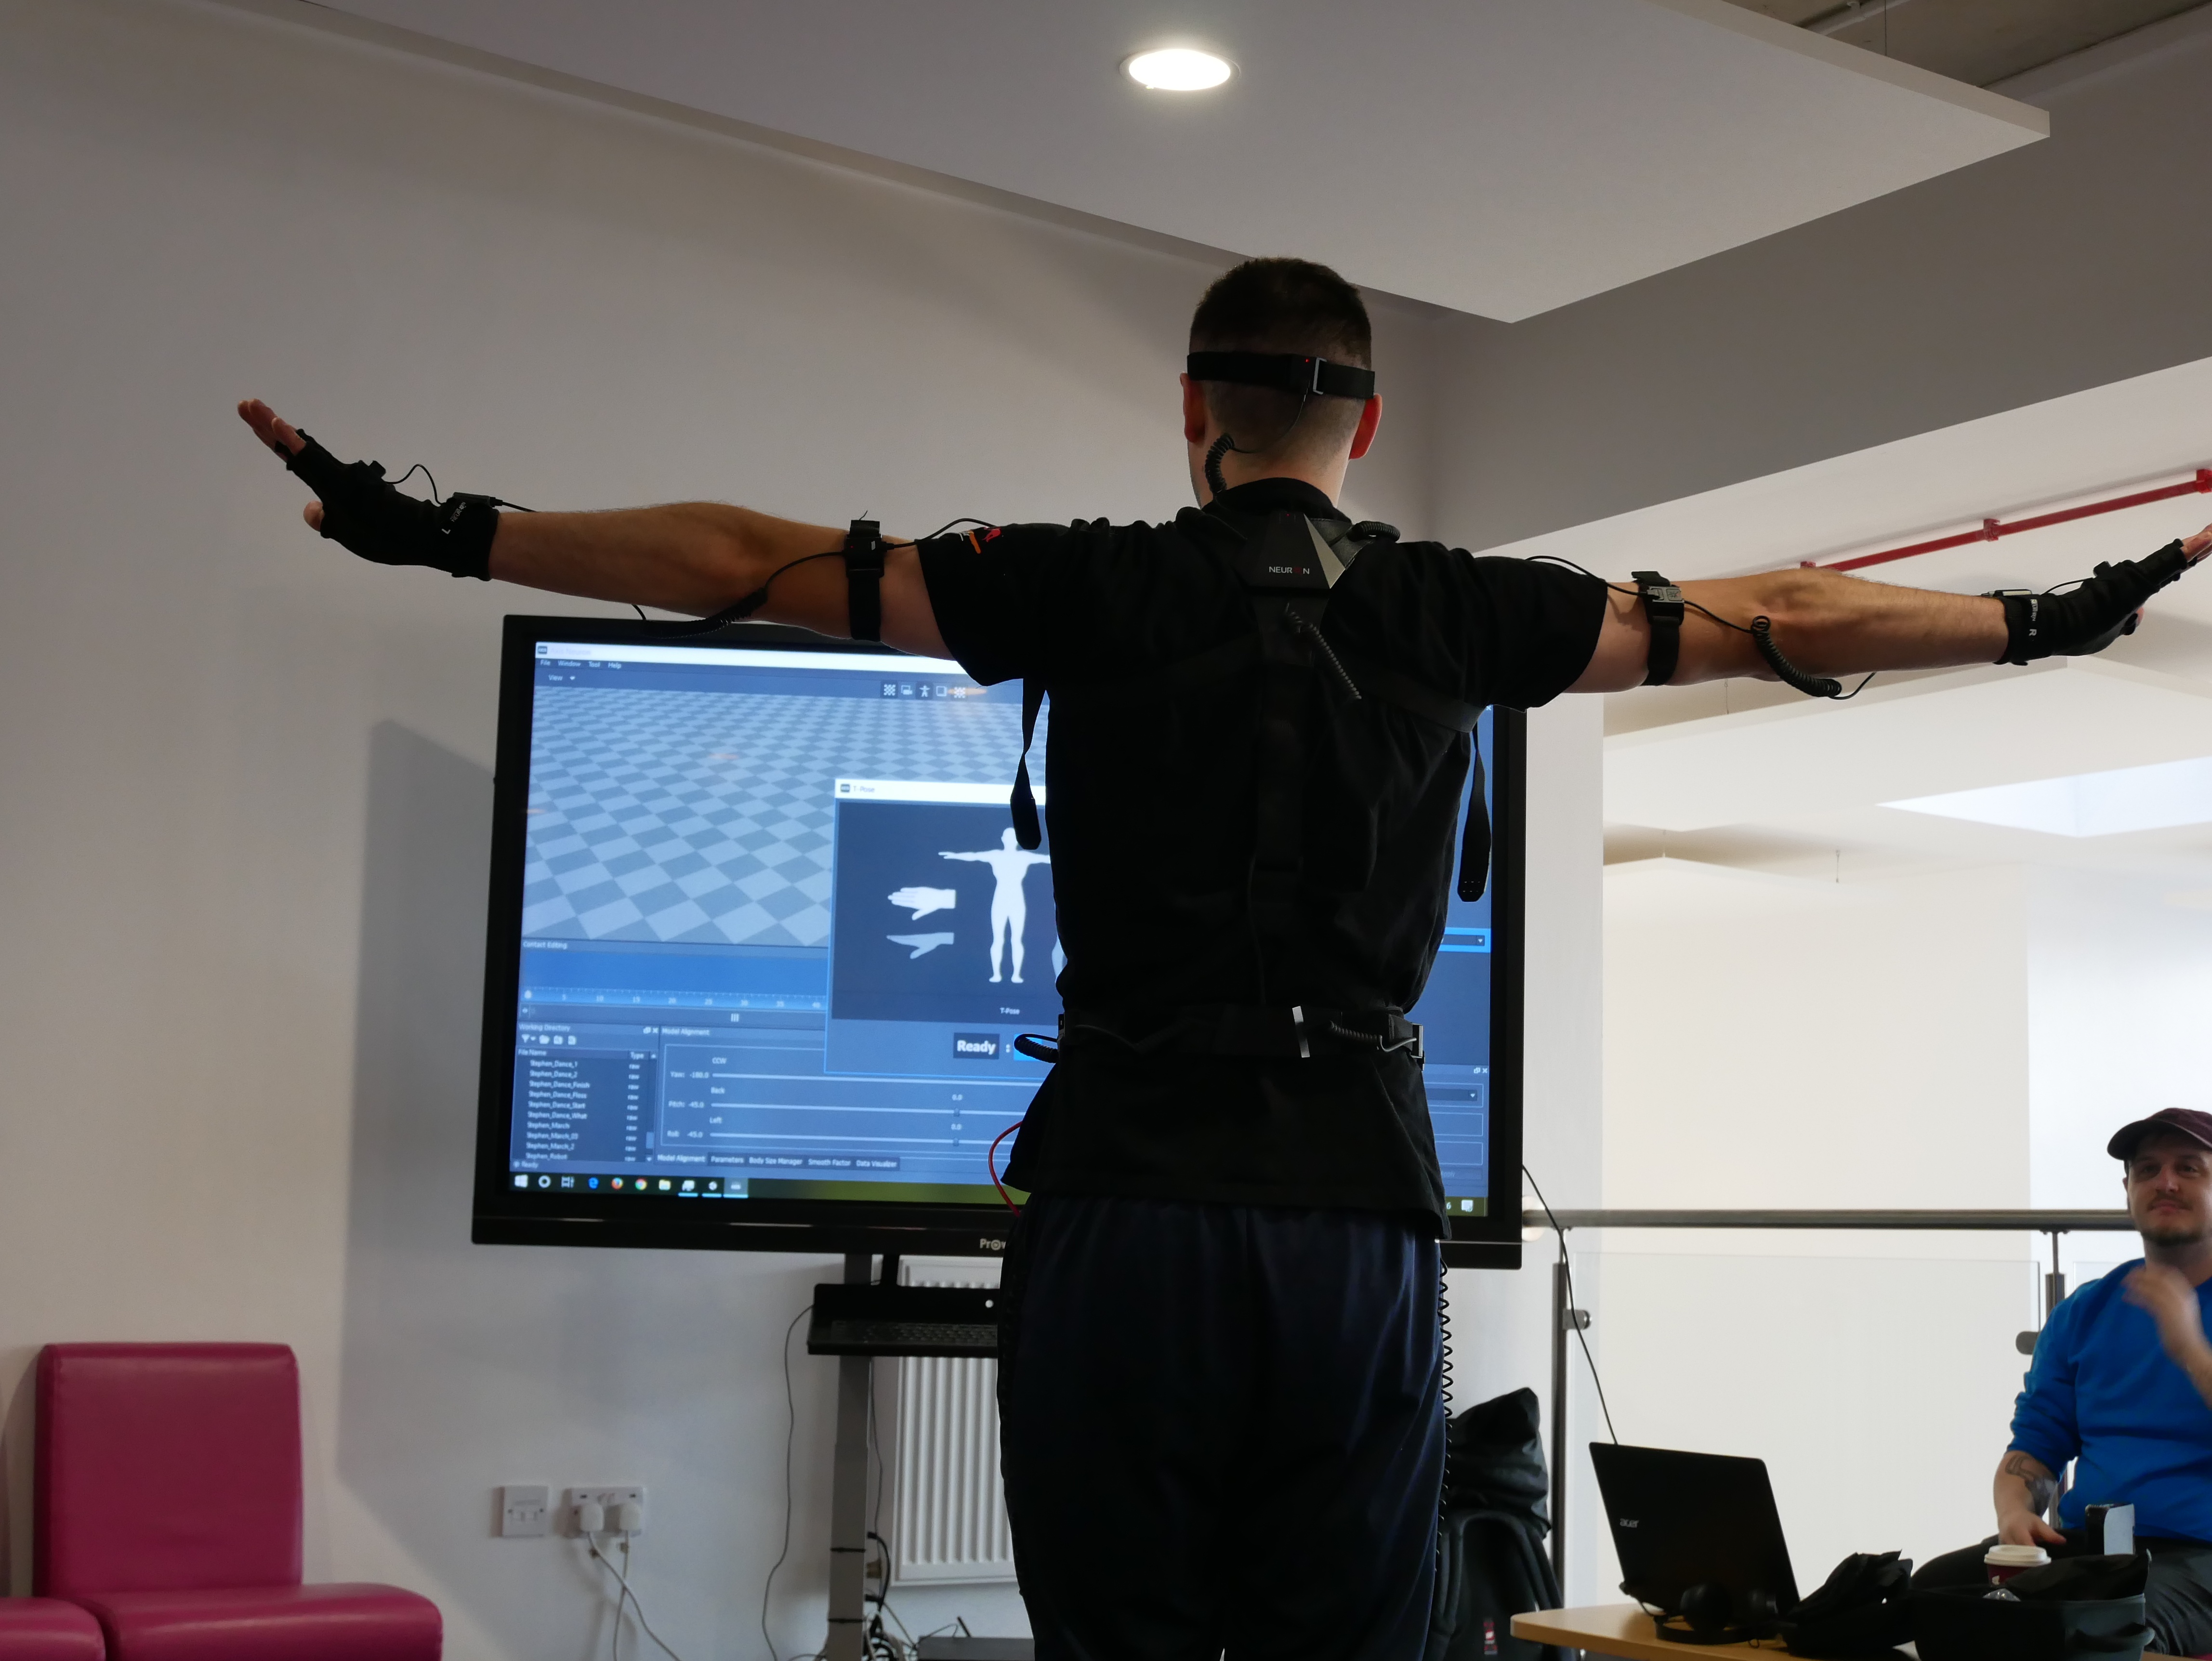
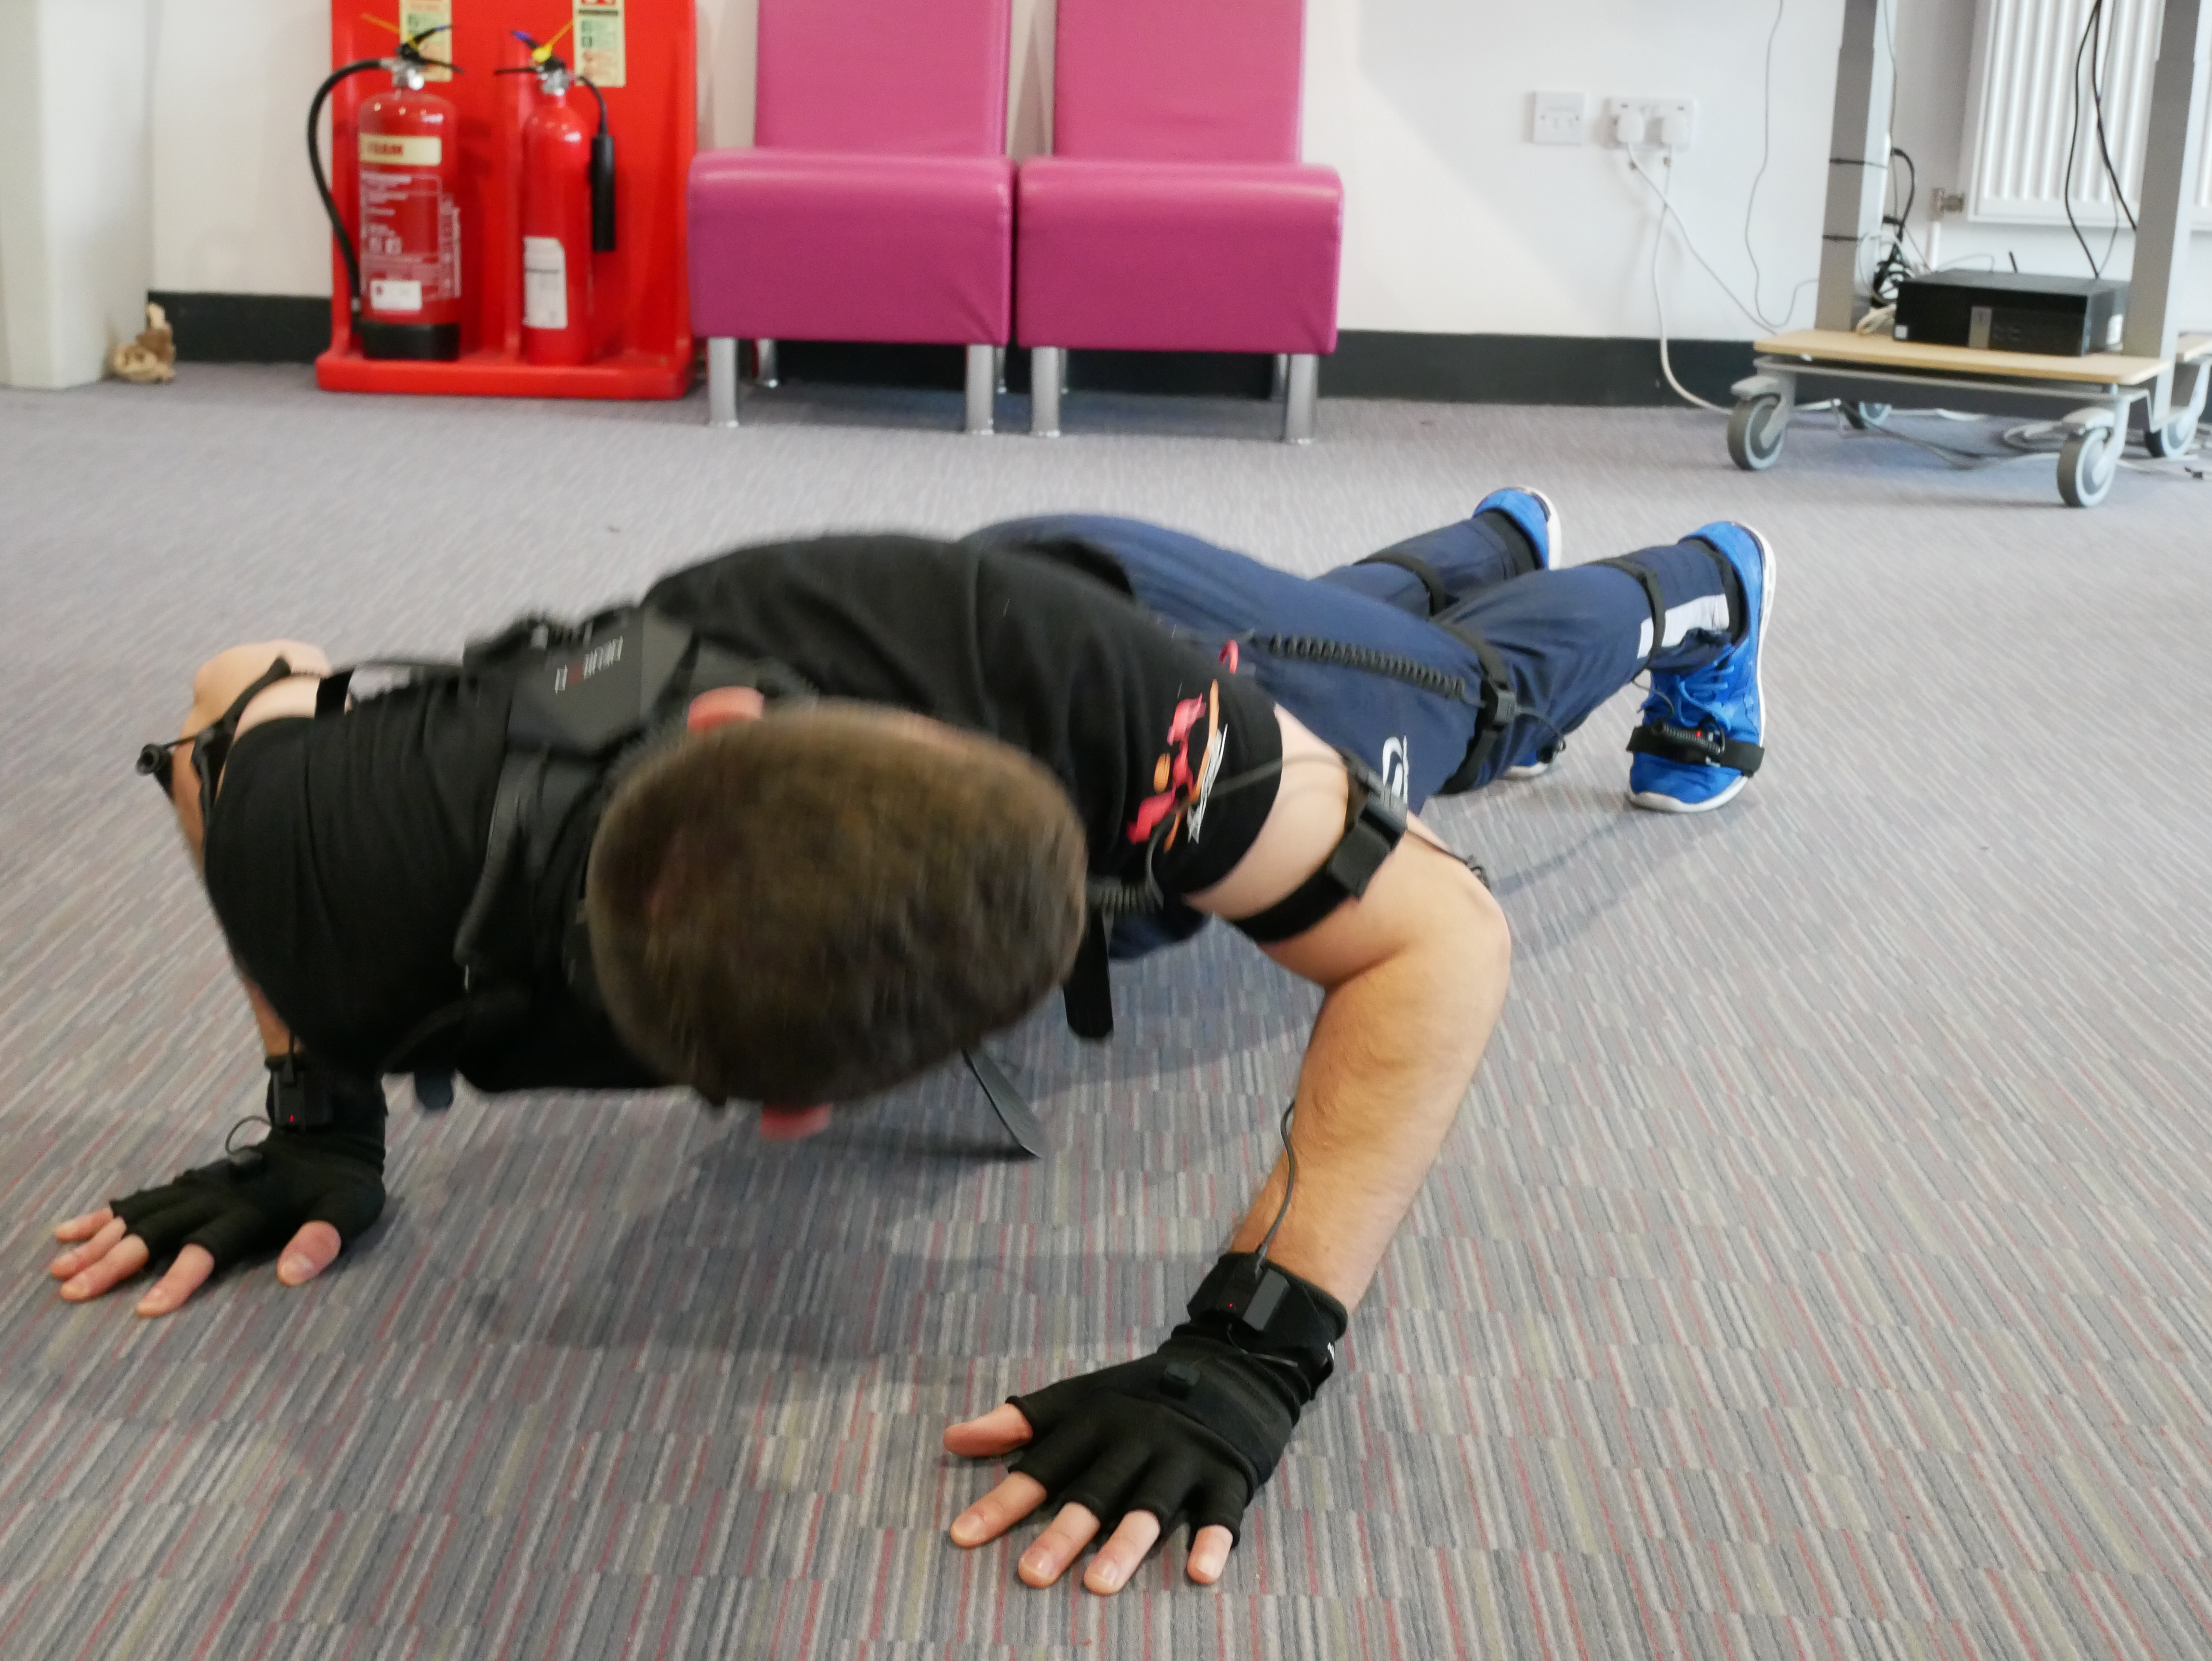
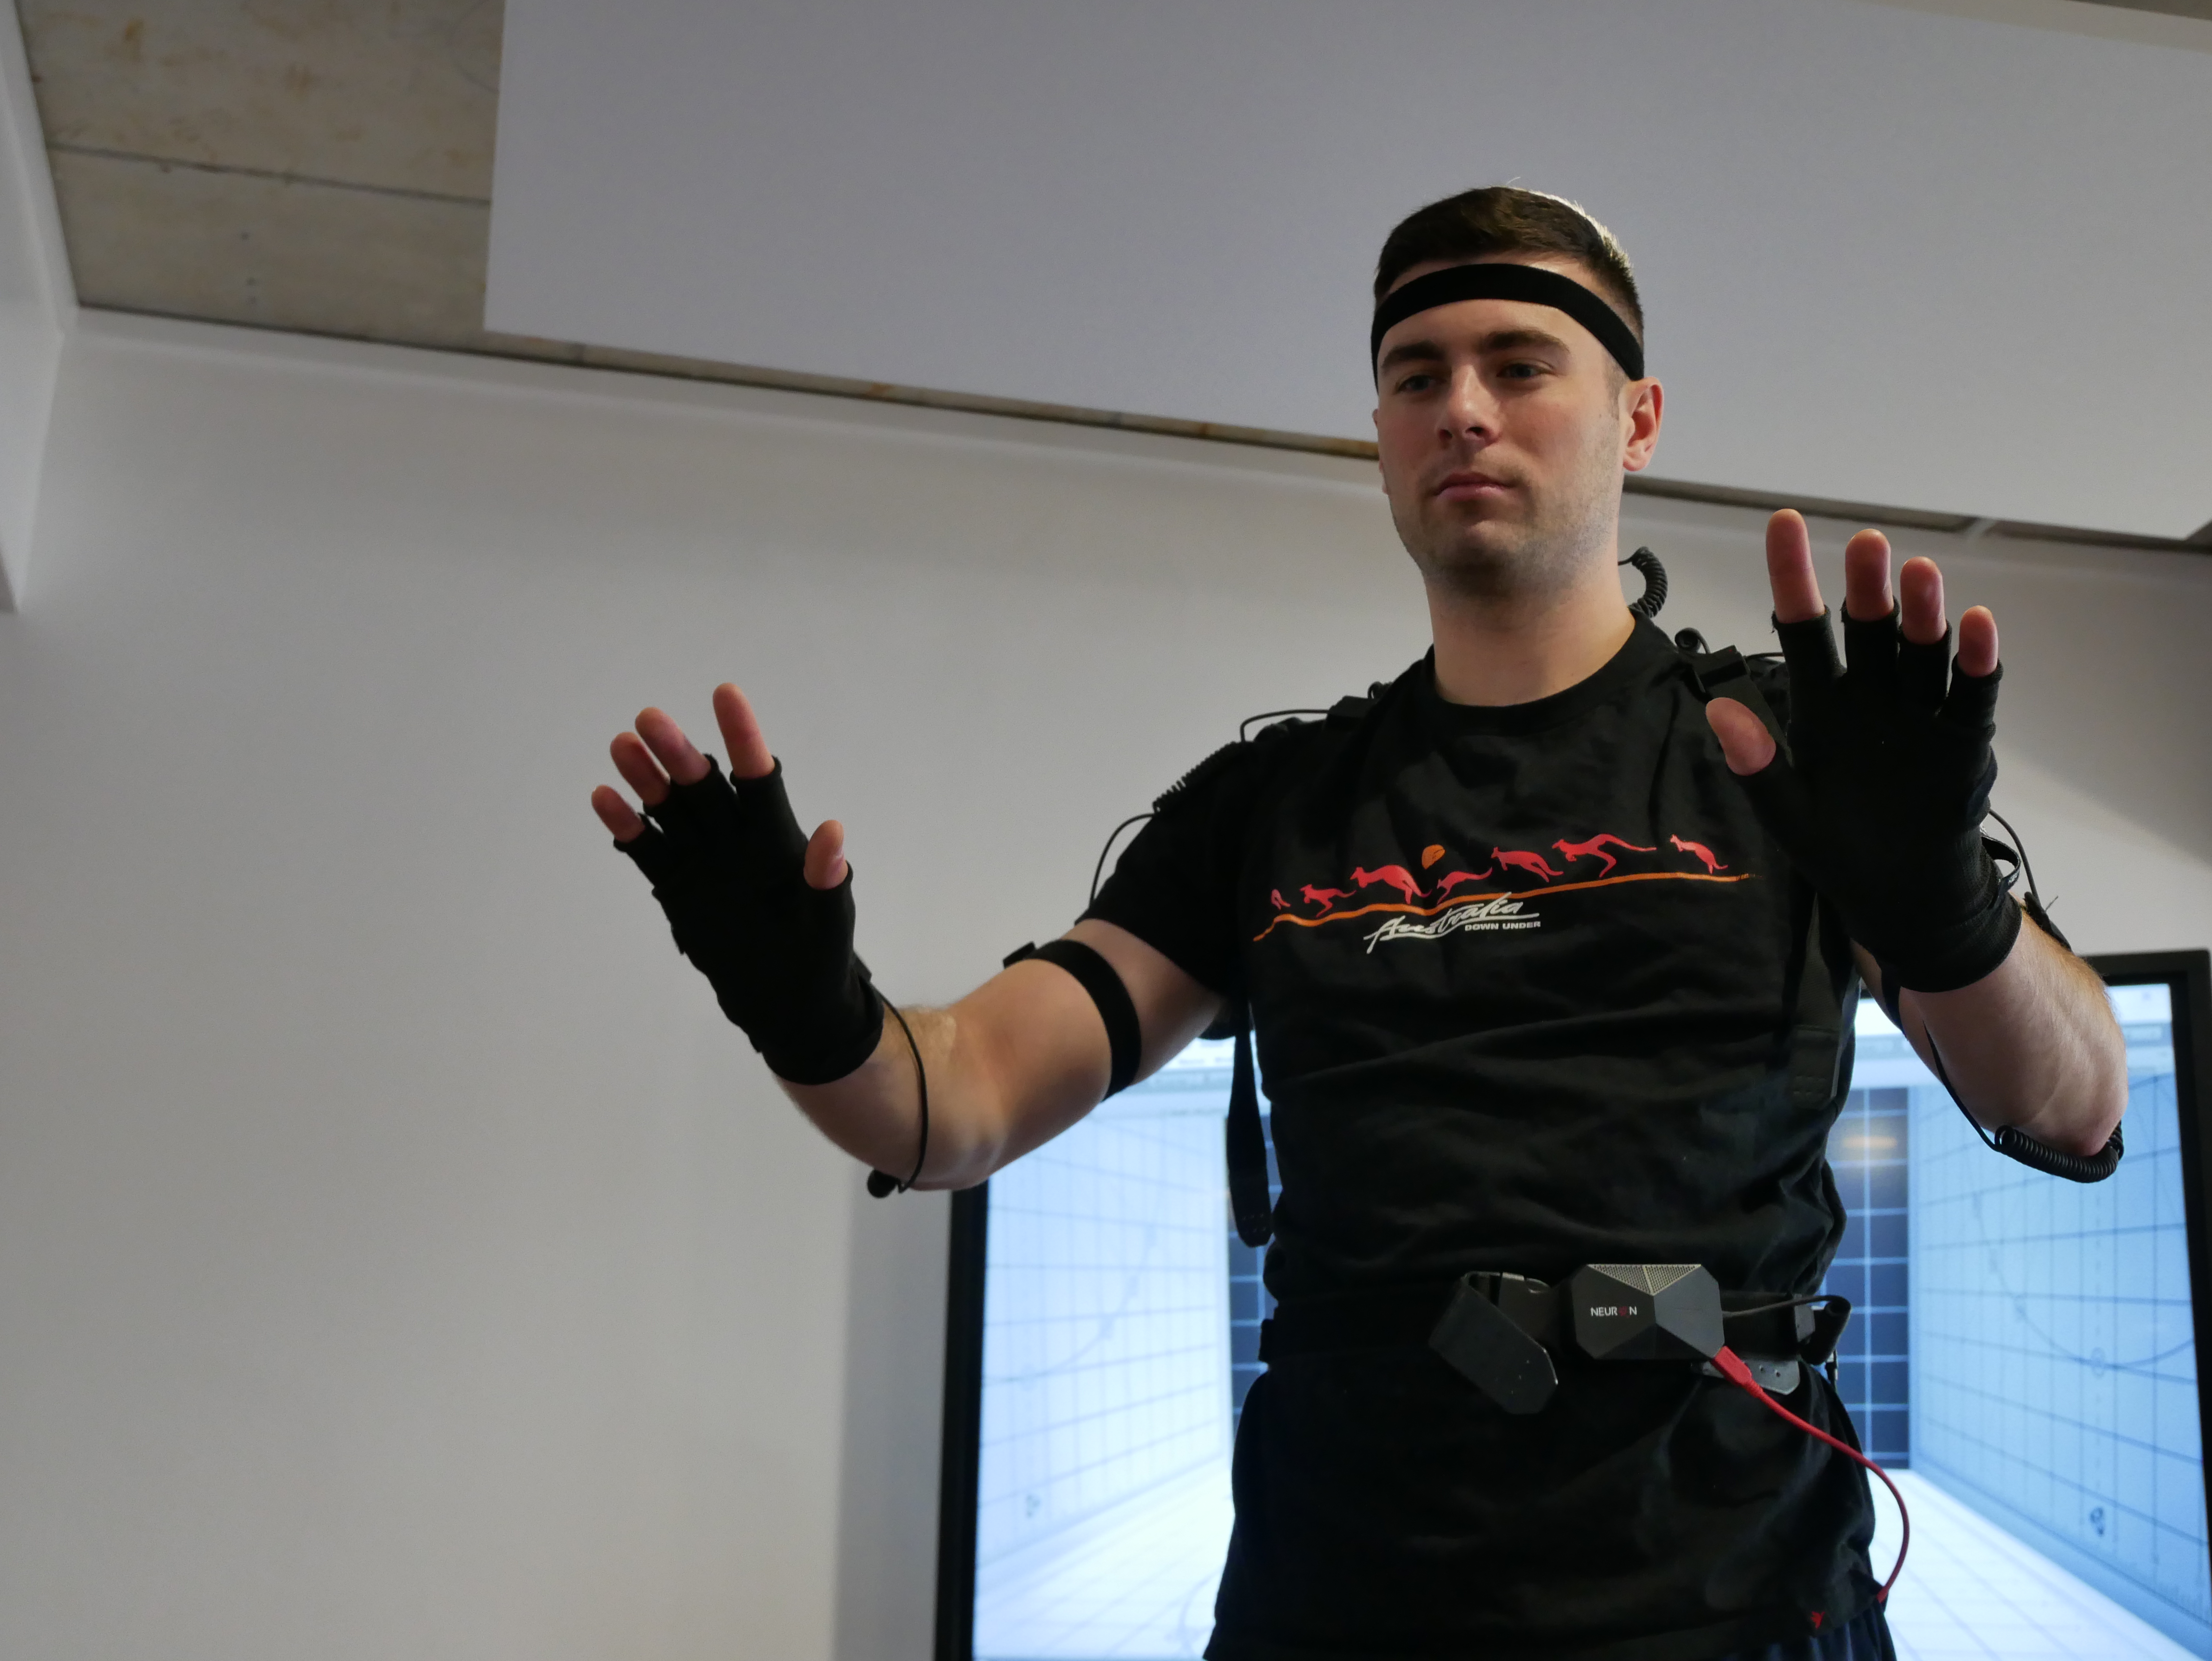
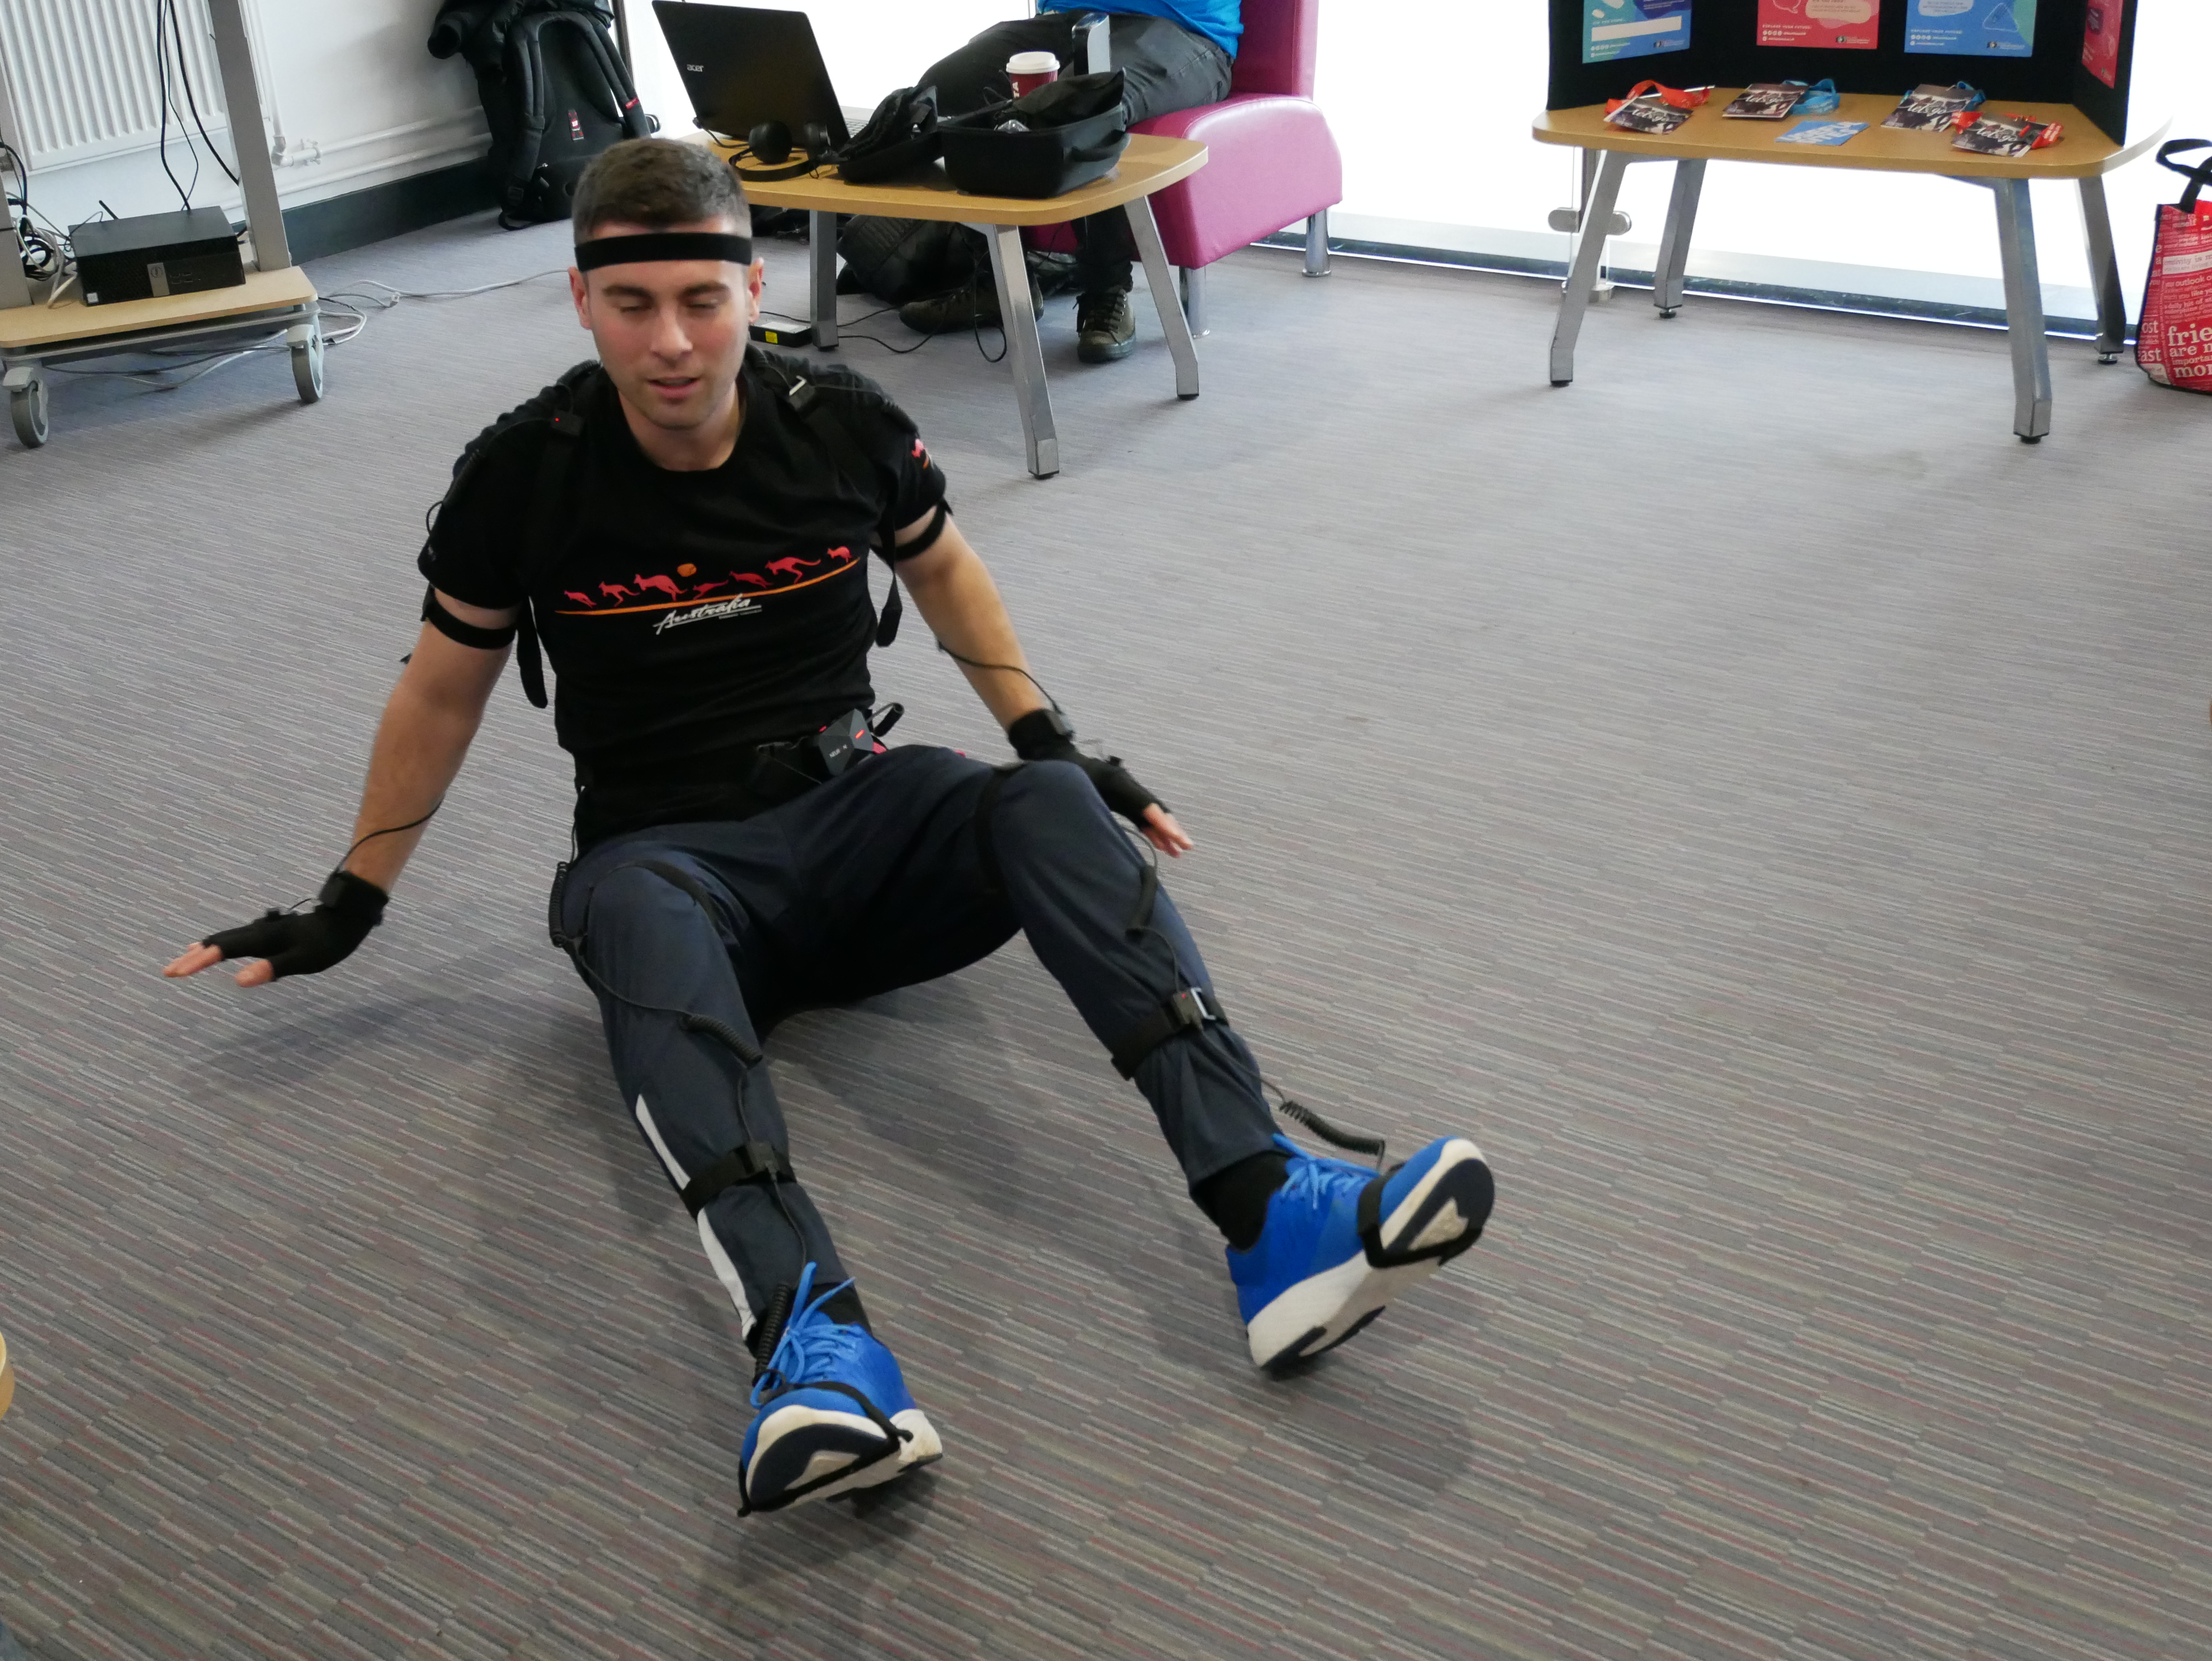
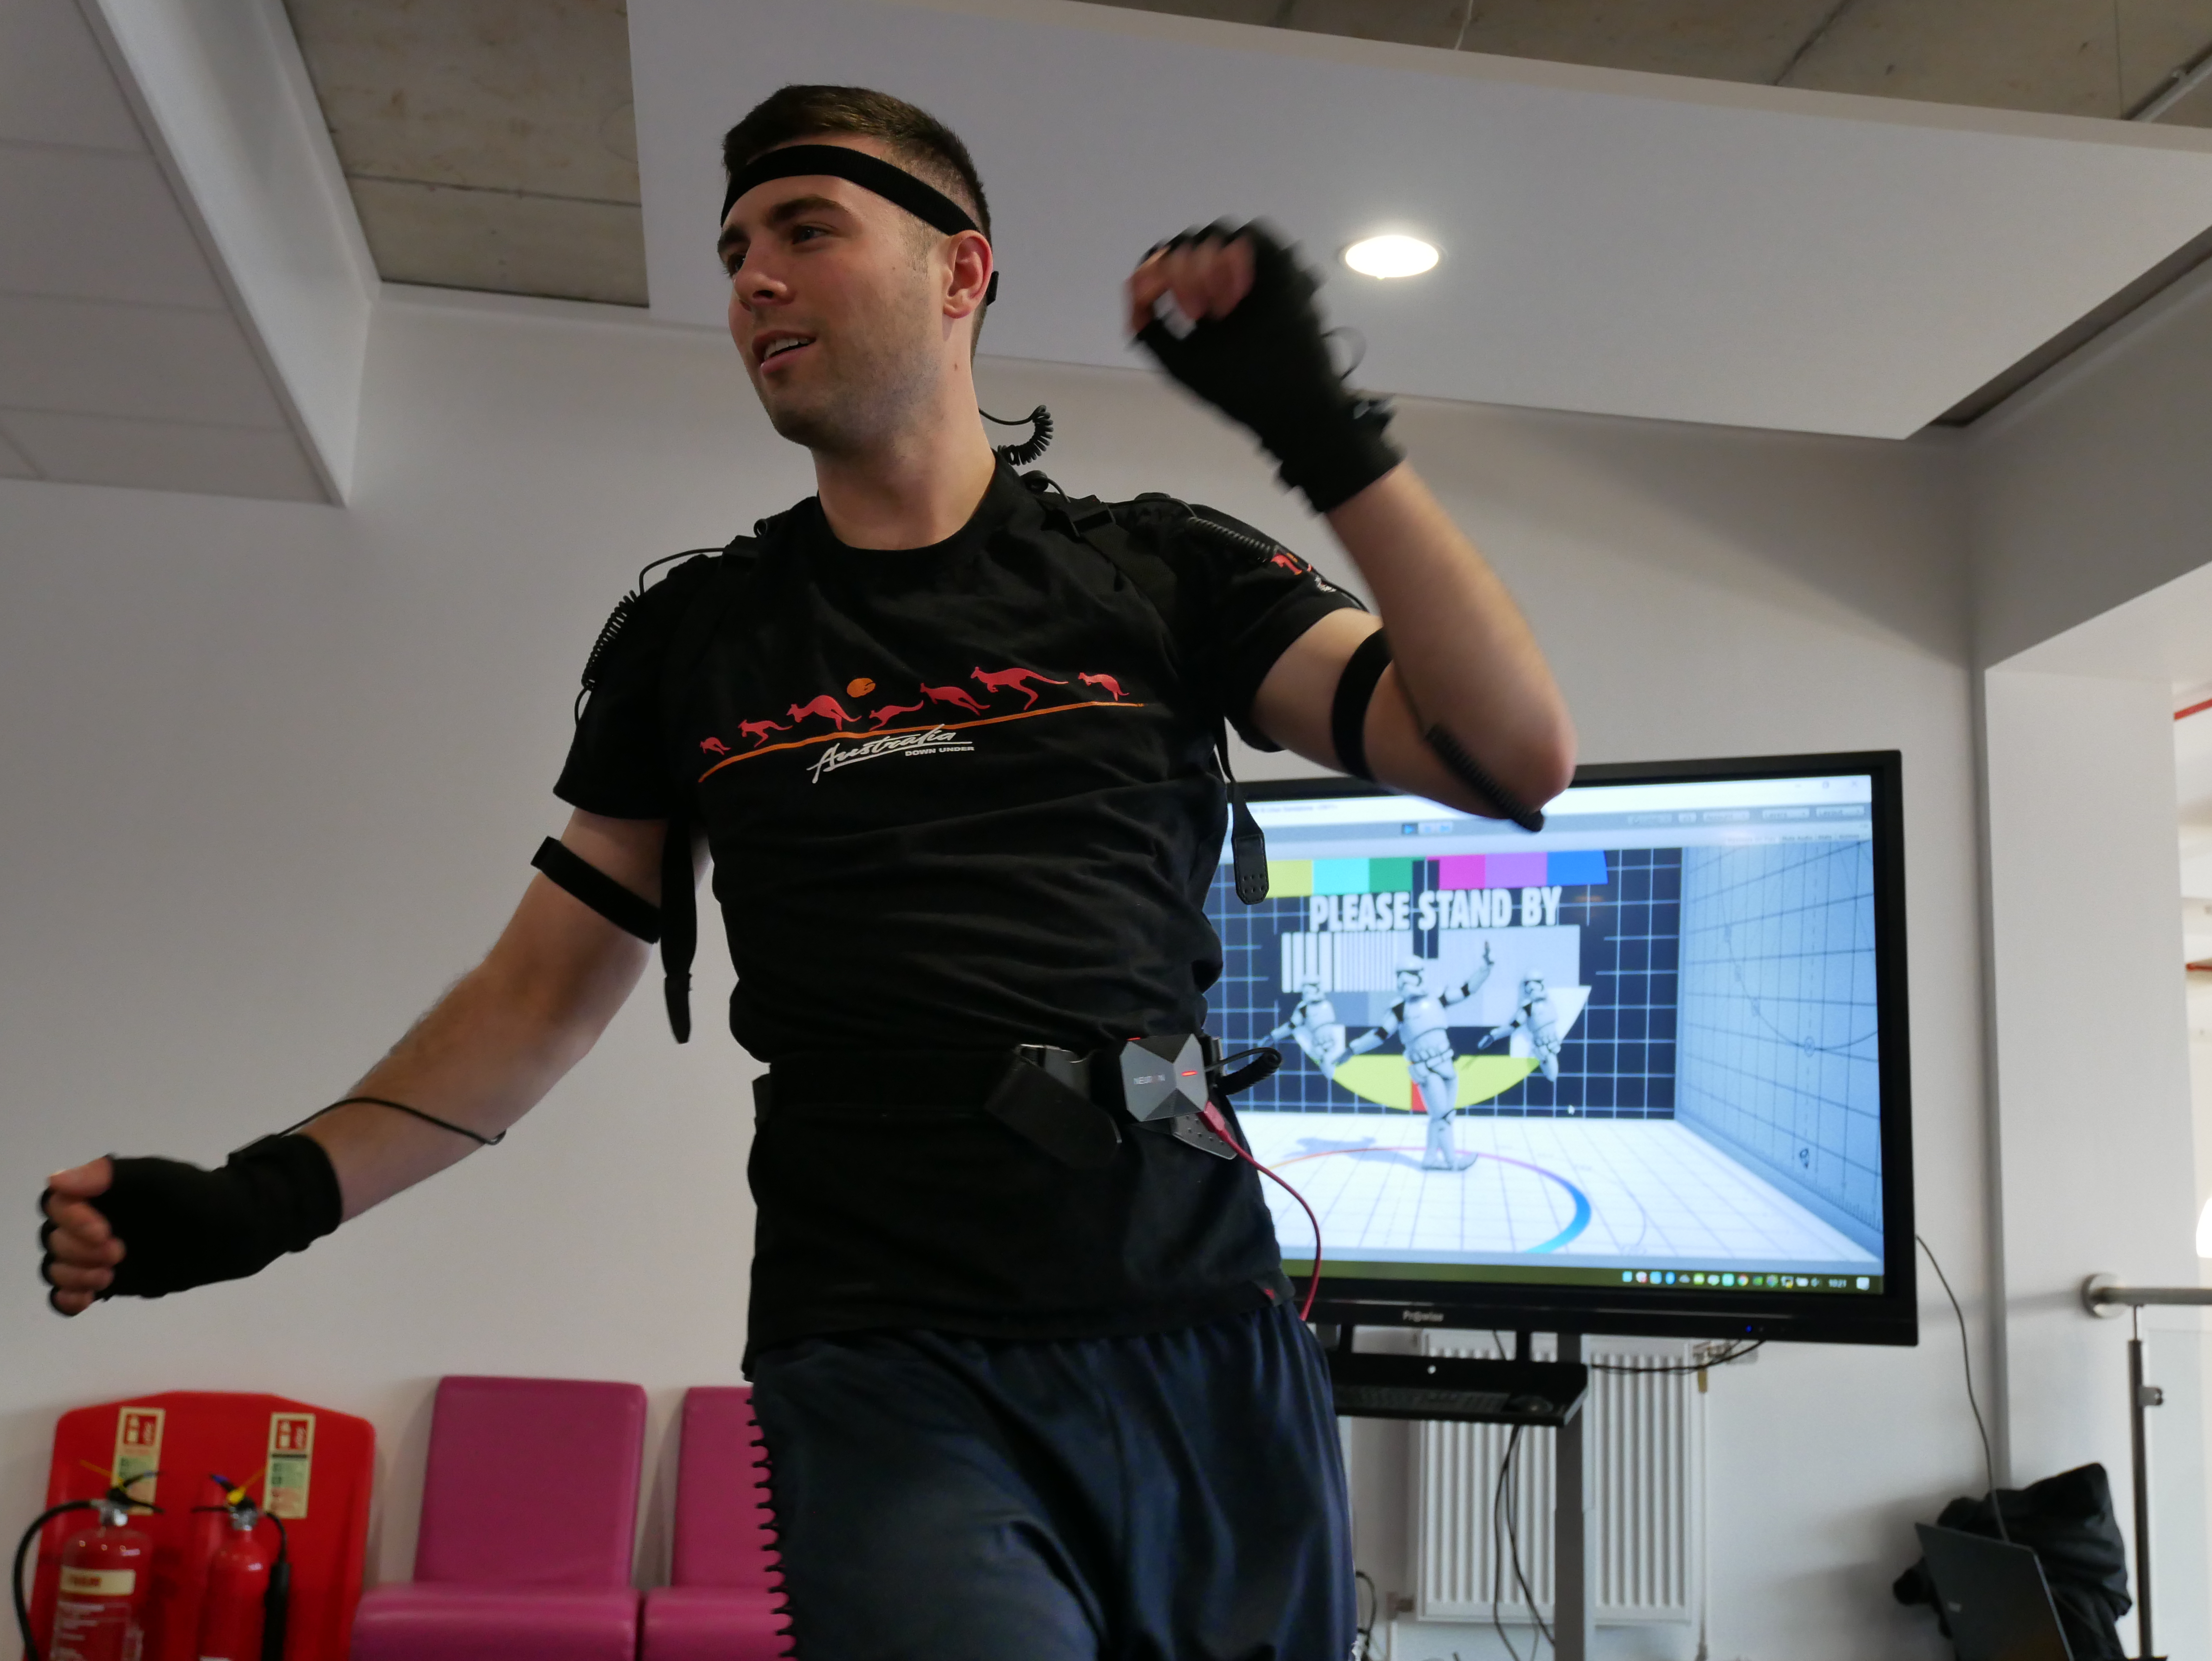
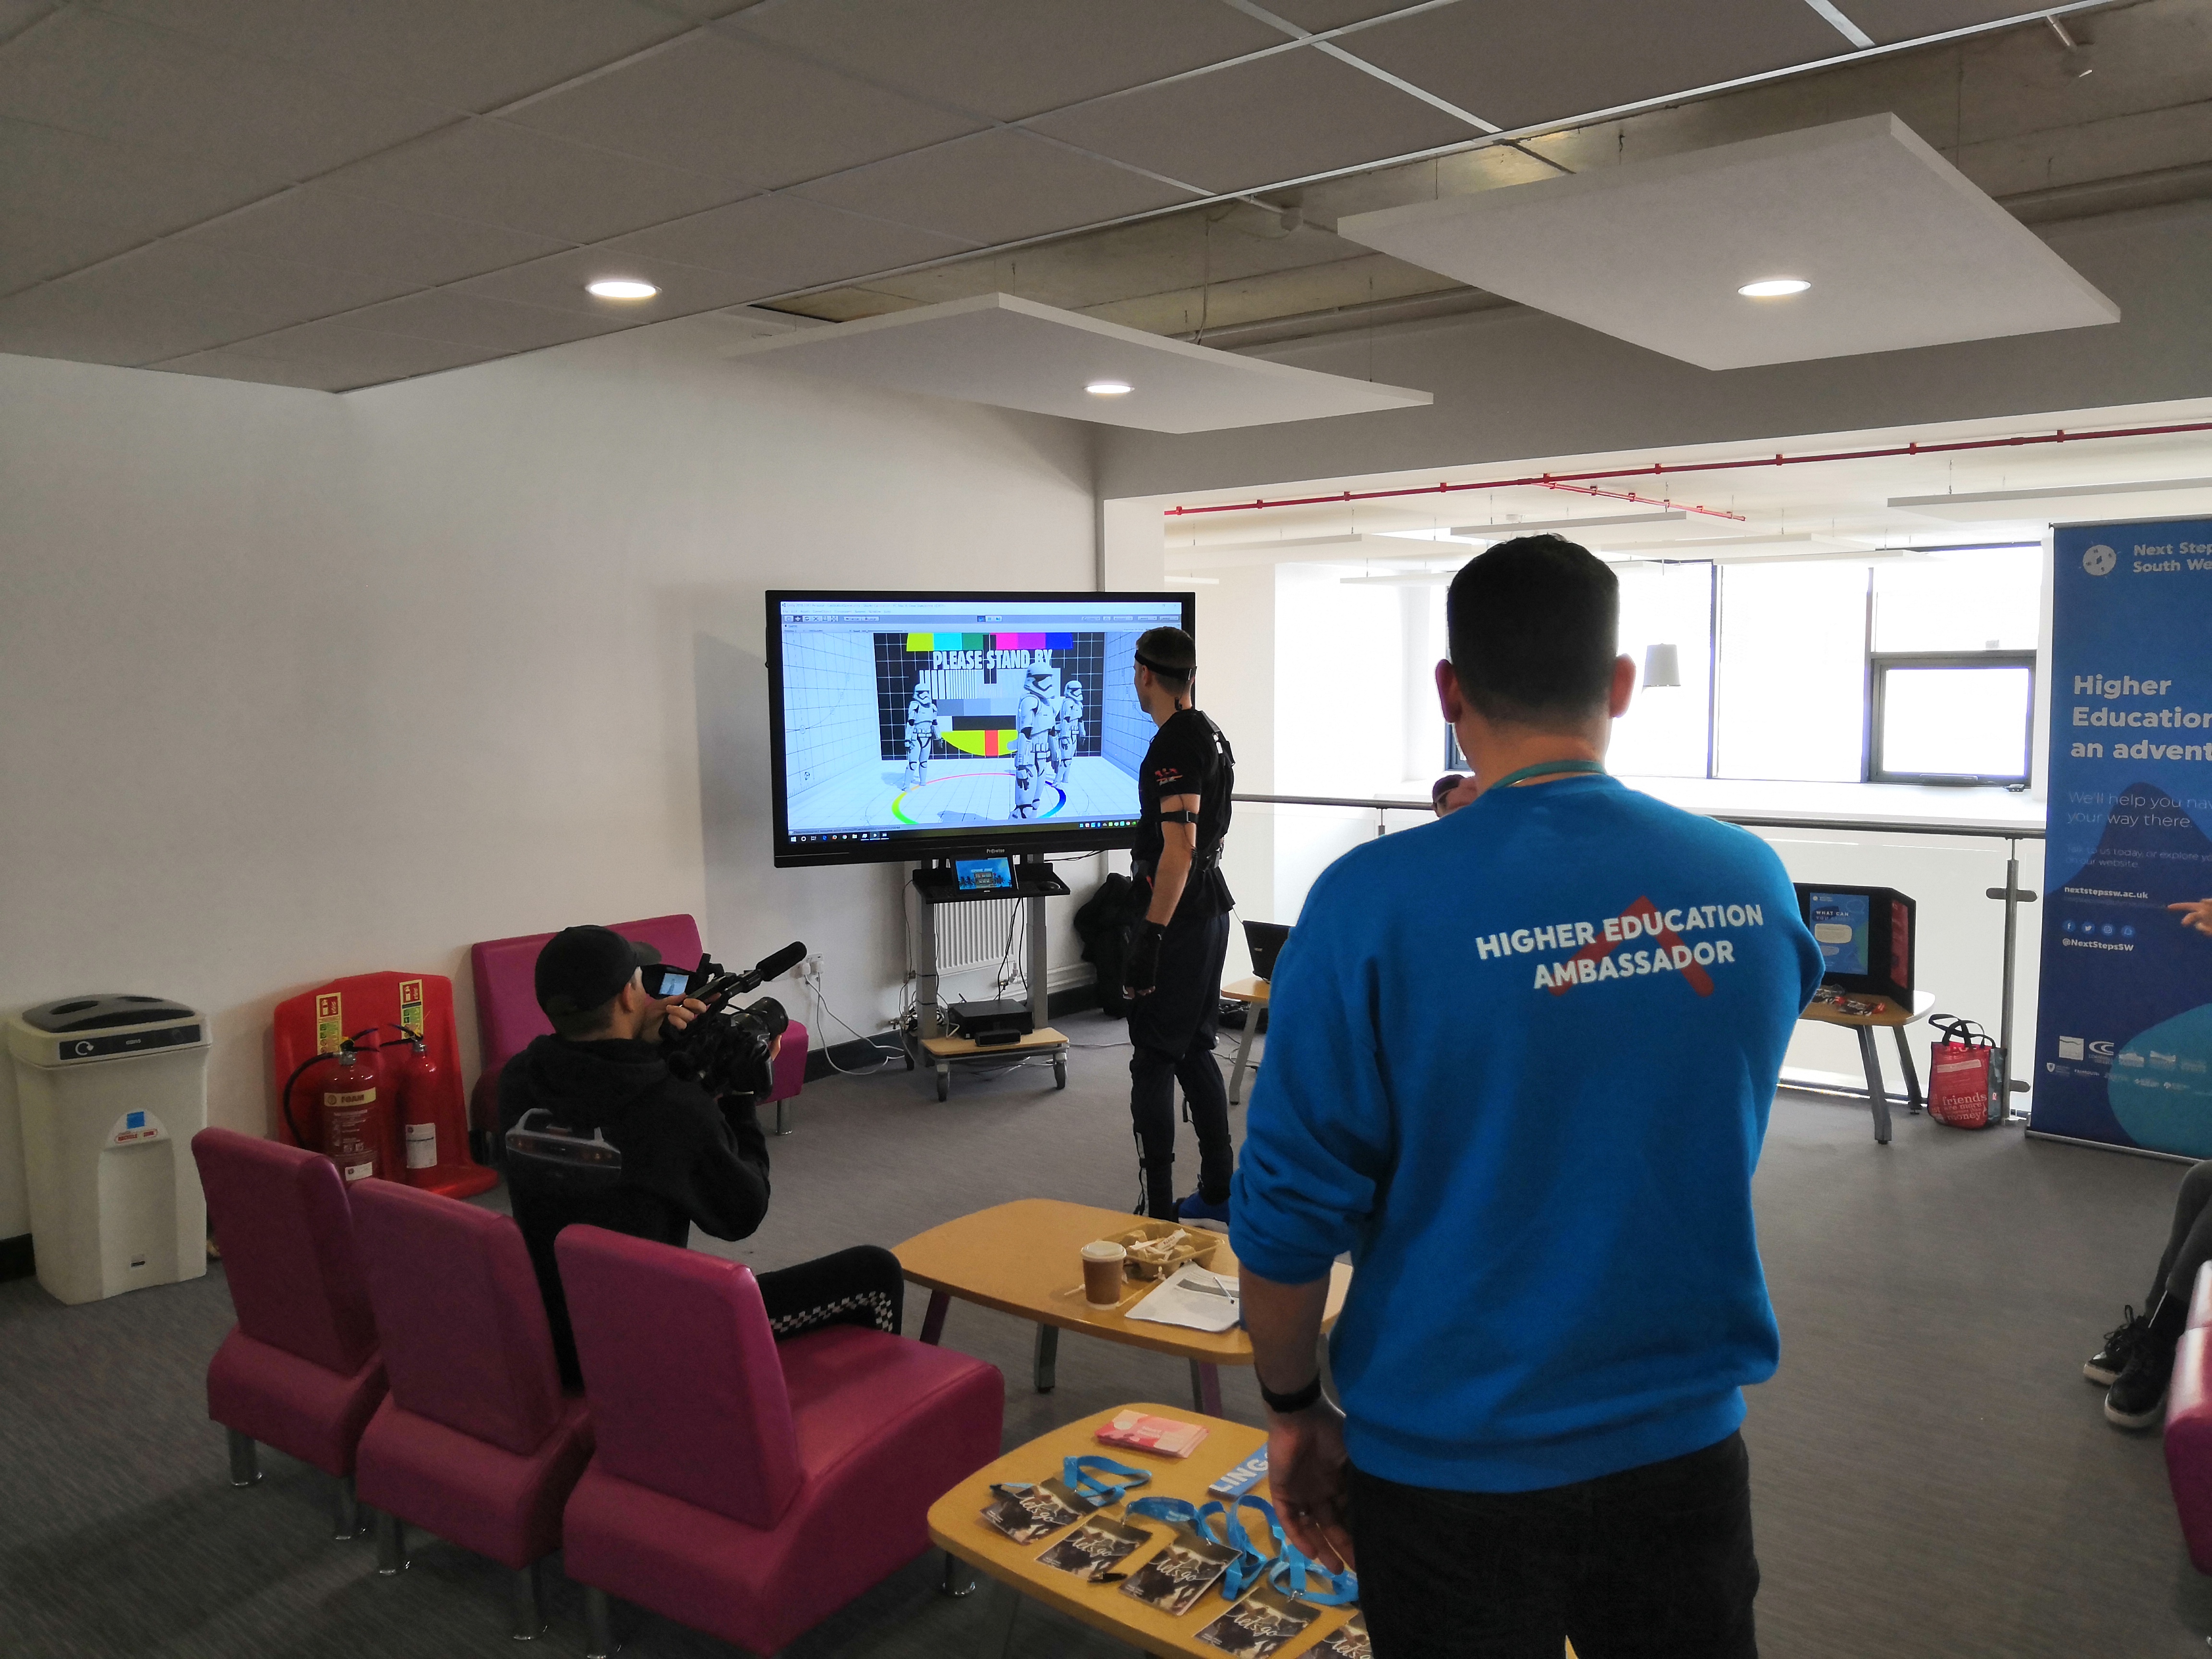
I had a play around on setting up a mocap suit and recording different moves then importing the mocap file to 3ds max. The mocap suit that I used is called Perception Neuron powered by Axis Neuron software. I set up a router not connected to the internet only to a laptop with the software on. I then set up the mocap suit making sure all the little sensors were lit up correctly in the software and on the suit itself. Next I helped Tazz a former student put on the Mocap suit and then I proceeded to go through the calibration set up.


Below are the videos of the Mocap software Axis Neuron.
Next I imported the BVH files into 3ds max 2019 and ran into a few problems as can be seen in the videos below.
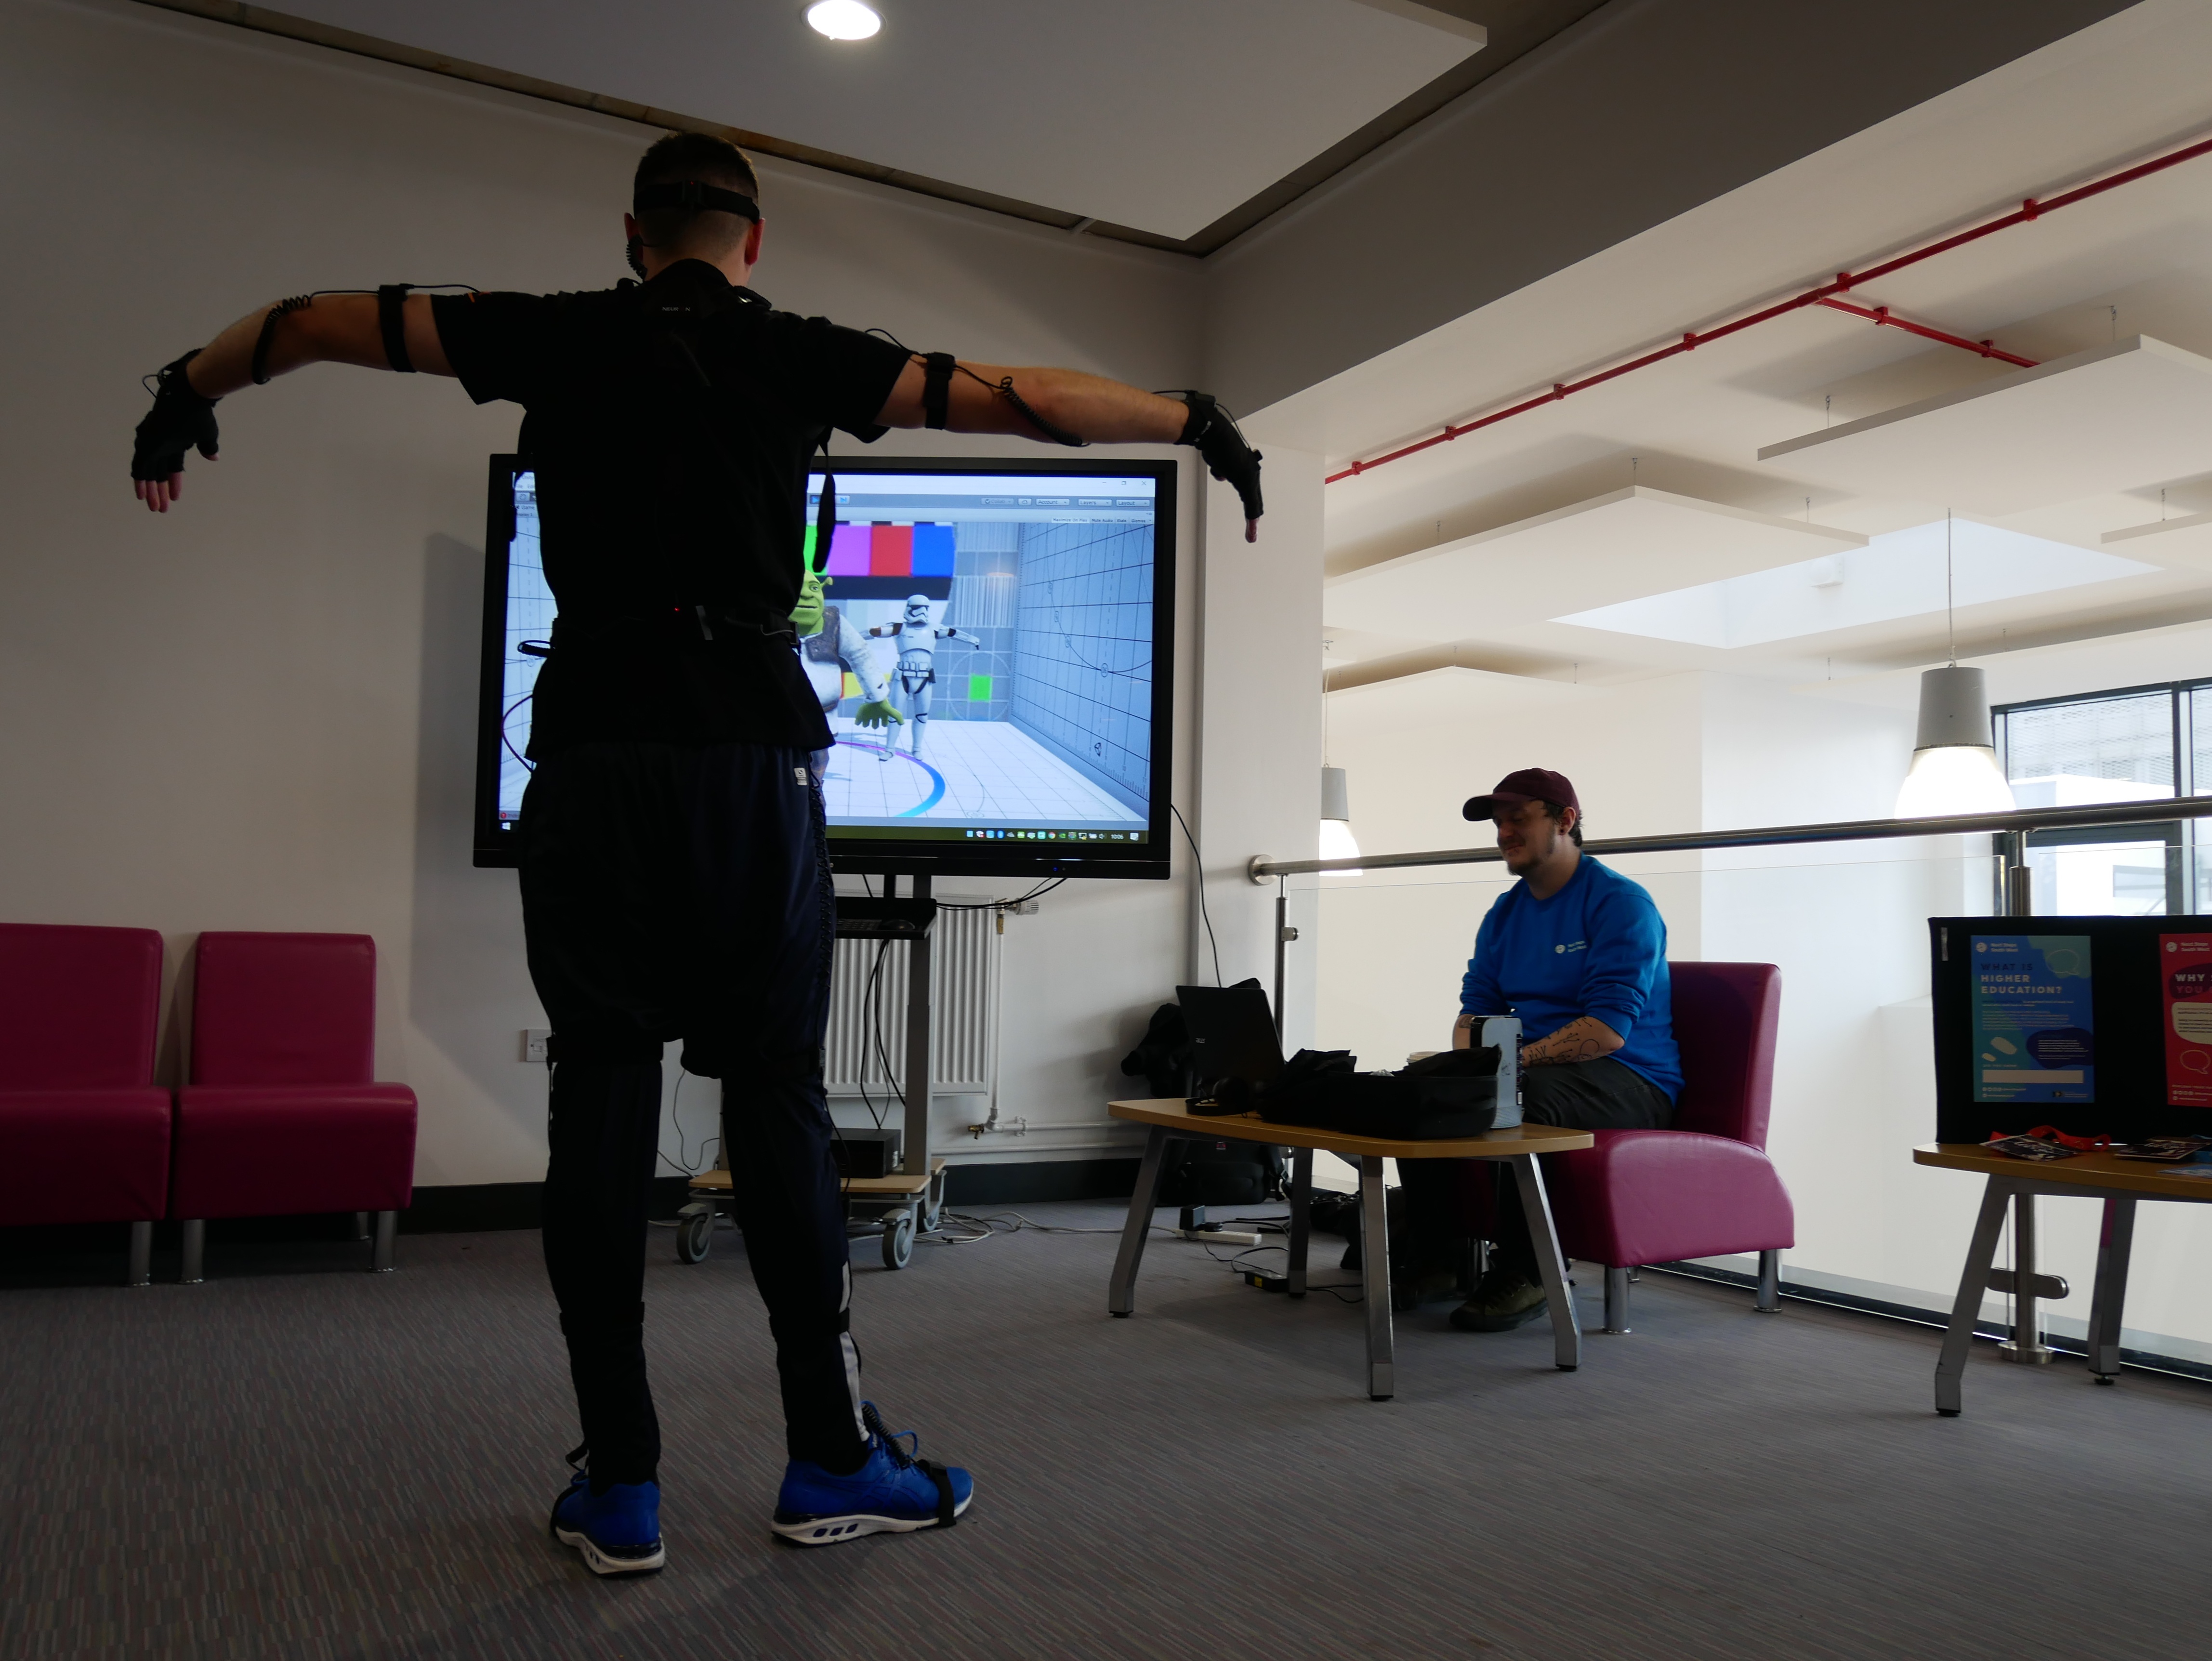
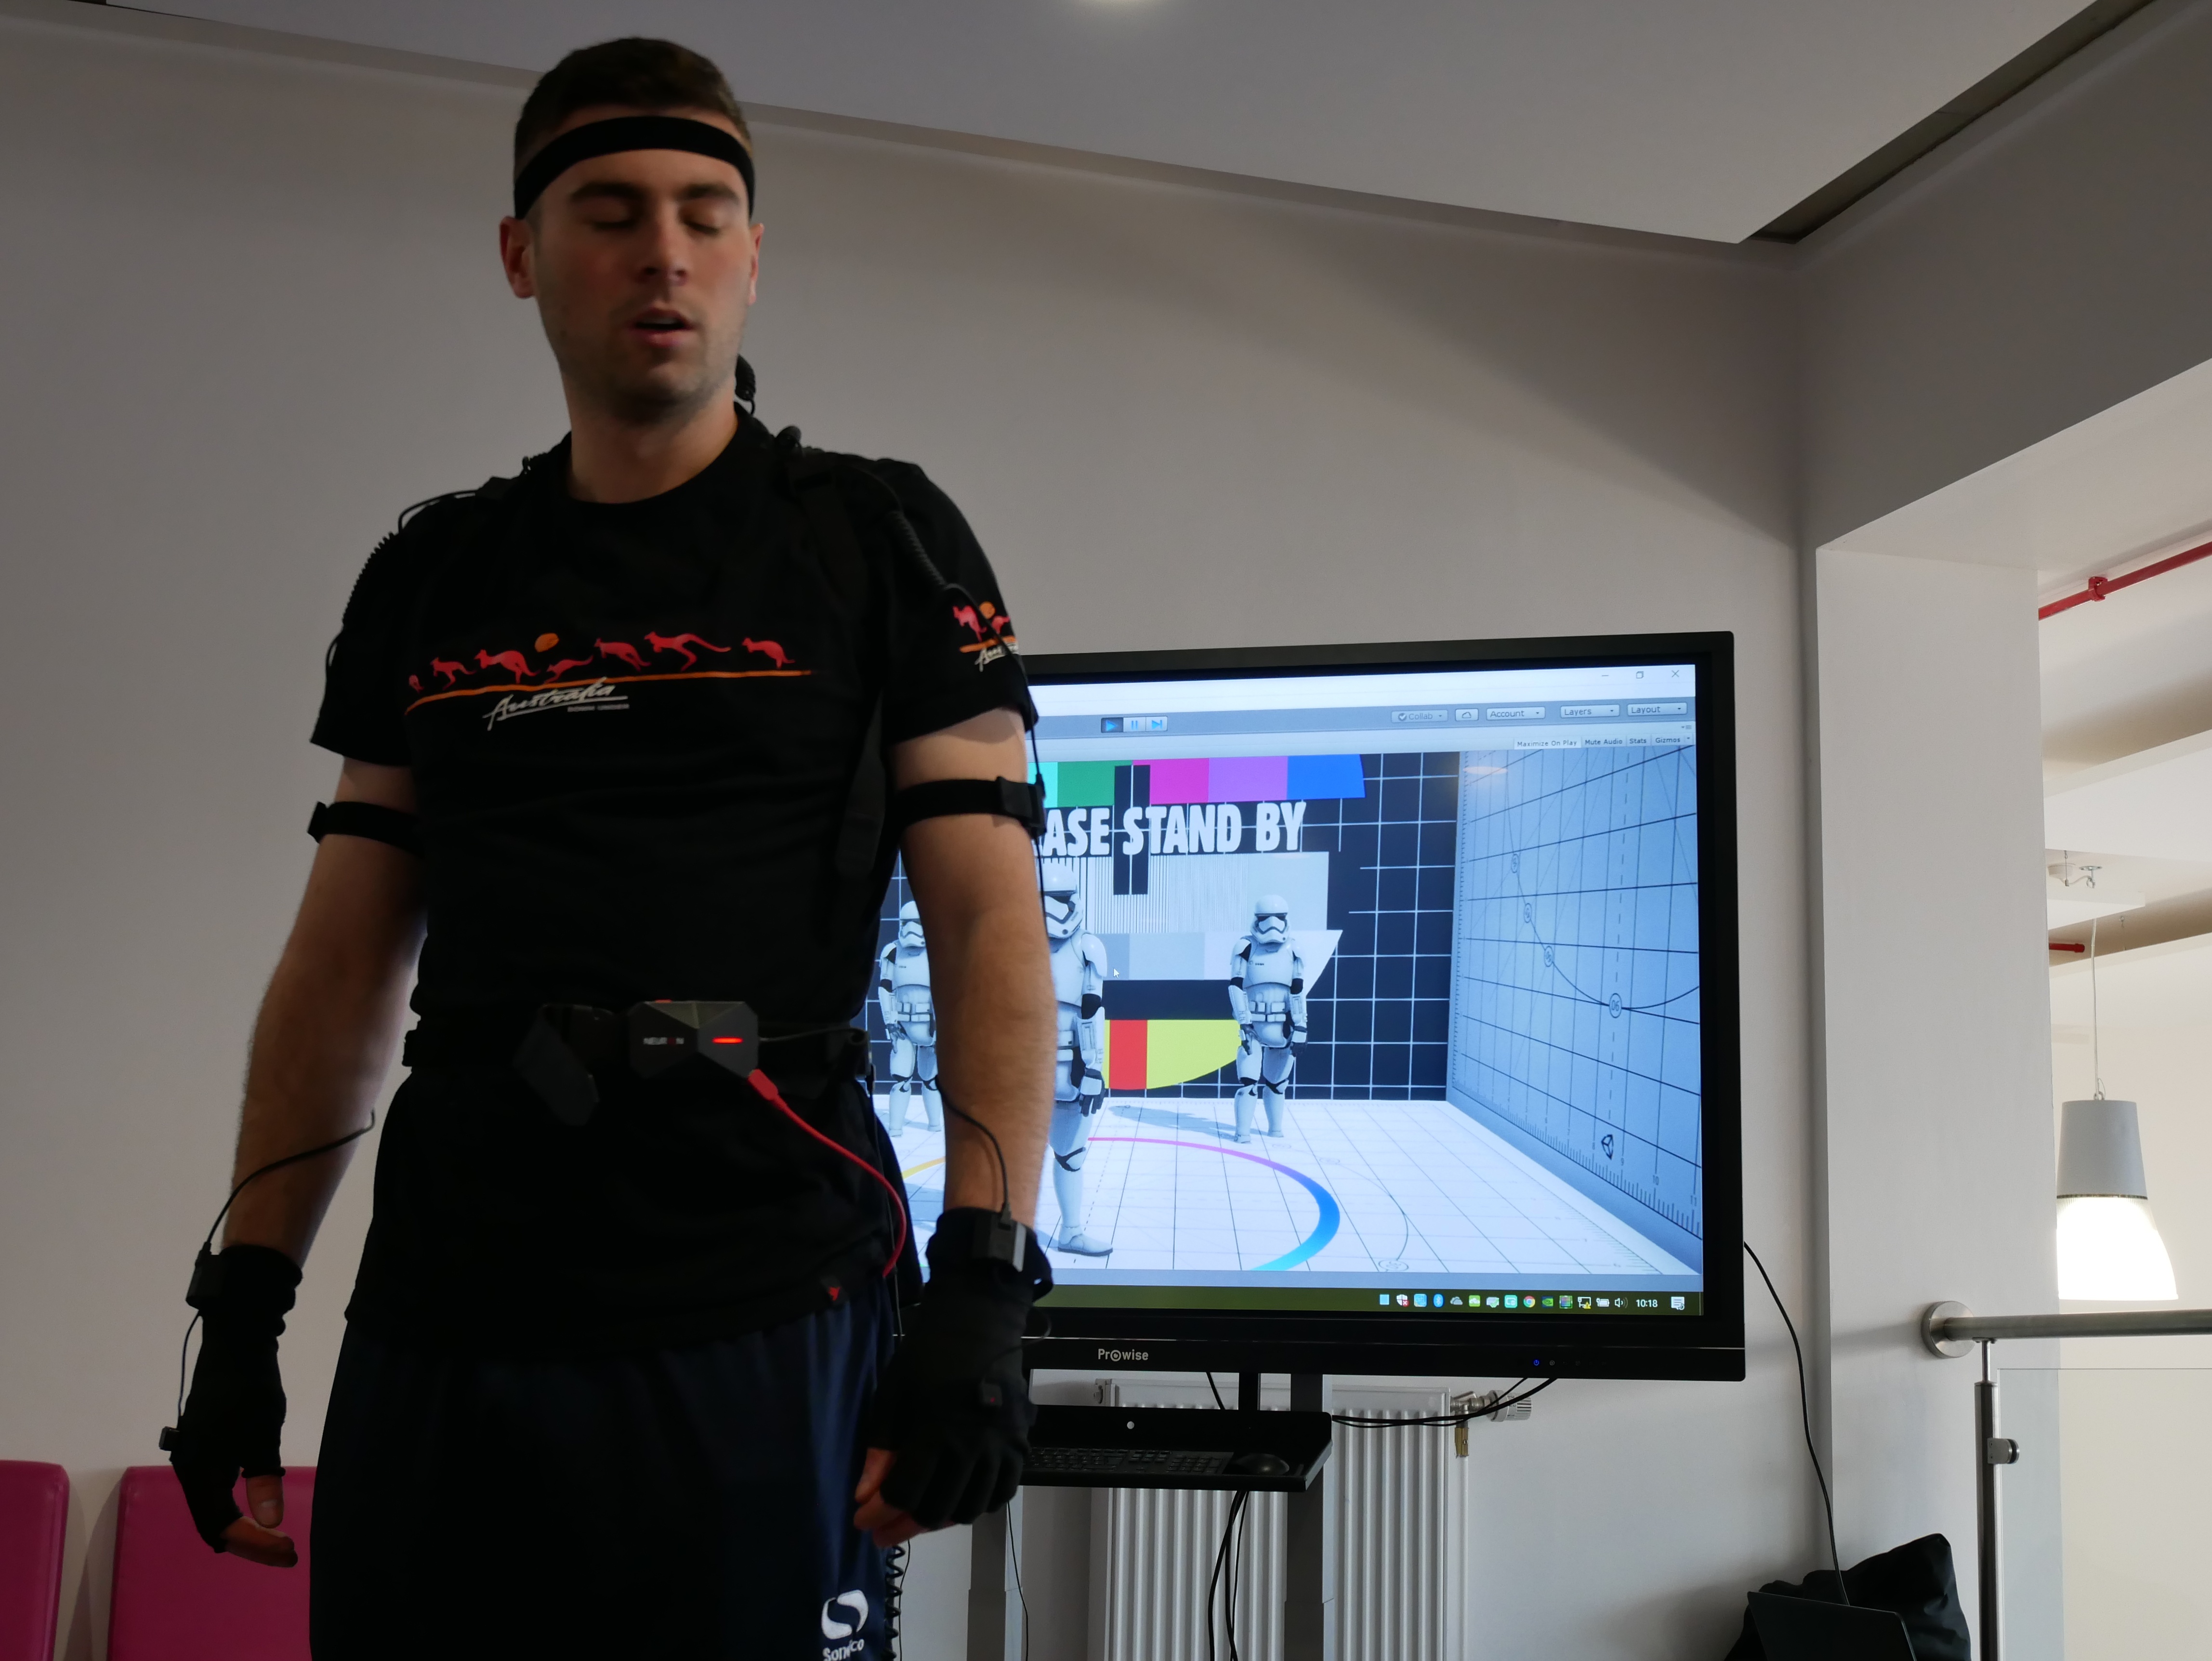
To add to the mocap part, Stephen and I are working on a proof of concept for an event at college. We tried to get a live feed in Unity but after playing around in both the mocap and unity software we were unsuccessful, however stephen was successful later on as he took the suit home to try and figure it out. It turns out the Unity sdk for Axis is located within the forum for the latest version of Unity.
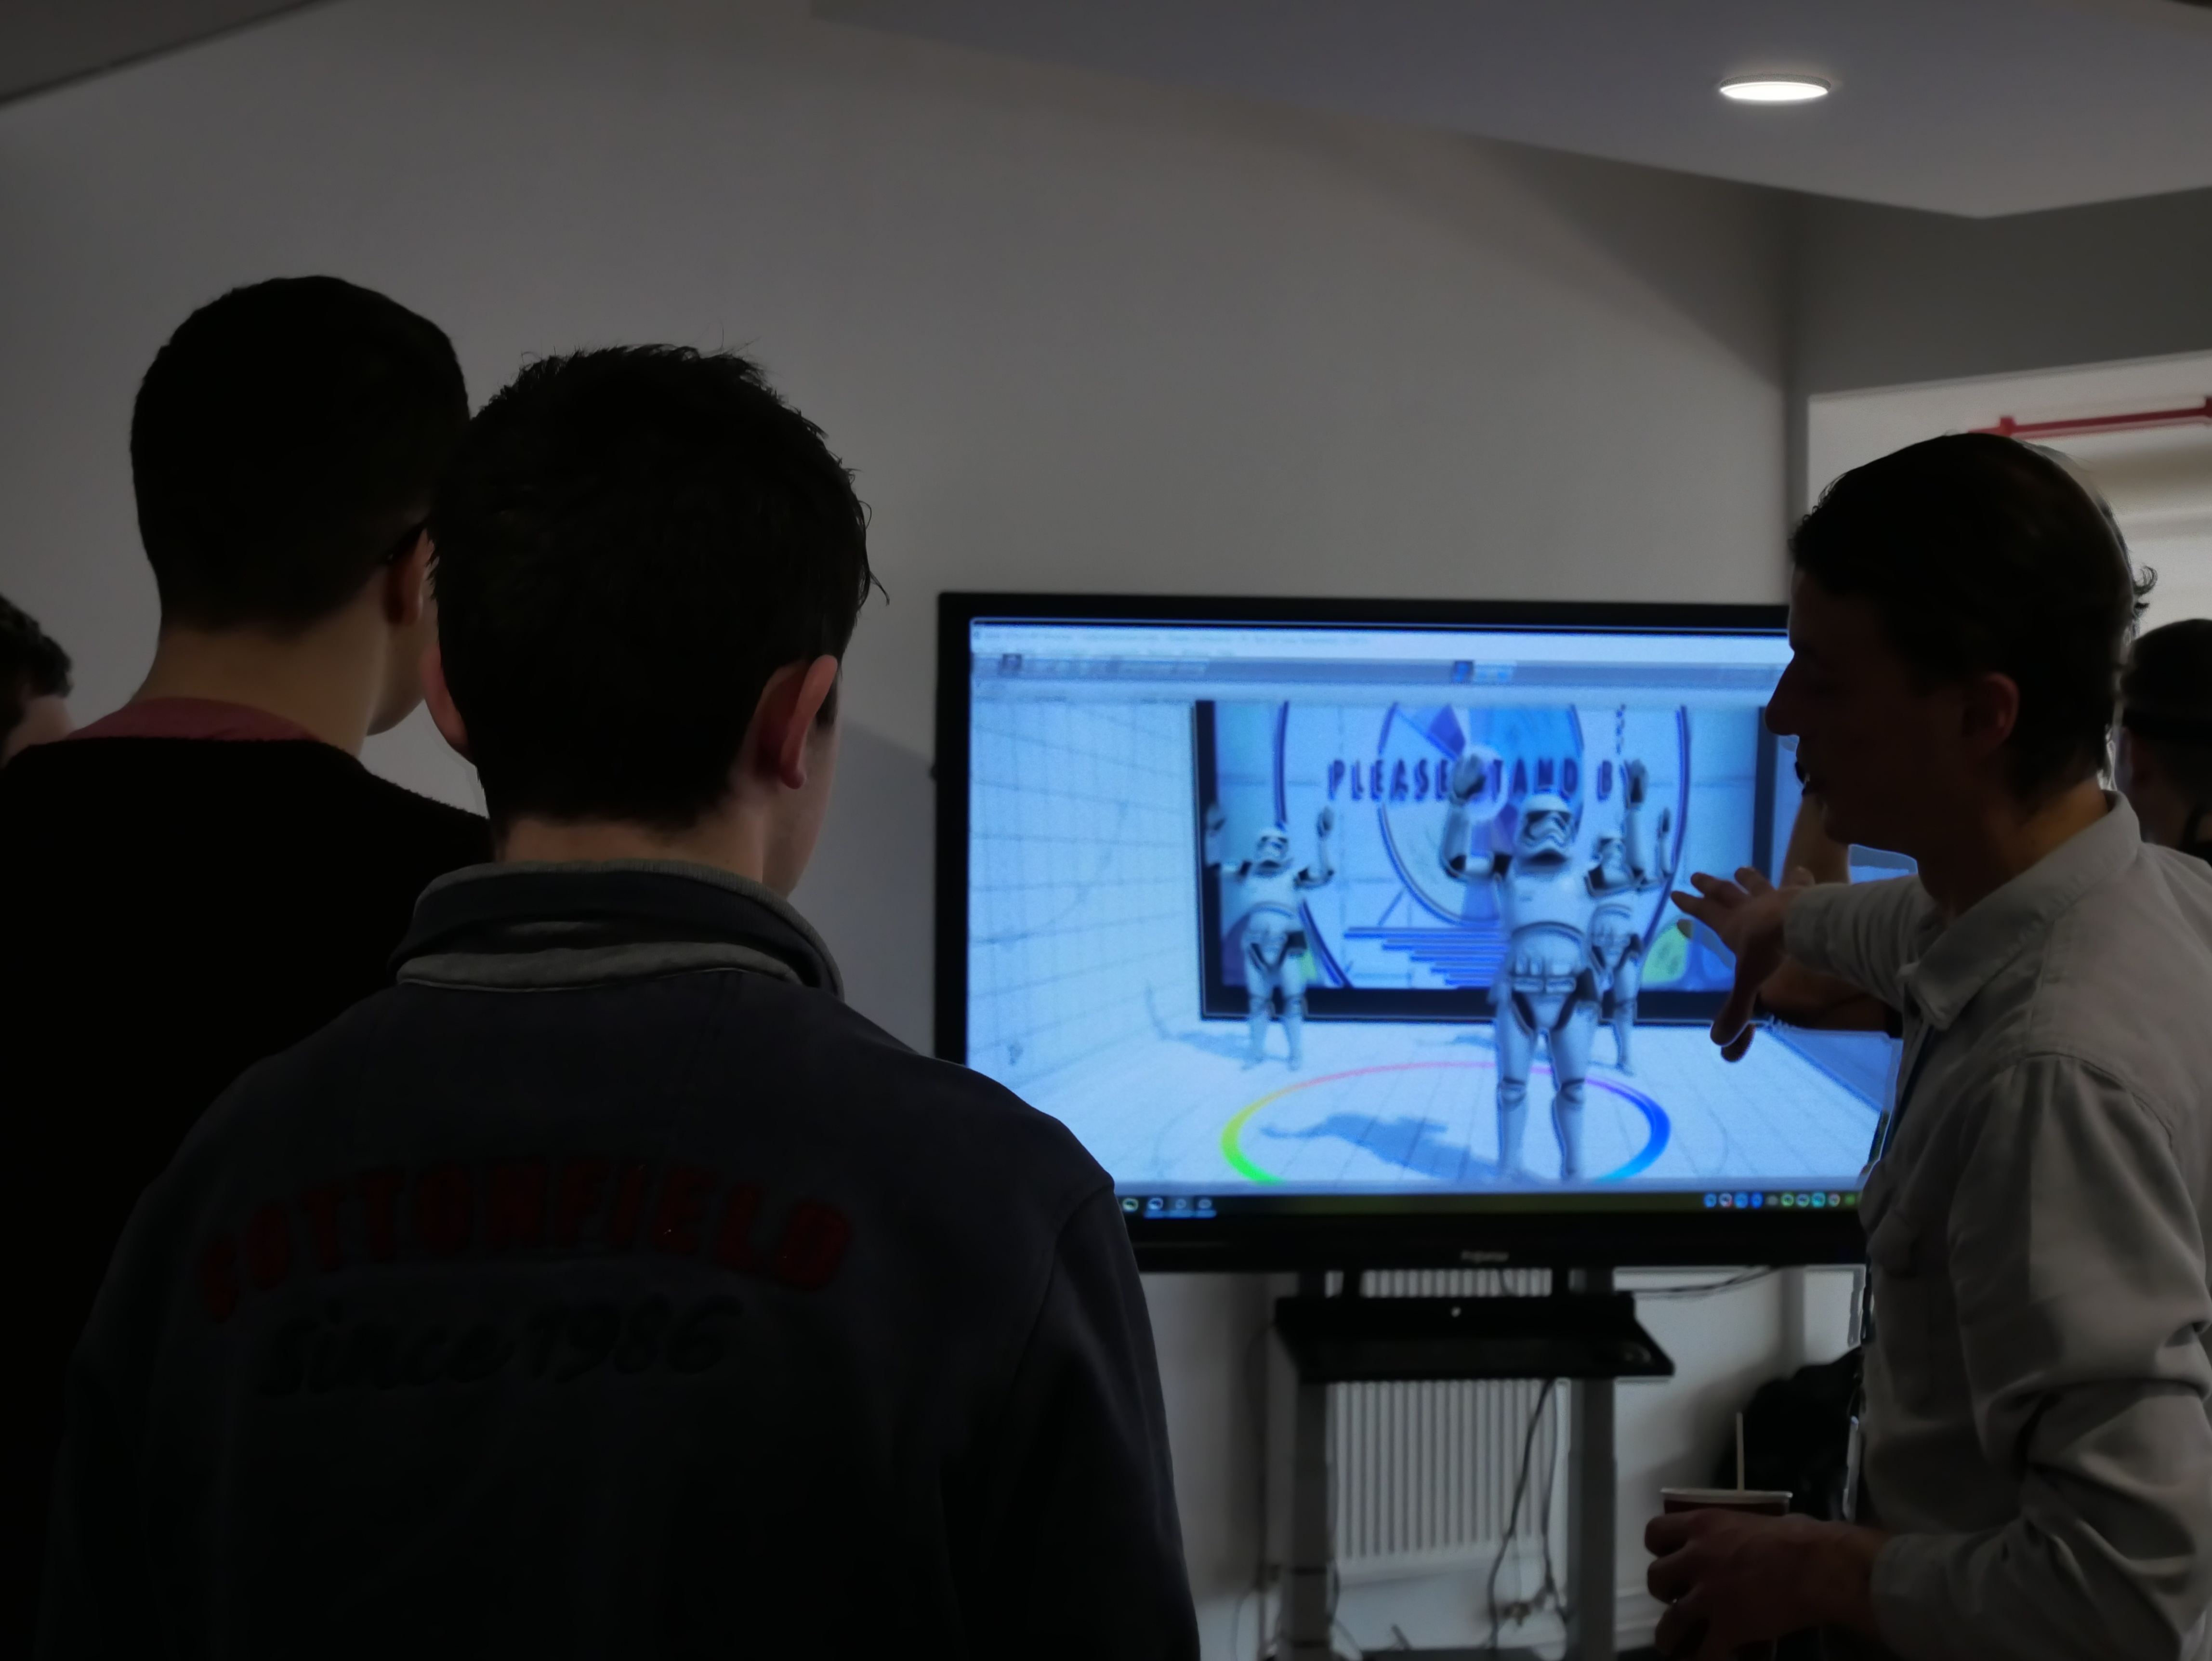
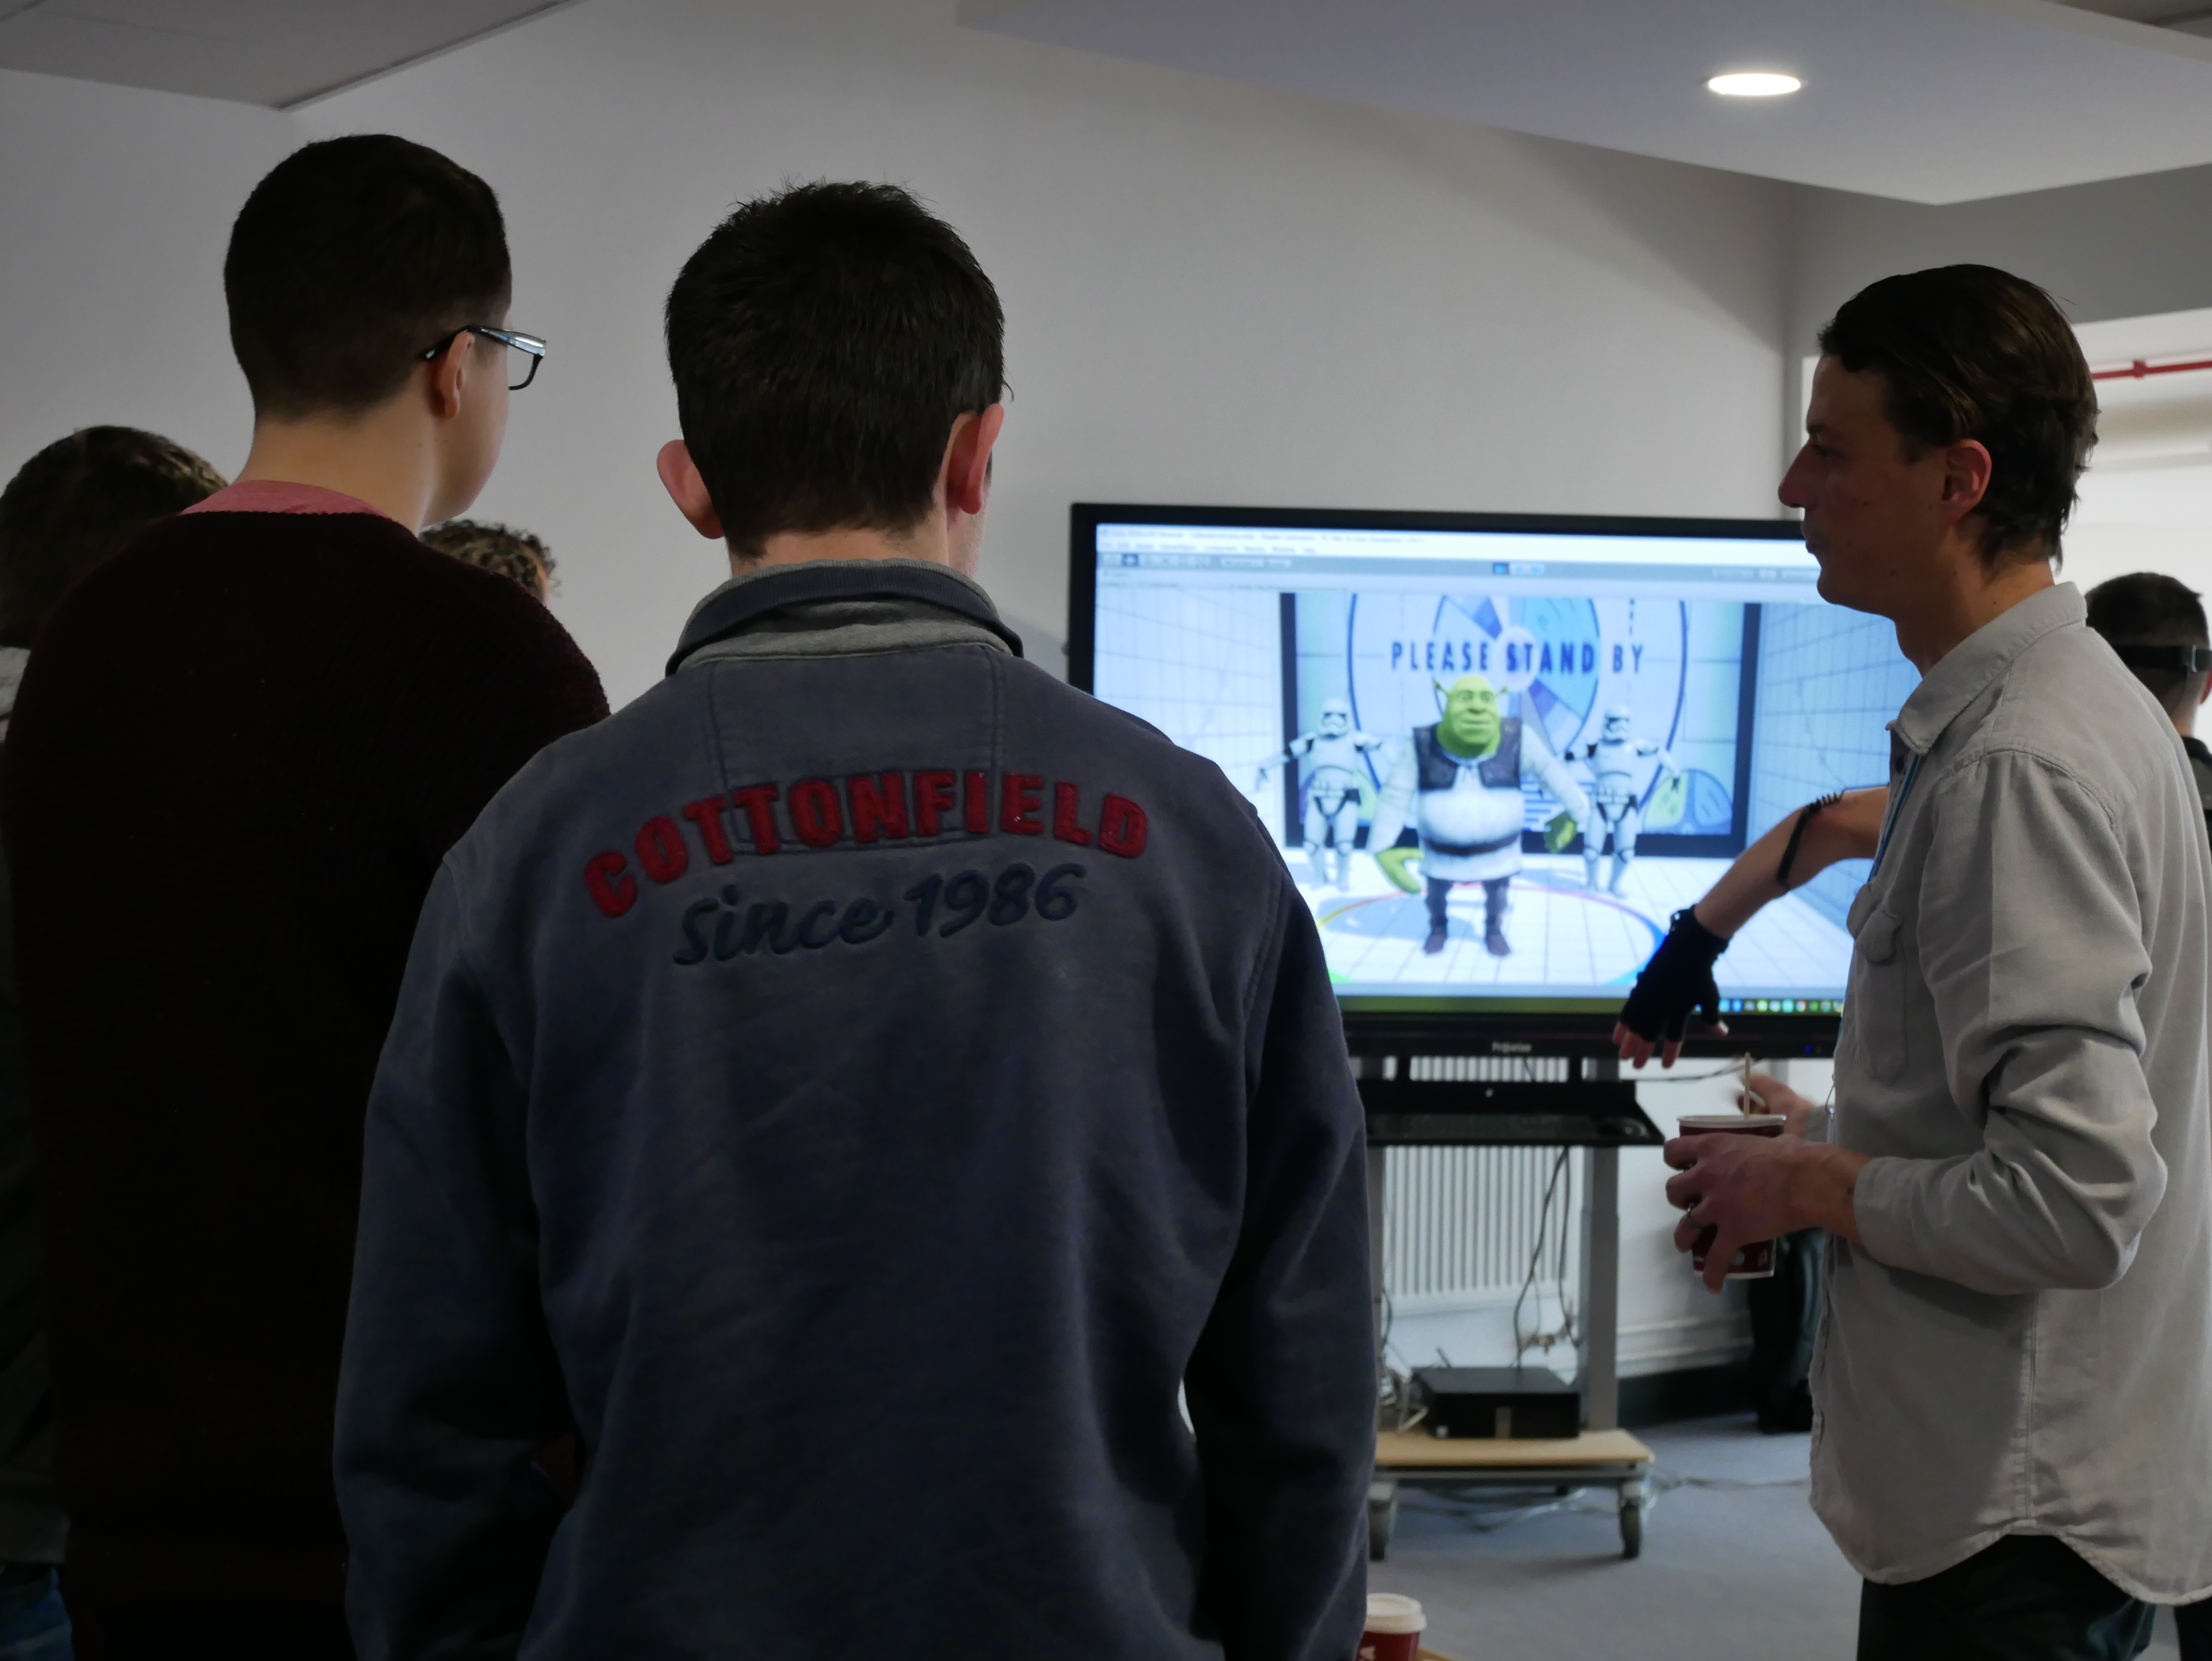
Come the open day, we set up all the mocap and calibrated the suit. We then got the got the performer to perform and we displayed what he was doing on the screen in a game engine called Unity. We had two characters that we could switch between and a background that could also be changed instantly. The characters were rigged and imported then the scripts for making them work in real time with what the performer was doing was added.


All the files can be viewed here:
drive.google.com/Implementing-Sound-and-Movement-2019
This folder contains all the files needed to reconstruct my scene within 3ds max and or Unity. It also includes all the original audio files and videos.
You can also download the complete Unity scene for this project in Mocap FE Day\Shader Calibration
References
AlanBeckerTutorials. (2015) Animating Walk Cycles. Available at: https://www.youtube.com/watch?v=2y6aVz0Acx0 [Accessed on 9/10/2018]
America’s Test Kitchen. (2014) Science: The Best Way to Use a Whisk (Have You Been Whisking All Wrong?). Available at: https://www.youtube.com/watch?v=zglSRFlFH-s [Accessed on 31/10/2018]
Animium (2014) Walk casually mocap http://animium.com/2014/10/walk-casually-mocap [Accessed on 25/10/2018]
BBC. (2014) Graham plays with a toy robot – The Graham Norton Show: Episode 15 – BBC One. Available at: https://www.youtube.com/watch?v=HEAHs7IhDNc [Accessed on 9/10/2018]
bluevalley. (2016) [HD] HRP-4 Humanoid Robot Walking Like A Real Human!!!. Available at: https://www.youtube.com/watch?v=c-bgLsvw848 [Accessed on 9/10/2018]
Danielle Jacobs. (2016) Opening the oven door. Available at: https://www.youtube.com/watch?v=rotJPJS2oTY [Accessed on 8/11/2018]
endlessreference. (2010) Animation Reference – Athletic Male Standard Walk. Available at: https://www.youtube.com/watch?v=vq9A5FD8G5w [Accessed on 9/10/2018]
Epicurious. (2007) Rolling Dough. Available at: https://www.youtube.com/watch?v=zxXYWQ_XMqw [Accessed on 31/10/2018]
Food52. (2012) How to Roll Out Pastry Dough. Available at: https://www.youtube.com/watch?v=DcxQ4-Fo4xA [Accessed on 31/10/2018]
Francis Jasmin. (2010) Walk Cycles Compilation. Available at: https://www.youtube.com/watch?v=k86w0zlzY54 [Accessed on 9/10/2018]
Hahne, B. (2009) BVH Conversion Release – motions list. Available at: https://sites.google.com/a/cgspeed.com/cgspeed/motion-capture/cmu-bvh-conversion/bvh-conversion-release—motions-list [Accessed on 25/10/2018]
Hahne, B. (2009) The 3dsMax-friendly BVH release of CMU’s motion capture database. Available at: https://sites.google.com/a/cgspeed.com/cgspeed/motion-capture/3dsmax-friendly-release-of-cmu-motion-database [Accessed on 25/10/2018]
Howcast. (2010) How to Roll Pastry Dough. Available at: https://www.youtube.com/watch?v=DcxQ4-Fo4xA [Accessed on 31/10/2018]
Marc, C. (2017) Developing robots that can walk more naturally. Available at: https://phys.org/news/2017-09-robots-naturally.html [Accessed on 9/10/2018]
Morgentau (2015) Clock tick tock SOUND EFFECTS. Available at: https://www.youtube.com/watch?v=Bv_J0j9hr0E [Accessed on 19/12/2018]
Nancy Baggett. (2012) The BEST Way to Roll Out Cookie Dough. Available at: https://www.youtube.com/watch?v=3eVybstMyjc [Accessed on 31/10/2018]
NBC 10 WJAR. (2014) Cooking: Techniques of rolling dough. Available at: https://www.youtube.com/watch?v=qdeFRtsVPzo [Accessed on 31/10/2018]
Noitom. (2019) Axis neuron Software. Available at: https://neuronmocap.com/content/axis-neuron-software [Accessed 11/01/2019]
Rachel Tallo. (2016) 57 open oven door. Available at: https://www.youtube.com/watch?v=a0ii_JvTAz8 [Accessed on 8/11/2018]
Rebel Builder. (2016) LEGO Star Wars K-2SO Buildable Figure Review! Set 75120. Available at: https://www.youtube.com/watch?v=GlJrN__7tgs [Accessed on 9/10/2018]
Rhijn, M v Et al. (2016) Para athletics explained – Blade running. Available at: https://www.paralympic.org/news/para-athletics-explained-blade-running [Accessed on 9/10/2018]
RingFrat. (2013) THE Forward Roll Tutorial. Available at: https://www.youtube.com/watch?v=XPlsmgMLf8E [Accessed on 7/11/2018]
Ronnie Street Stunts. (2016) PARKOUR SAFETY ROLLS Tutorial – Forward Roll, Side Roll, Back Roll. Available at: https://www.youtube.com/watch?v=6x-cG9giKXY [Accessed on 7/11/2018]
Rusty Animator. (2017) walk cycle animation blueprint: a how to guide. Available at: https://www.youtube.com/watch?v=GlYTXs0Cyc8 [Accessed on 9/10/2018]
SciNews. (2016) Atlas robot walking on snow. Available at: https://www.youtube.com/watch?v=lULK_e0LK70 [Accessed on 9/10/2018]
Sears PartsDirect. (2015) Oven Door Won’t Open: Troubleshooting Door Lock Problems. Available at: https://www.youtube.com/watch?v=320yZMp34oA [Accessed on 8/11/2018]
ShatteredEmpyrean. (2016) Forward roll animation. Available at: https://www.youtube.com/watch?v=RahIQGQWkQQ [Accessed on 7/11/2018]
speedyGonzales Et al. (2012) Difference between “Robot”, “machine”, and “automaton”. Available at: https://english.stackexchange.com/difference-between-robot-machine-and-automaton [Accessed on 9/10/2018]
Woodford, C. (2018) Gears. Available at: https://www.explainthatstuff.com/gears.html [Accessed on 9/10/2018]
Woodford, C. (2018) Hydraulics. Available at: https://www.explainthatstuff.com/hydraulics.html [Accessed on 9/10/2018]
Woodford, C. (2018) Springs. Available at: https://www.explainthatstuff.com/how-springs-work.html [Accessed on 9/10/2018]
TheKitchyKitchen. (2015) How to Whisk // Living Deliciously. Available at: https://www.youtube.com/watch?v=Cw5msH2mAkg [Accessed on 31/10/2018]
The MAD Museum (2018) The History of Automata. Available at: https://themadmuseum.co.uk/history-of-automata/ [Accessed on 9/10/2018]